non-purging seal, or tap the driveshaft or yoke
with a plastic or rawhide mallet on the side oppo-
site the dry seal, while continuing to lubricate. If
grease still does not appear, loosen the cap-
screws at the bearing with the dry seal, to relieve
seal tension. Lubricate the U-joint until new
grease is seen at the seal, then tighten the cap-
screws to the correct torque specifications. If the
bearing will not take grease, replace the U-joint;
see Group 41 of the 108SD and 114SD Work-
shop Manual.
6. Check the purged grease. If it appears rusty,
gritty, or burned, replace the U-joint.
f410012a10/06/2016
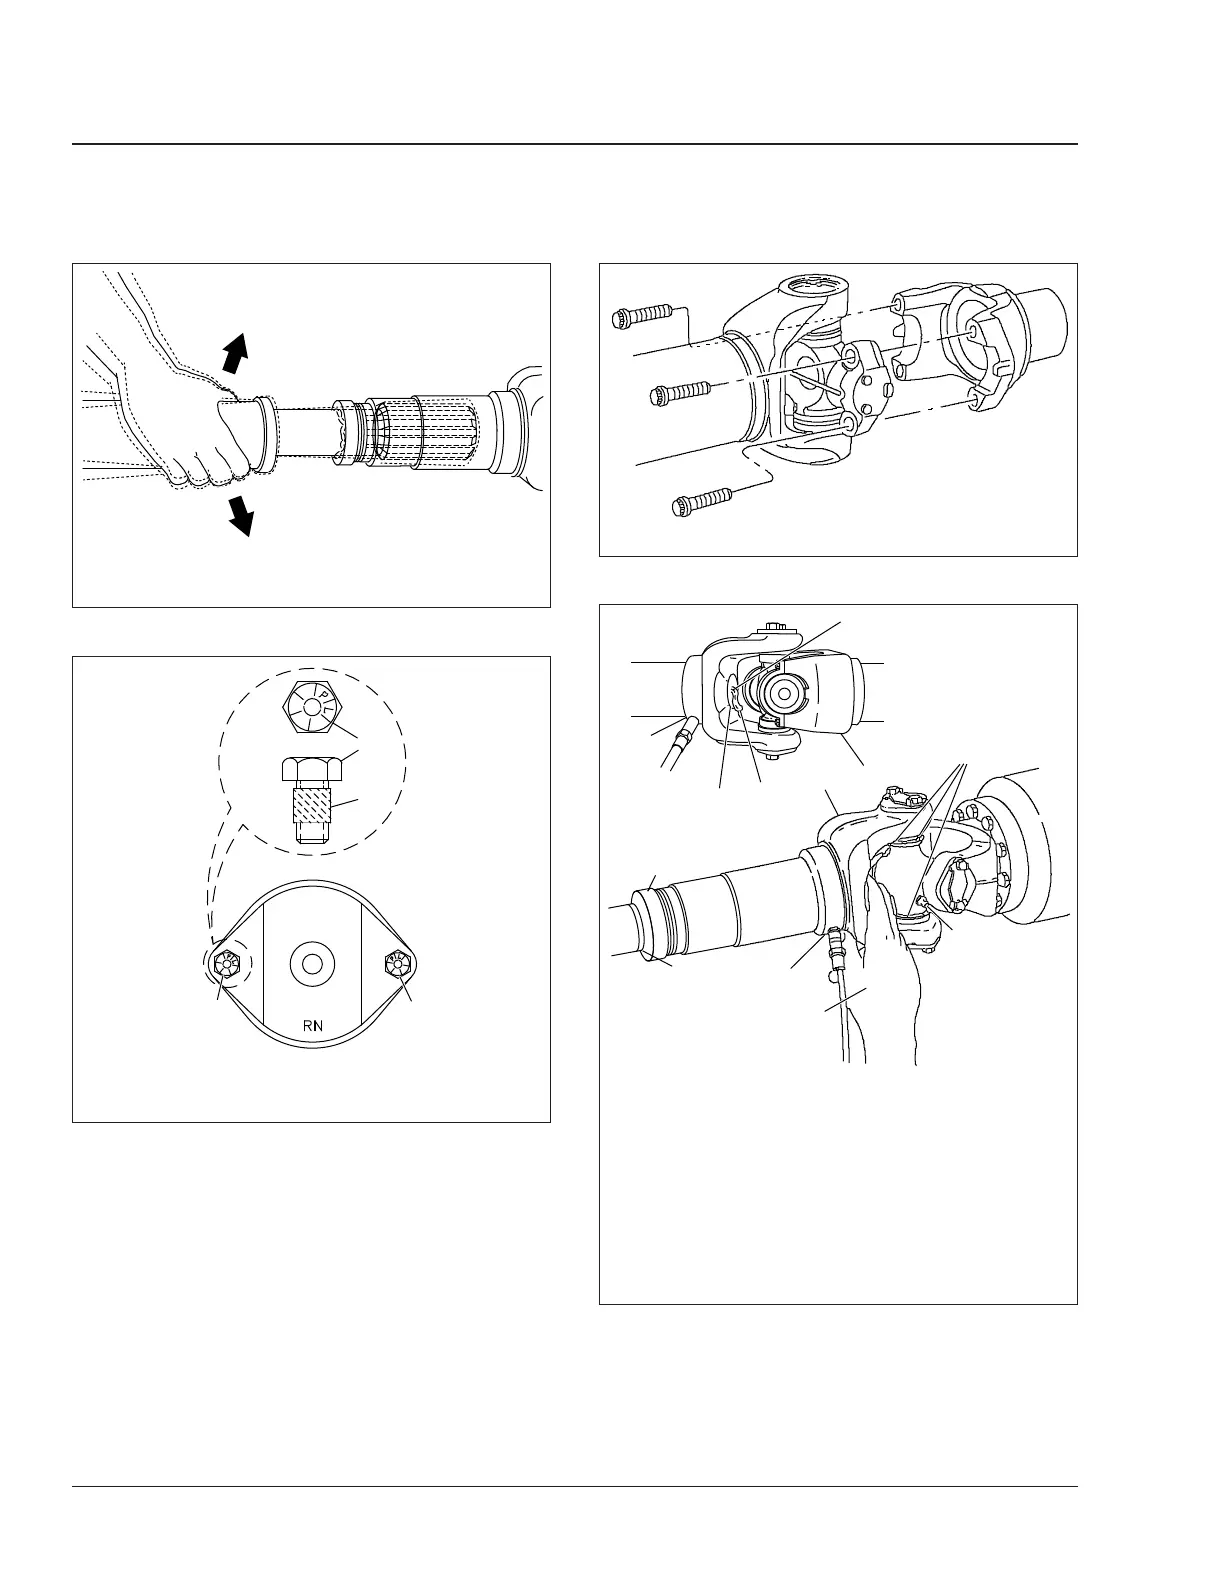
Attempt to move the sleeve-yoke and splined shaft back
and forth.
Fig. 3, Slip Joint Spline Wear Checking
f410155a10/06/2016
1
1
1
2
M
E
R
I
T
O
R
1. Self-Locking Capscrew
2. Adhesive Band
Fig. 4, Meritor U-Joint Fasteners for Full-Round Yokes
f41018210/06/2016
Fig. 5, Meritor RPL Series U-Joint
f410050a10/07/2016
1
1
2
3
3
3
4
5
6
7
8
A
A. After grease appears, cover the pressure-relief hole
while continuing to lubricate.
1. Slip Joint Grease Fitting (with grease gun attached)
2. Yoke Plug
3. Grease
4. Half-Round Yoke
5. Yoke Plug Pressure-Relief Hole
6. Slip Joint Seal
7. Full-Round Yoke
8. U-Joint Grease Fitting
Fig. 6, Slip Joint and U-Joint Lubrication
Driveline41
108SD and 114SD Maintenance Manual, September 201541/4