Meritor Drive Axle Lubricant Capacities
Axle Model
Capacity
*
:
pints (liters)
Single-Drive, Single Reduction
†
RS–21–160 39.5 (18.7)
RS–23–160 39.5 (18.7)
RS–23–161 37.2 (17.6)
RS–23–185 47.3 (22.4)
RS–25–160 37.2 (17.6)
Tandem-Drive, Single Reduction
RT–40–145, RT–40–145A,
RT–40–145P
Forward 30.2 (14.3)
Rear 25.8 (12.2)
RT–44–145, RT–44–145P
Forward 29.3 (13.9)
Rear 25.1 (11.9)
RT–46–160, RT–46–160P
Forward 39.1 (18.5)
Rear 34.4 (16.3)
*
Quantities listed are approximate. Fill axle until lubricant is level with bot-
tom of fill hole with vehicle on level ground.
†
See "Traction Equalizer Additives" in the text.
Table 4, Meritor Drive Axle Lubricant Capacities
IMPORTANT: When the ambient temperature is
above 0°F (–18°C), use SAE 10 heavy-duty en-
gine oil, API service classification SD (sulfated
ash content must not exceed 1.85%). When the
ambient temperature is below 0°F (–18°C), use
one part kerosene to three parts SAE 10 heavy-
duty engine oil, API service classification SD
(sulfated ash content must not exceed 1.85%).
This cold-weather mixture can be safely used
up to 32°F (0°C).
Commercially available automatic transmission
fluid may be used in place of SAE 10 engine oil.
Automatic transmission fluid can be used for all
temperatures; do not mix it with kerosene. To
prevent component damage, do not mix engine
oil and automatic transmission fluid.
4. Fill the shift unit housing through the oil fill hole
until specified lubricant is level with the bottom of
the opening.
5. Apply a small amount of Loctite
®
242, or equiva-
lent sealant, to the threads of the fill plug. Install
the plug finger-tight on the rear axle housing.
Use a wrench and tighten it an additional 1-1/2
turns.
35–02 Axle Breather and Axle
Lubricant Level
Inspection
Dana Spicer Axle
CAUTION
Failure to keep the rear axle filled to the proper
level with the recommended lubricant can result in
rear axle damage.
1. Park the vehicle on level ground, apply the park-
ing brakes, and chock the tires.
2. If the vehicle has just been driven, allow a few
minutes for the lubricant to settle.
3. Clean the oil fill plug and area surrounding it,
then remove the plug from the fill hole (see
Fig. 1), or from the standpipe (if so equipped)
installed in the fill hole.
IMPORTANT: A lubricant level close enough to
be seen or touched is not sufficient. It must be
level with the bottom of the fill hole (see Fig. 3),
or the top of the standpipe opening.
f350021a
08/06/93
1
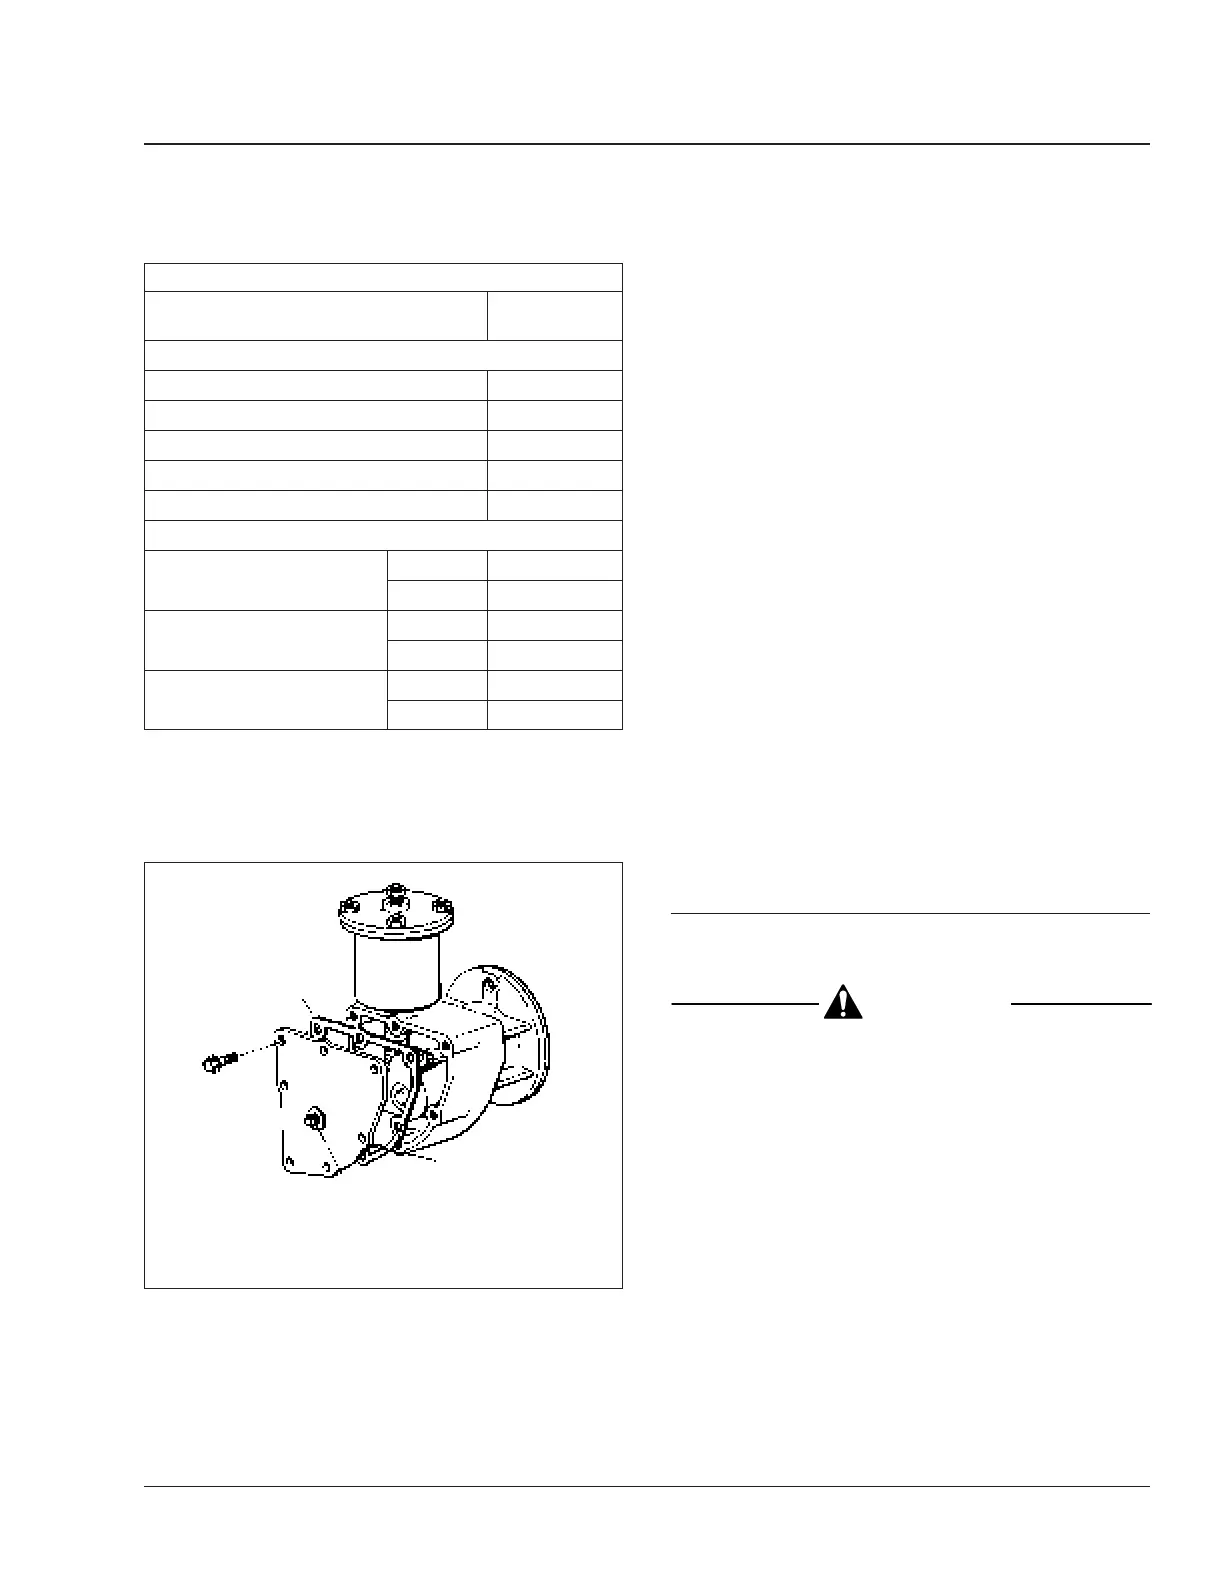
2
3
1. Housing Cover Gasket
2. Oil Fill Plug
3. Shift Unit Housing Cover
Fig. 6, Two-Speed-Axle Shift Unit
Rear Axle 35
Century Class Trucks Maintenance Manual, April 2005 35/5