13. Install the desiccant cartridge on the end cover.
Turn the cartridge clockwise until the desiccant
cartridge makes contact with the end cover.
14. Place the desiccant cartridge in a vise, and turn
the end cover clockwise an additional 180 to 225
degrees to fully tighten the desiccant cartridge to
the end cover.
NOTE: Desiccant cartridge torque should not
exceed 50 lbf·ft (68 N·m).
15. Place the housing over the desiccant cartridge
and align the mounting holes with the end cover.
IMPORTANT: Replace, do not reuse the Nylok
nuts on the air dryer cover.
16. Install the 6 bolts, 12 washers, and 6 new Nylok
nuts. Tighten the Nylok nuts in a star pattern 17
to 24 lbf·ft (23 to 33 N·m). See
Fig. 2.
17. Install the air dryer on the lower mounting
bracket. Install the two previously marked bolts,
08/09/95
f421383
1
2
3
4
5
9
10
11
12
13
14
15
17
18
19
21
22
23
24
25
10
10
10
10
10
10
6
7
8
8
8
20
16
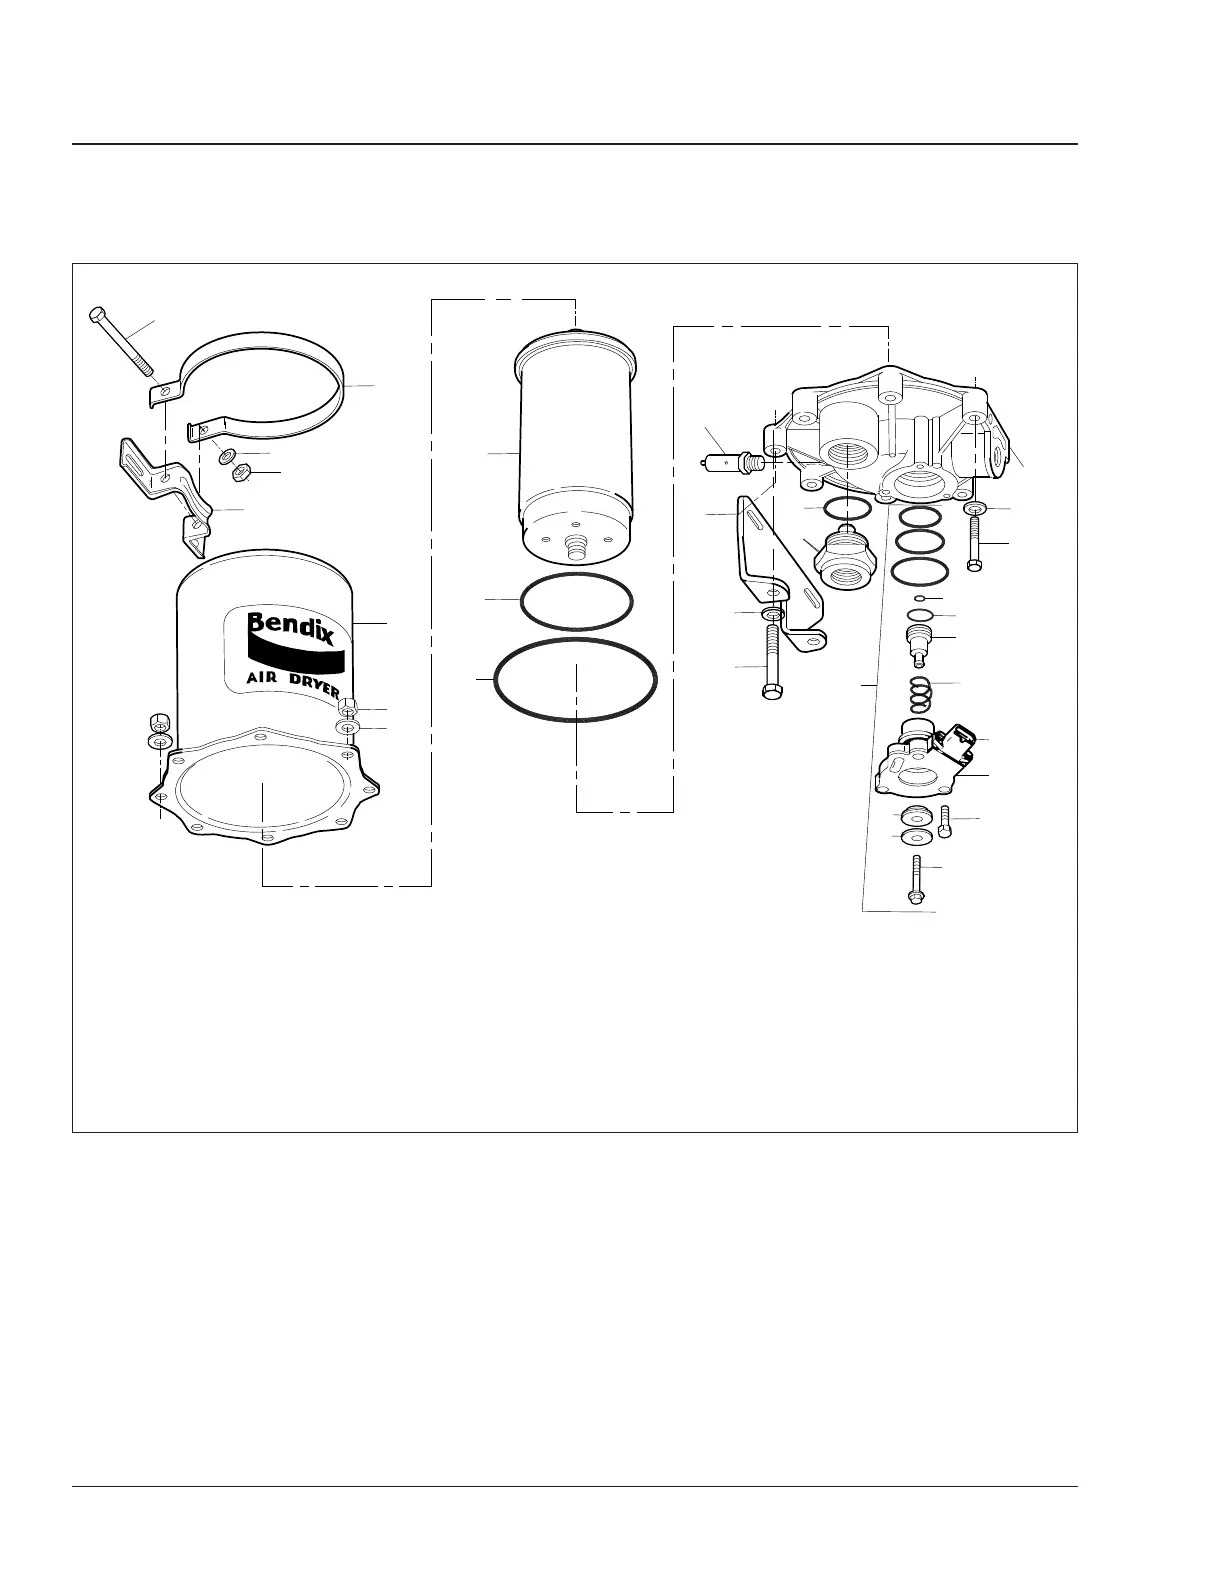
1. 5/16 x 4-1/2 Upper Mounting
Bracket Bolt
2. Upper Mounting Bracket Strap
3. Lockwasher
4. 5/16-Inch Nylok Nut
5. Upper Mounting Bracket
6. Housing
7. Nylok Nut
8. 3/8-Inch Special Washer
9. Desiccant Cartridge
10. O-Ring
11. Safety Valve
12. Lower Mounting Bracket
13. 3/8-Inch Bolt (long)
14. Check Valve Assembly
15. Purge Valve Assembly
16. Purge Valve Capscrew
17. Exhaust Diaphragm
18. Purge Valve
19. 1/4-Inch Tapping Screw
20. Purge Valve Housing
21. Heater and Thermostat
Housing
22. Return Spring
23. Purge Piston
24. 3/8-Inch Bolt
25. End Cover
Fig. 1, AD–9 Air Dryer (exploded view)
Brakes42
Business Class M2 Plus Maintenance Manual, 02/10/202342/2