4.2.6.5 Drive Motor replacement
Required tools: Wide flat screwdriver
External circlip pliers and TORX T-20
Procedure
duration:
45 minutes
A. Remove the cover and both drive wheels, as outlined in section 4.1.5.
B. Remove the gearbox and both shafts, as outlined in section 4.2.6.4.
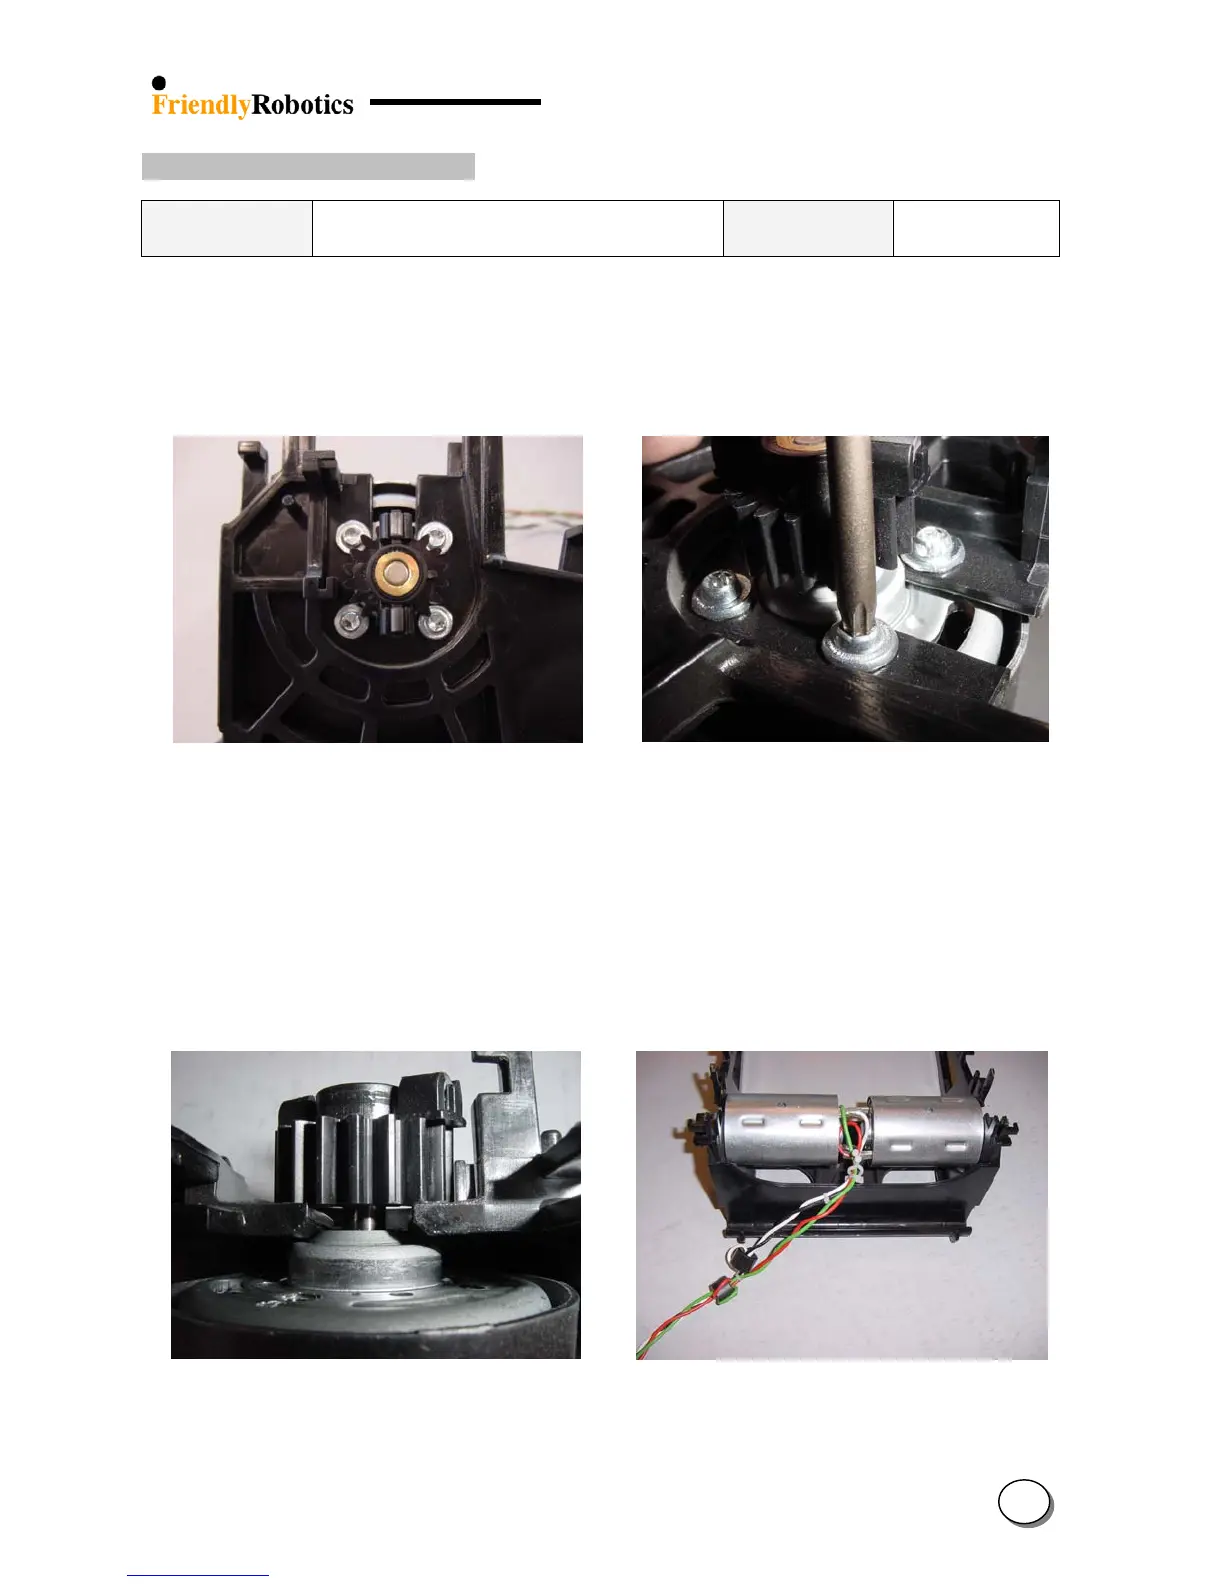
C. Identify the 4 screws that hold the drive motor to the gear frame, as shown in Figure 4.2.6.5.1.
D. Open the four screws using TORX T-20 tool, as illustrated in Figure 4.2.6.5.2.
Figure 4.2.6.5.1 Figure 4.2.6.5.2
The 4 screws that hold the Using a TORX T-20 to open
Drive Motor to the gear frame the motor screws
E. Remove the defect motor by sliding the holding shoulders of the gear frame to the gap
between the motor and the pinion, as illustrated in Figure 4.2.6.5.3.
F. Free the cables coming out of the motor by twisting open the twist lock on the gear frame and
by cutting the wire strap tie between the two magnetic beads. Discard of the defected motor.
Place the new motor into the gear frame; secure the wires through the twist lock and attach a
strap between the two magnetic beads, as illustrated in Figure 4.2.6.5.4.
Figure 4.2.6.5.3 Figure 4.2.6.5.4
Removing the drive motor Placement of the new motor
from the gear frame and the cable attachment
4
31