*NOTE- When attaching heavy scraper kit, do
NOT tighten any hardware until stated in direc-
tions. Adjustments may need to be made.
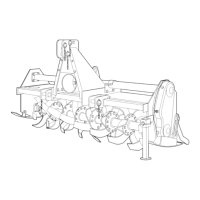
Reference Figure 2
To attach heavy scraper kit to disc, place scraper
bar top plate (ref. #2) on top of gang beam and
scraper mount bracket (ref. #1) on bottom of
gang beam. Using 5/8" x 5" Gr. 2 bolts (ref. #3),
fasten both pieces together around gang beam
with 5/8" lock washer and hex nut (ref. #4 & #5).
There should be two scraper mount bracket
assemblies for each gang beam with the place-
ment being close to each gang hanger. Some
adjustment may need to be made when mount-
ing scraper arm & blade assemblies (ref. #16).
Take heavy scraper bar (ref. #13) and mount on
top of scraper mount bracket assembly with 1-
hole scraper bar clamp (ref. #11). Use a 1/2" x 2
1/2" Gr. 2 bolt (ref. #6) and a 1/2" flange locknut
(ref. #7) to fasten. Scraper arm & blade assem-
blies (ref. #16) are now mounted on bottom of
scraper bar (ref. #13). There are two different
sides of scraper arm & blade assemblies (ref.
#16). One side fits the right front and left rear, the
other side fits the left front and right rear. When
mounting scraper arm & blade assemblies (ref.
#16) to bottom of scraper bar (ref. #13), use 2-
hole clamp (ref. #12) on top of scraper bar (ref.
#13) and fasten together with 1/2" x2 1/2 GR 2
bolt(ref. 6) and 1/2” flange locknut (ref. #7).
Scraper arm & blade assemblies are not provid-
ed for outside front and inside rear blades! Once
all scraper arm & blade assemblies (ref. #16)
have been mounted, now is the time to make
adjustments to scraper mount bracket assem-
blies, if needed. When adjustments are made,
tighten scraper mount bracket assemblies to
gang beam and tighten scraper bar (ref. #13) to
scraper mount bracket assembly using 1-hole
scraper bar clamp (ref. #11) and hardware (ref.
#6 & #7). Scraper arm & blade assemblies (ref.
#16) should then be positioned as close to the
disc blade as possible without touching it.
Turning the gang after mounting each scraper
arm & blade assembly (ref. #16) will help deter-
mine the correct mounting position of each one.
This is recommended to prevent dragging or
binding of the gang.
*NOTE- Tighten all fasteners after setting and
adjustments are made.
*NOTE- Re-tighten all fasteners after first opera-
tional use.
Heavy Scraper Kit Mounting Instructions
Optional Equipment 16