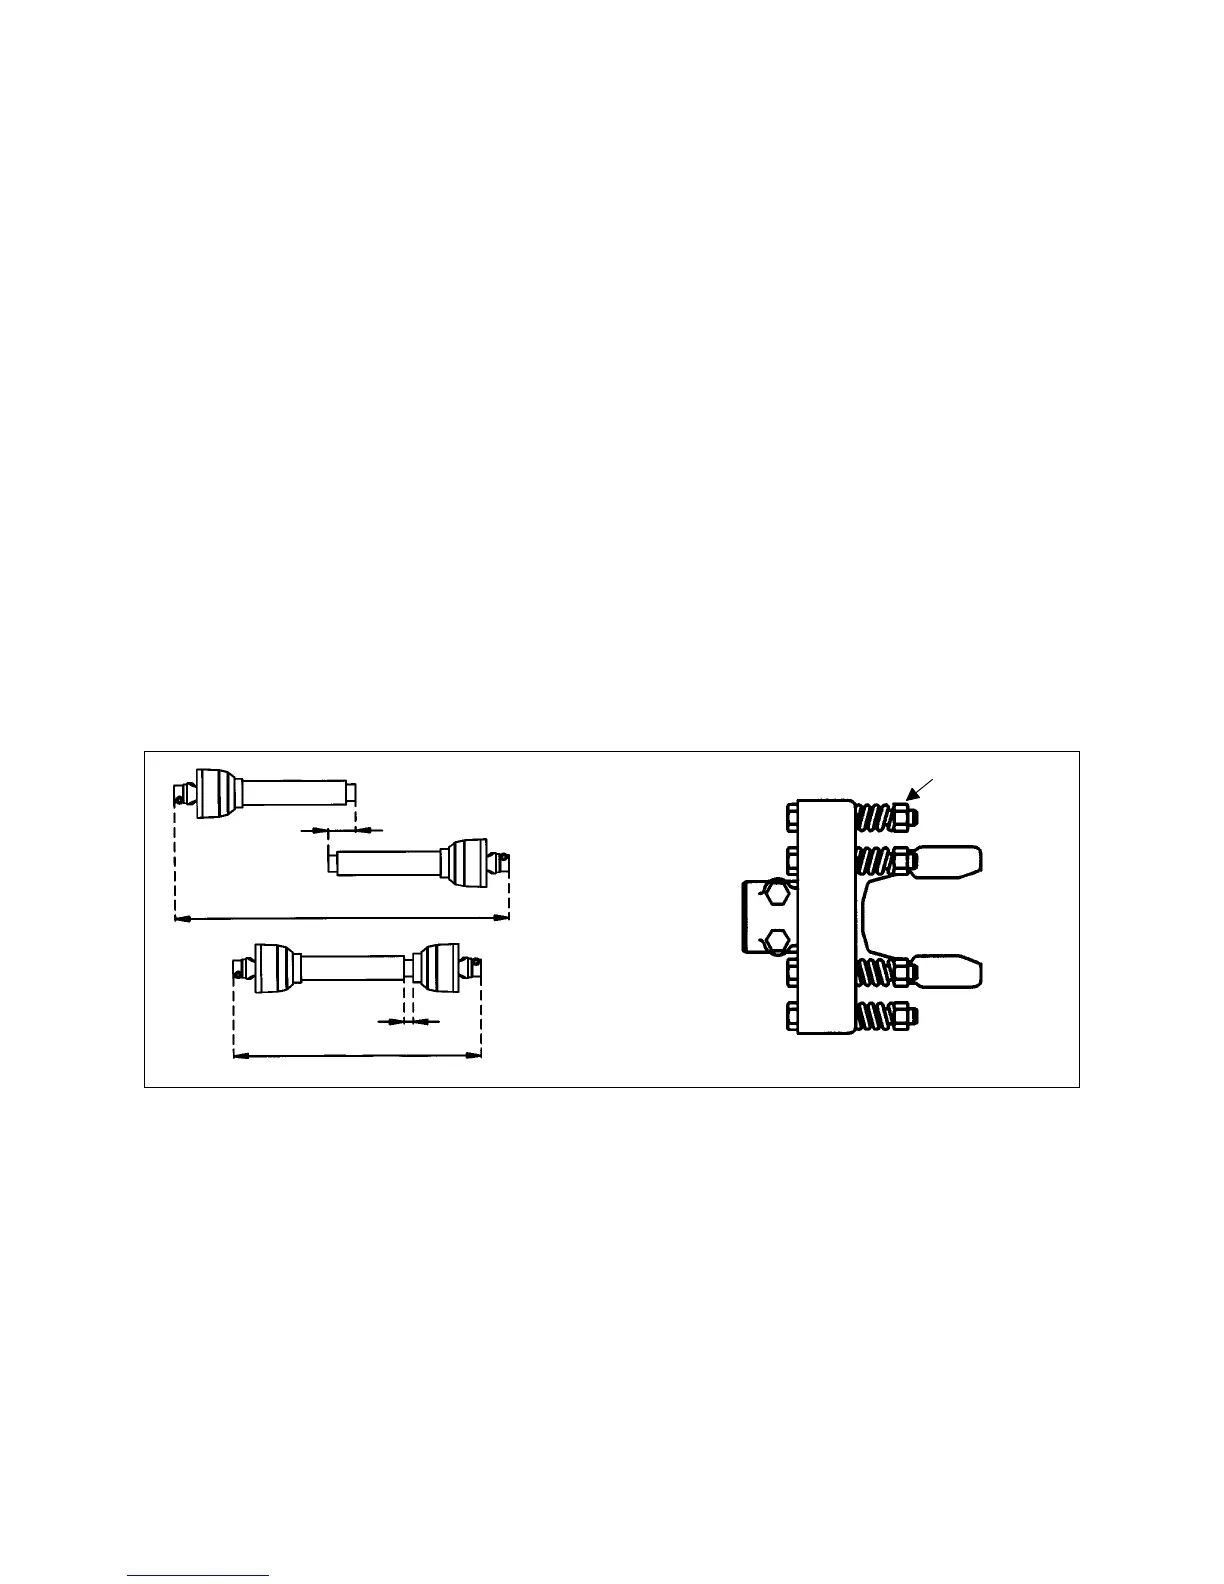
If it is determined that the driveline is too long, follow these procedures to adjust the
length:
1. Separate the two driveline halves. Connect one half to the tractor PTO and the other
half to the implement.
2. Raise and lower the implement with the 3 point hitch to find the position where the
driveline is shortest. Hold the half shafts side by side and mark the desired length on
the outer female tube guard leaving a 2” gap between the end of the guard tube and
bell guard.
3. Cut off both guard tubes the same amount as marked in step 2.
4. Shorten both drive tubes the same amount as the guard tubes.
5. De-burr and clean filings from drive tubes and apply grease to outside of inner
telescoping tube.
6. Reassemble the driveline halves and connect to tractor and implement. Raise and
lower machine again to be sure driveline does not bottom out in the shortest position
and has a minimum overlap of 6” in the longest position.
7. Install both driveline safety chains. One should be hooked in a hole on the outer
driveline yoke shield and to the tractor to restrict outer shield rotation. The second
one should be hooked in a hole on the inner driveline yoke shield and to the
implement to restrict inner shield rotation.
If determined that the driveline is too short for your tractor, contact your local dealer.
3.11 - Safety Slip Clutch
Your aerator-overseeder is supplied with a safety slip clutch. It is important to ensure
that it is working properly. The slip clutch delivered with your machine is set at a specific
torque for normal working conditions.
If the clutch slips frequently while the unit is working, it may be necessary to tighten the
spring nuts (see #1, fig. 10) on the slip clutch. Tighten the spring nuts in ½ turn
increments, then test run the unit for 600 to 800 ft. Repeat the operation if necessary.
The discs on the clutch need to be replaced in the event that the clutch continues to slip
even though the spring nuts have been tightened.
OPERATION 21 FRONTIER
A
ERATOR-OVERSEEDER OPERATOR’S MANUAL
MIN.
MAX.
min. 6"
min. 2"
Fig. 10
1


 To Next Page