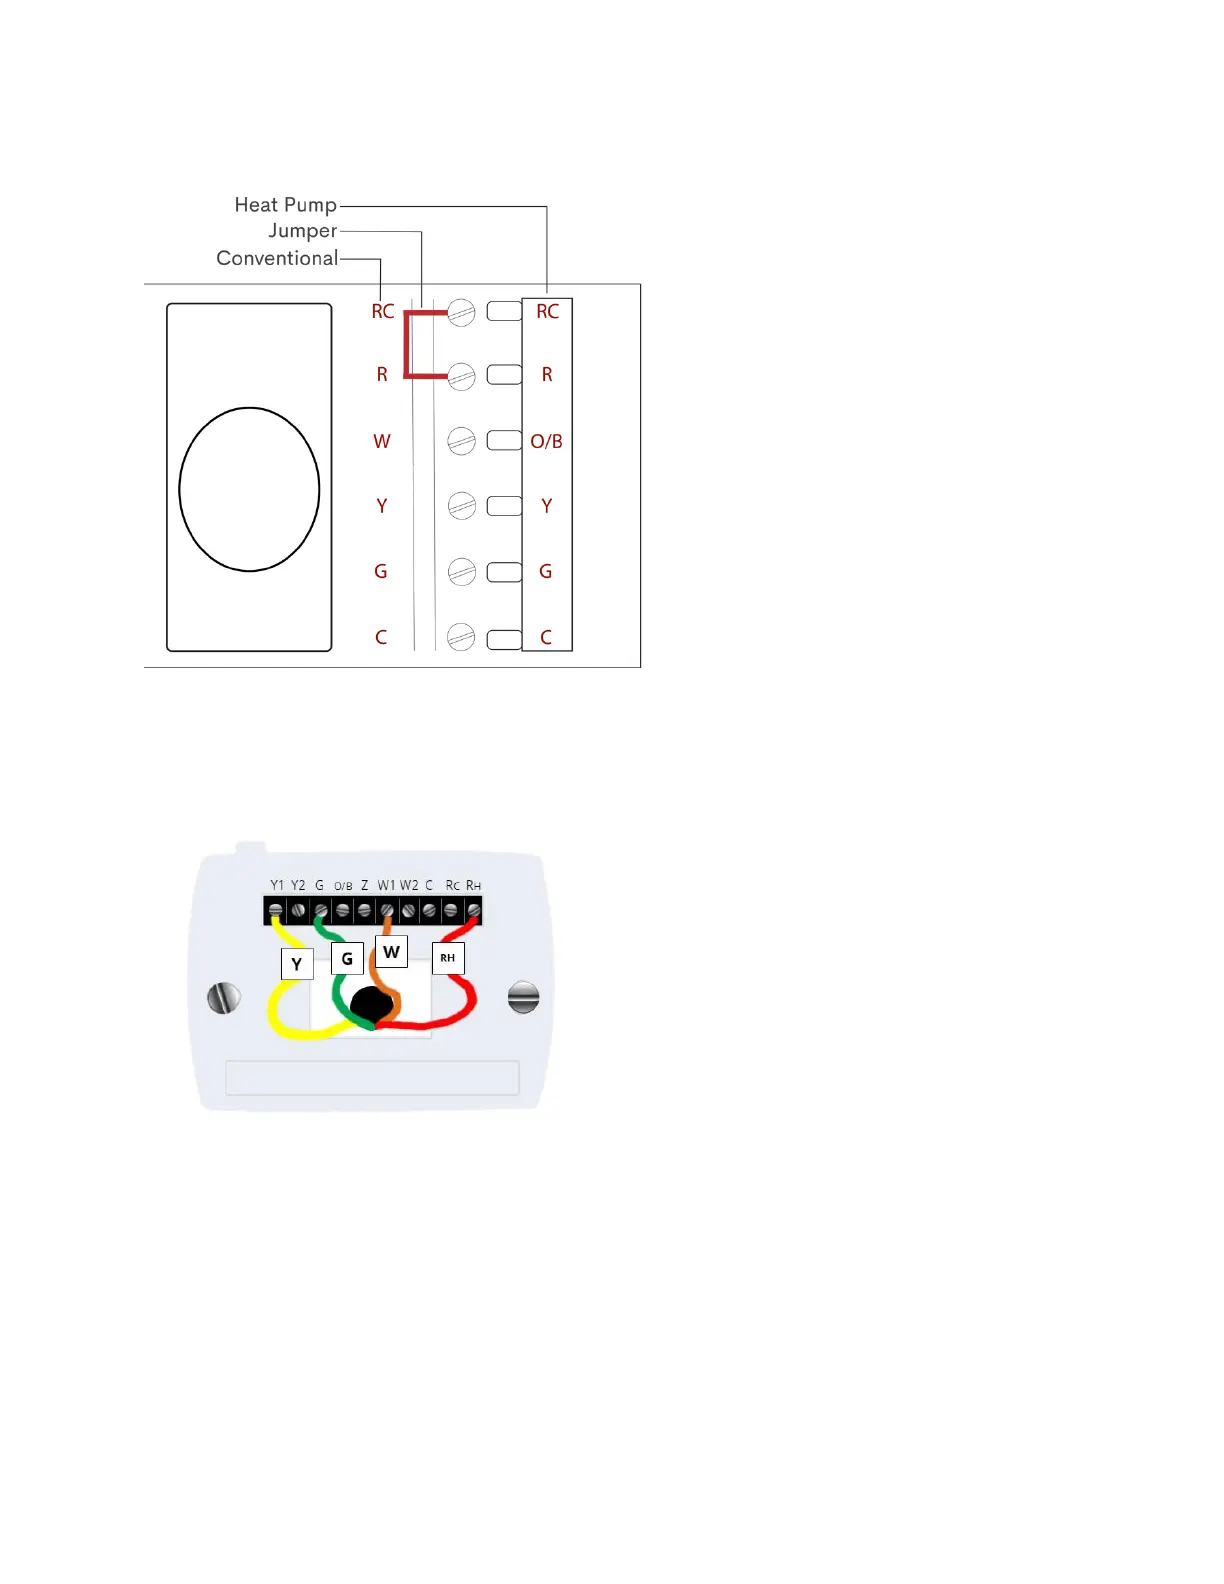
5. Check for the presence of a jumper between R and RC or RH and RC. Although most systems do not have jumpers (shown
below), if you see one, please be sure to remove it before proceeding. The Frontpoint Smart Thermostat has a digital
jumper built in, so any physical jumper would cause issues.
6. Label the wires with tape and a permanent marker before disconnecting so you don’t get them mixed up.
a. Example: the red wire inserted into the RH terminal should be labeled as “RH”. The labeled configuration will
likely look something like this:
*For more information on what each of the letters indicate, please refer to page 13.
7. Disconnect each of the wires from the thermostat. You may need to unscrew a screw if screws are holding the wire in place.
Secure the wires so they don’t fall back into the wall, which can be done by wrapping the wires around a pencil.
8. Unscrew the base plate of the previous thermostat and remove.
9. Mount the base plate of the new thermostat, using its bubble level as an indicator; the bubble should be in the center
when your thermostat is level.
a. If desired, add the trim plate behind the base plate before mounting. The trim plate is optional but will cover any
scuff marks and add stability.