MAINTENANCE
Maintenance Section 5-10FB42 08/01
© 2004 Alamo Group Inc.
MAINTENANCE
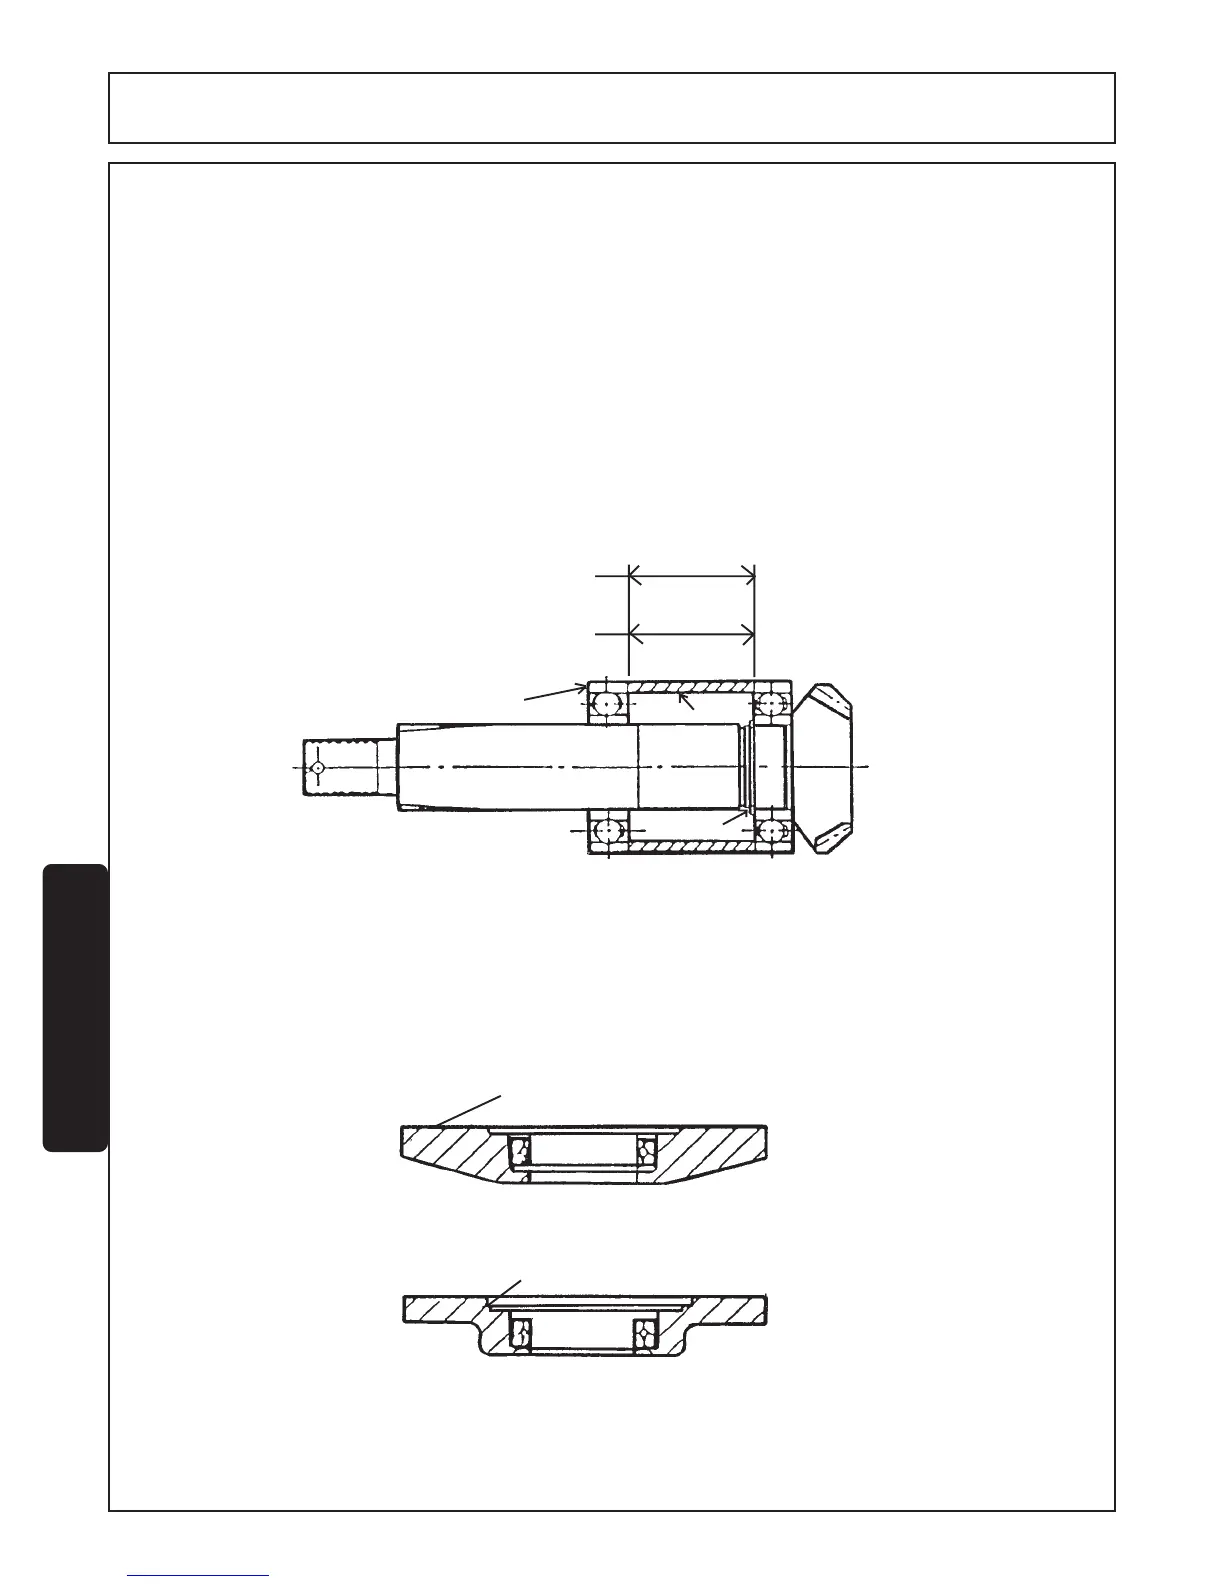
DISASSEMBLY OUTPUT SHAFT (FIG 10)
1. Install slotted nut (Ref 18, Figure 8) onto shaft and then tap shaft end on solid surface to remove lower bearing
and spacer.
2. Remove snap ring (Ref #7) and then repeat above procedure to remove upper bearing.
ASSEMBLY
1A. Assembly of output shaft is accomplished in exact reverse order. Install bearing over shaft and press up against
bottom end of gear. Install snap ring (Ref. #7 Figure 8).
2A. Install spacer and lower bearing on shaft. NOTE: Bearing Spacer (Ref #6) may be two different lengths and
each spacer requires a different bottom cap.
LOWER BEARING RETAINER CAP (Figure 11)
1. Remove old seal from cap and press in new seal. (See SEAL INSTALLATION RECOMMENDATIONS).
Note difference between bearing caps shown to make sure proper part is being used.
SPACER #1425 - 2.560 LG.
USE WITH CAP #1424
SPACER #6149 - 2.415 LG.
USE WITH CAP #1083
4
6
7
FIGURE 10
BEARING CAP USED WITH
SHORT
SPACER #6194 - 2.415 LG.
BEARING SET IN CAP 1/8 IN.
BEARING CAP USED WITH
LONG
SPACER #1425 - 2.560 LG.
BEARING SET FLUSH WITH CAP
FIGURE 11