Machine Components
49
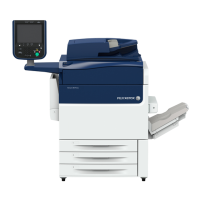
Product Overview
2
Inside and right views of the machine
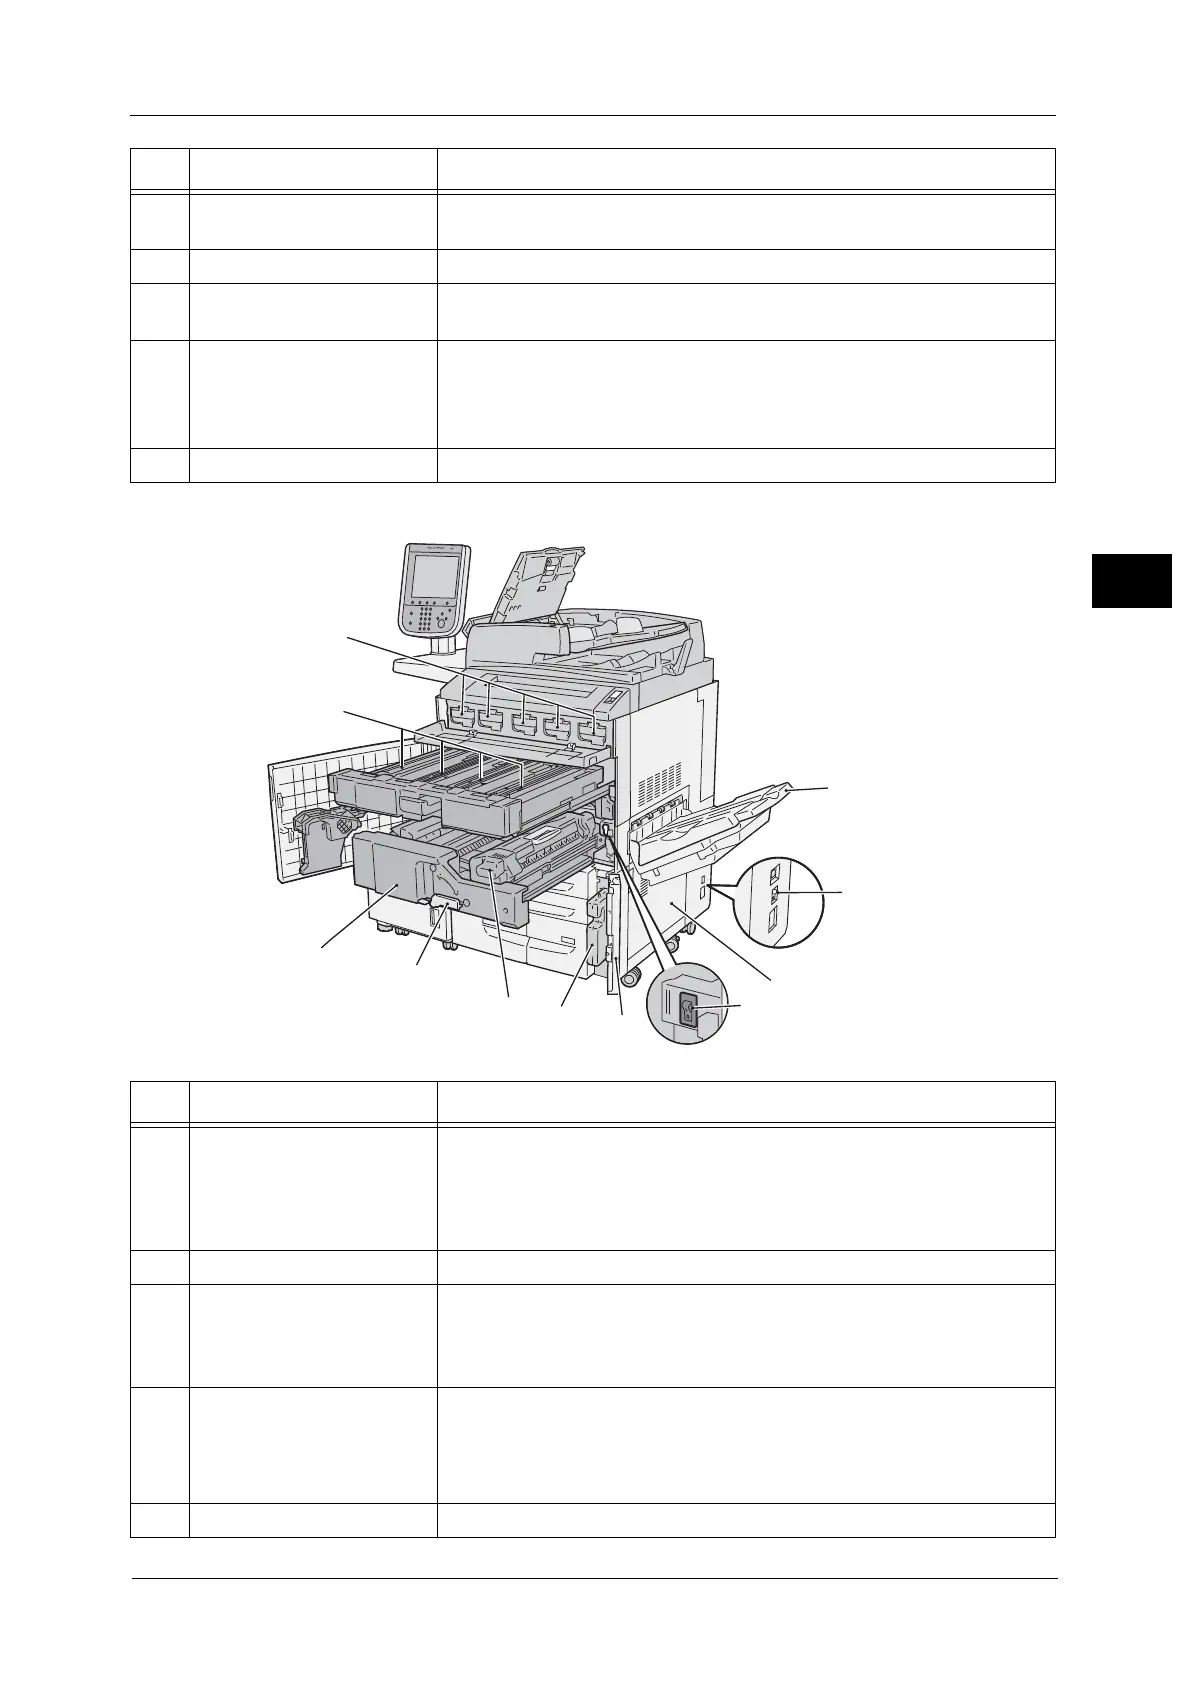
11 Tray 5 (Bypass) Used for loading non-standard paper (thick-stock paper, and other special
media) that cannot be loaded in Trays 1 to 4, Tray 6 and Tray 7.
12 Tray 5 (Bypass) top cover Open the top cover to clear paper jams.
13 Control panel Consists of operation buttons, LED indicators, and a touch screen.
For details, refer to "Control Panel" (P.64).
14 Stylus pen Used for touching the touch screen on the control panel to configure
settings.
Note • You can directly touch the touch screen not only with the stylus pen but
also with a finger.
15 Stylus pen holder Stores the stylus pen.
No. Component Function
1
2
5
3
6
7
8
9
11
10
4
No. Component Function
1 Output tray Outputs are delivered here.
Two types of trays are available: an optional normal output tray ( Simple
Catch Tray) and an optional offset stacking tray (Offset Catch Tray).
When the optional offset stacking tray is attached and A4 or smaller size
paper is to be output, do not use the extension flap.
2 Ground fault interrupter Automatically turns the machine off when a current leakage is detected.
3 Bottom right door Open this door to clear paper jams.
When the C3 Finisher or the C3 Finisher with Booklet Maker is attached,
open the Transport Unit V1 front door first, and then open this bottom right
door.
4 Main power switch Switches the main power of the machine on and off. Always follow the
instructions by the system administrator.
Important • Always switch the power off before switching the main power off.
For more information, refer to "Power Source" (P.57).
5 Waste toner container door Open this door to replace the waste toner container.
 Loading...