11 Job Status
412
Job Status
11
If received print jobs are set to be saved as Charge Print under [Tools] > [Authentication/
Security Settings] > [Authentication] > [Charge/Private Print Settings] > [Receive Control],
the jobs are saved for each Billing ID. Any jobs that were not given a Billing ID on the print
driver are saved in [No User ID].
For more information on how to register user IDs on the machine, refer to "5 Tools" > "Accounting" > "Create/View User
Accounts" in the Administrator Guide.
Note • Unlike the Private Charge Print feature, the Charge Print feature can store jobs without a user ID,
such as e-mail printing and print jobs sent from ContentsBridge or CentreWare Internet Services,
and can print the jobs after authenticating users.
• [Charge Print] appears when [Save as Charge Print Job] is selected by using one of the following
procedures in the System Administration mode:
- Select [Save as Charge Print Job] in [Receive Control].
- Select [According to Print Auditron] in [Receive Control], and then select [Save as Charge Print Job]
in [Job Login Failure].
- Select [According to Print Auditron] or [Save as Private Charge Print Job] in [Receive Control], and
then select [Save as Charge Print Job] in [Job without User ID].
For information on how to set Charge Print, refer to "5 Tools" > "Authentication/Security Settings" > "Authentication" >
"Charge/Private Print Settings" in the Administrator Guide.
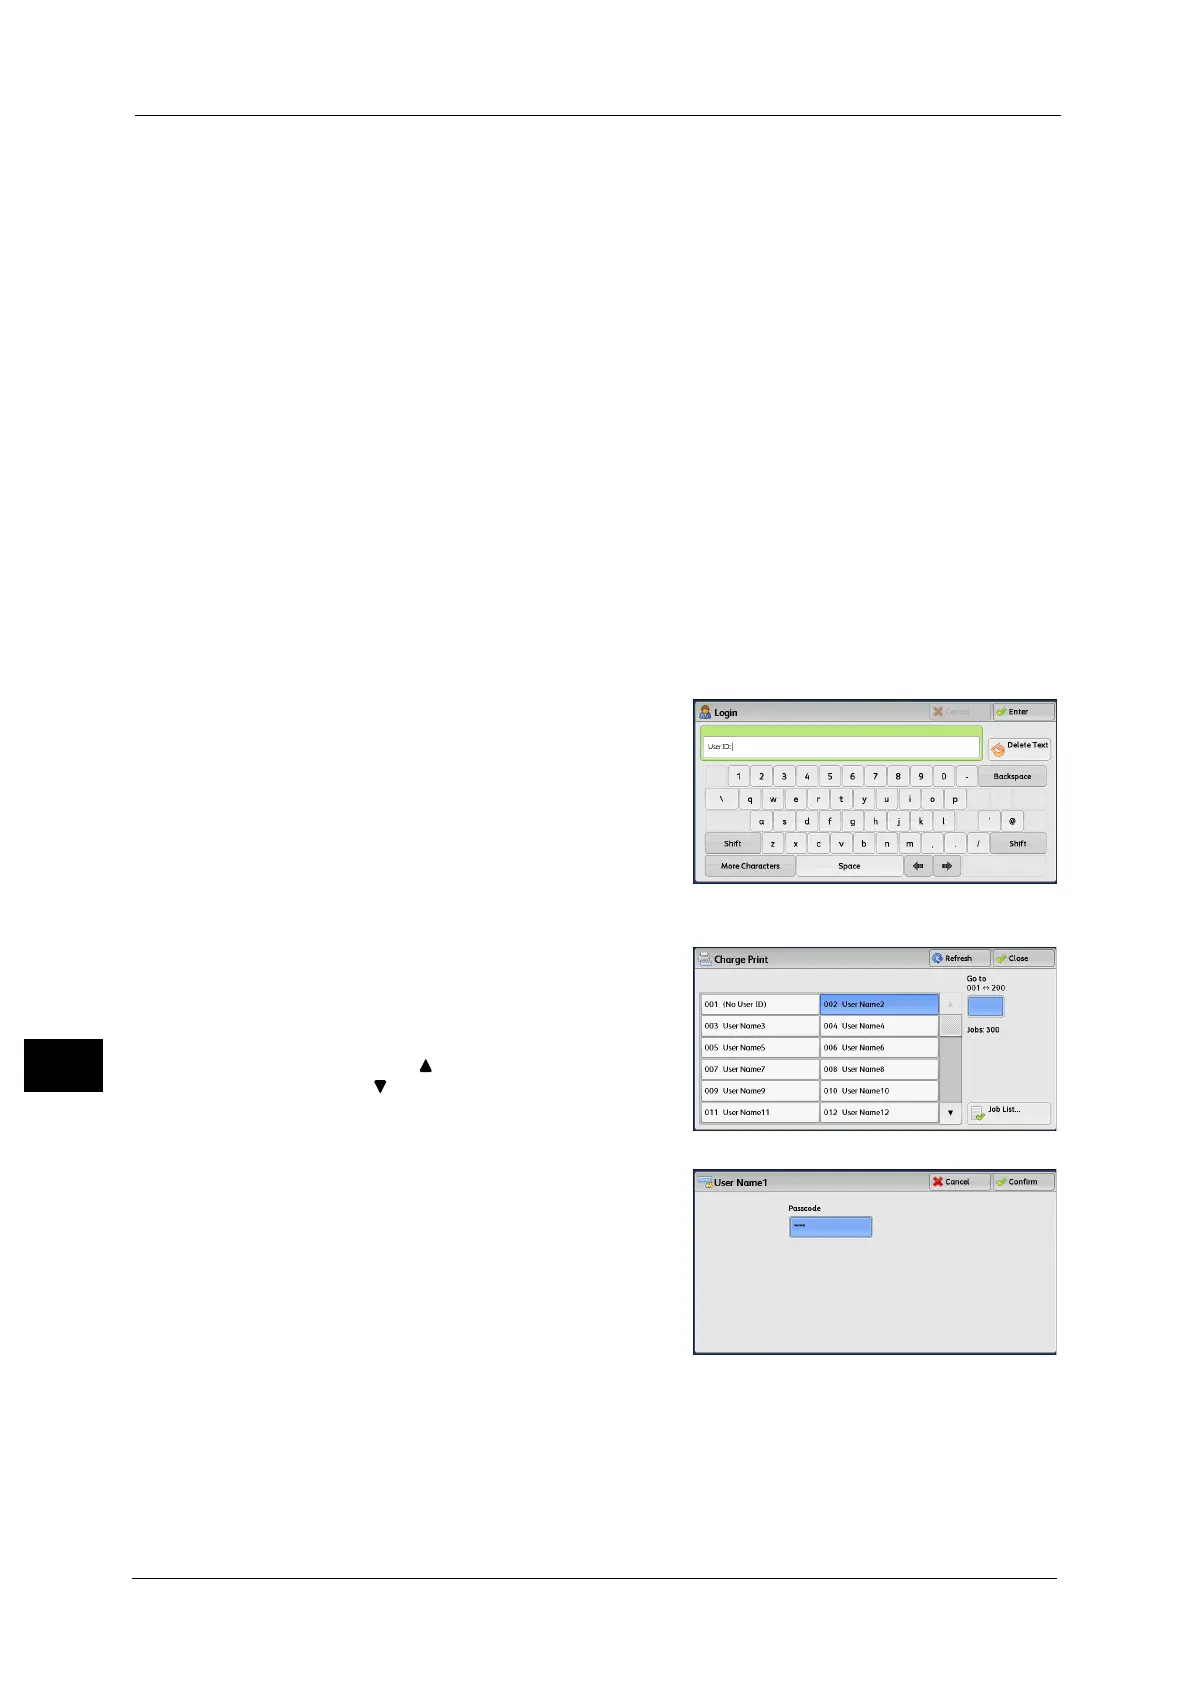
The following describes how to print and delete a job stored with the Charge Print feature.
1 Press the <Log In/Out> button on the control panel, or select the login information field on
the touch screen.
2 Enter the user ID, and select [Enter].
Note • When the passcode is set, enter the user ID
and select [Next]. Then, enter the passcode
and select [Enter].
• While a user is authenticated, the <Log In/
Out> button lights up on the control panel.
• To log out of the machine, press the <Log In/
Out> button on the control panel.
3 Select [Charge Print].
4 Select the user to be checked, and select [Job
List].
Note • Select [Refresh] to display the updated
information.
• Select [ ] to return to the previous screen or
[ ] to move to the next screen.
• You can enter a user ID in [Go to] using the
numeric keypad to display the user ID at the
top of the list.
5 Enter the passcode, and select [Confirm].
Note • If the passcode is not set, the passcode entry
screen does not appear.

 Loading...


