12
Print
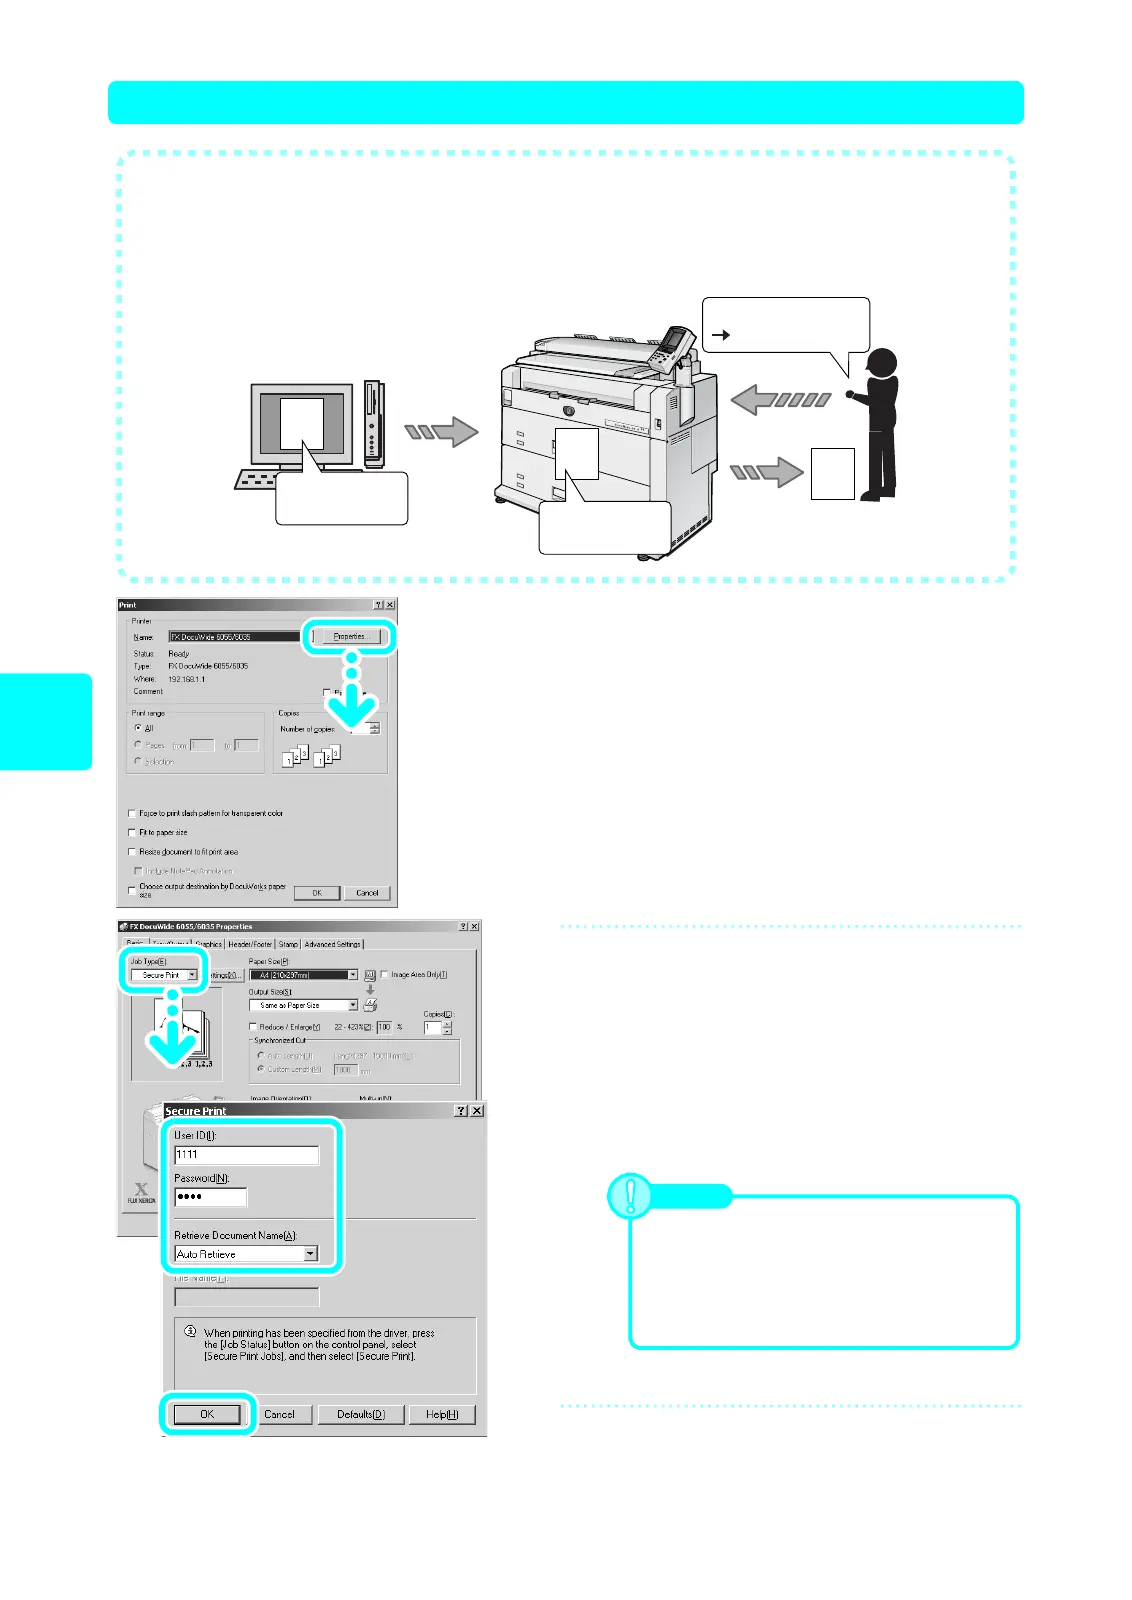
Secure Print (1) Specifying Secure Print from your Computer
1
Select [Print] from the application's
[File] menu.
(1) Select [FX DocuWide 6055/6035] from the [Name]
menu.
(2) Click [Properties]
2
Specify the settings for secure
printing.
(1) Click the [Basic] tab.
(2) Select [Secure Print] from [Job Type] .
(3) Enter [User ID] and [Password].
(4) From [Retrieve Document Name], select [Auto
Retrieve].
(5) Click [OK].
3
Click [OK] on the [Print] screen.
Set security
Send data
Store within
machine
Print
Enter password
Specify printing
Top secret
Top secret
Top secret
● You can temporarily store data specified for printing on the machine, and then print
it by operation on the machine.
● When using the accounting function, you can use Private Charge Print. Refer to
User Guide P.149.
Note
You can enter up to 24 alphanumeric
characters as your user ID and between 4 to 12
numeric characters for your password.
When selecting [Queued Document Name],
enter a document name in [Document Name]
using up to 24 characters.
 Loading...