Do you have a question about the FujiFilm IP-10 and is the answer not in the manual?
Ensure ink ribbon cartridge is free of slack and properly inserted into the printer.
Slide the paper tray forward and load paper with the glossy side facing up.
Plug the power cord and USB extension cable into the printer to initiate startup.
Connect camera via USB, power it on, and access the camera's menu for settings.
Set image quality to 2M and navigate to the ID SETTING option.
Select the desired size/layout and choose between EASY OPERATION A or B.
Select print size, confirm image deletion choice, and access Camera Direct ID.
Understand EASY-B mode, use a light-colored background, and position the subject correctly.
Use zoom for head and chin framing, and utilize flash for optimal lighting.
Start printing via EASY-A or EASY-B, select images, and review proofs before printing.
Bend leader strips at perforations and use the cutter to precisely cut photos.
Place finished photos in a folder for protection and close the front tab for presentation.
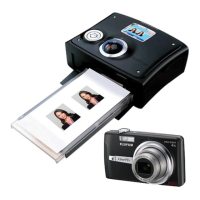
This document serves as a detailed quick reference guide for the Fuji IP-10 Digital Passport System, a comprehensive solution for producing passport-compliant photographs. The system integrates a digital camera, a dedicated photo printer, and a passport photo cutter, designed for efficiency and ease of use in professional settings.
The Fuji IP-10 Digital Passport System is engineered to streamline the process of capturing, printing, and cutting passport-sized photographs that meet various international standards. It allows users to take digital images, select appropriate photo sizes and layouts, and print them directly from the camera to the printer. The system supports both automated printing of all images taken (EASY-A mode) and selective printing of specific images (EASY-B mode), offering flexibility based on user preference. Once printed, the photos are then precisely cut to the required dimensions using a specialized cutter. The entire workflow, from image capture to final product, is designed to be quick and user-friendly, making it suitable for businesses that require on-demand passport photo services.
While specific technical specifications like camera sensor resolution, printer speed in pages per minute (PPM), or exact dimensions of the devices are not explicitly detailed in the provided pages, several operational details can be inferred:
The system emphasizes a straightforward, step-by-step operational flow:
Printer Setup:
Camera Setup and Configuration:
Image Capture:
Printing Process:
Photo Cutting and Finishing:
The guide provides basic maintenance instructions related to consumables:
While not explicitly detailed, the digital nature of the system suggests potential for firmware updates for the camera and printer, and general cleaning of the devices would be standard maintenance practices. The modular design, with separate camera, printer, and cutter components, likely simplifies troubleshooting and replacement of individual units if needed. The inclusion of a "Detailed Quick Reference Guide" itself is a maintenance feature, providing users with immediate access to operational instructions and troubleshooting steps.
| Brand | FujiFilm |
|---|---|
| Model | IP-10 |
| Category | Camera Accessories |
| Language | English |