Do you have a question about the Fujitsu 2737 and is the answer not in the manual?
Contains important notes on manual symbols, safety, and product usage guidelines.
Explains the various warning symbols used in the manual for user safety and understanding.
Clarifies the intended use and limitations regarding high-safety critical applications.
Provides detailed specifications for the 19-inch rack models, including dimensions and capacity.
Lists the types of Fujitsu products compatible for mounting within this rack.
Covers essential safety and environmental considerations for the rack's installation location.
Outlines critical safety measures and checks required when transporting the rack.
Provides crucial guidance for safe and effective rack installation and ongoing operation.
Details methods and requirements for ensuring the rack withstands seismic activity.
Explains the process of adjusting leveling feet for a stable and level rack installation.
Describes measures to prevent rack instability and tip-over accidents.
Describes how to install blank panels to cover unused rack spaces.
Covers general safety and operational advice not covered elsewhere.
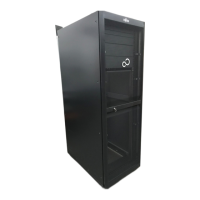
Details the overall structure and components of the 19-inch rack.
Specifies the configuration and accessories for the 19-inch rack Model 2724.
Specifies the configuration and accessories for the 19-inch rack Model 2737.
Specifies the configuration and accessories for the 19-inch rack Model 2742.
Specifies the configuration and accessories for the 19-inch rack Model 2616.
Specifies the configuration and accessories for the 19-inch rack Model 2624.
Specifies the configuration and accessories for the 19-inch rack Model 2642.
Provides instructions on how to open the front door of the rack safely.
Provides instructions on how to open the rear door of the rack safely.
Covers the essential steps and considerations for installing the rack correctly.
Details methods for securing the rack to withstand seismic activity up to 2.5 m/s2.
Details methods for securing the rack to withstand seismic activity up to 10 m/s2.
Explains the procedure for connecting multiple racks together for expansion.
Provides step-by-step instructions for installing and removing cage nuts for equipment mounting.
Details the procedure for installing and removing core spring nuts used in rack assembly.
Explains how to change the direction of front and rear door opening.
Details the process for altering the front door's hinge position for different opening directions.
Details the process for altering the rear door's hinge position for different opening directions.
Provides instructions for installing a fixed-type general-purpose table onto the rack.
Provides instructions for installing a movable-type general-purpose table onto the rack.
Details the procedure for installing a dedicated rack for storing laptop computers.
Explains how to install cable holders for managing cables within the rack.
Describes how to install blank panels to cover unused rack spaces.
Provides instructions for installing side cable ducts for organized cable routing.
Details the installation of L-shaped stabilizers for rack stability and safety.
Details the installation of pullout-type stabilizers for rack stability and safety.
Covers the installation of a specialized kit to enhance the rack's earthquake resistance.
Explains the installation process for Power Distribution Units (PDUs) into the rack.
Details the installation procedure for 1U-sized PDUs into the rack.
Details the installation procedure for 0U-sized PDUs into the rack.