EasyManua.ls Logo

Furinno 10003 User Manual

Furinno 10003
2 pages
To Next Page IconTo Next Page
Page #1 background imageLoading...
Page #1 background image
Assembly Instruction
Customer Service
Tel/Fax: 281.500.9372
Toll Free: 773.299.8111 (Mon - Fri 9am - 5pm)
Email: support@furinno.com
WARNING:
>This unit has been designed to support the
maximum loads shown. Exceeding these
load limits could cause sagging, instability,
product collapse, and/or serious injury.
>DO NOT allow children to climb on unit.
>Put heavier items on lower shelves.
its Space. its Budget
www.furinno.com
Install Nail leg(3)to the bottom of Side
Panel(B)using hammer.
STEP 6
Fasten another piece of Bottom Panel(D)
to Side Panel(B)using Screw(1).
STEP 5
Unfold Bin(4)and slide into the unit.
STEP 7
Recommended Maximum Weight
Furinno Center Coffee Table
w/4 Bin-Type Drawers
1000320140529
MODEL :
10003
31.5”(W) x 15.6”(H) x 18.9”(D)DIMENSION :
*Unit in Pound(lbs)
40
15
Tool RequiredTool RequiredNo Tools Required
Recomm. 1 PersonRecomm. 2 Person
Approx. 5 minutesApprox. 10 minutesApprox. 15 minutesApprox. 20 minutesApprox. 30 minutes
Question and Answer IconNeed help?

Do you have a question about the Furinno 10003 and is the answer not in the manual?

Furinno 10003 Specifications

General IconGeneral
Product NameFurinno 10003
CategoryIndoor Furnishing
MaterialEngineered Wood
Assembly RequiredYes
ShapeRectangular
StyleModern
ColorBlack
Weight Capacity15 pounds

Summary

Assembly Instructions

Step 5: Fasten Bottom Panel

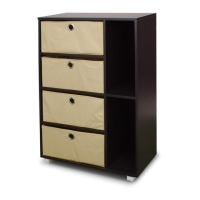
Fasten another piece of Bottom Panel (D) to Side Panel (B) using Screw (1).

Step 6: Install Nail Leg

Install Nail leg (3) to the bottom of Side Panel (B) using hammer.

Step 7: Unfold and Slide Bin

Unfold Bin (4) and slide into the unit.

Recommended Maximum Weight

Information on the maximum weight capacity of the unit and usage guidelines.

Important Warnings

Safety warnings regarding load limits, instability, and child climbing.

Assembly Guide

Step 1: Insert Wood Dowel

Insert Wood Dowel (2) to Panels (B), (E), and (F) with Glue (5).

Step 2: Attach Side Panels

Attach Panels (B) and (E) to the unfinished surface of Panel (A) with Glue (5).

Step 3: Attach Divided Panel

Attach Panel (F) to the unfinished surface of Panel (A) with Glue (5).

Step 4: Attach Shelf Panel

Attach Shelf Panel (C) to Panels (E) and (F), then fasten to Side Panel (B).

Useful Hints Before You Start

Provides essential tips for a smooth and correct assembly process.
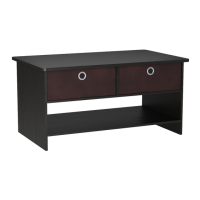
Related product manuals