EasyManua.ls Logo

Furinno 14110R1 User Manual

Furinno 14110R1
2 pages
To Next Page IconTo Next Page
Page #1 background imageLoading...
Page #1 background image
Assembly Instruction
its Space. its Budget
Furinno 5 Tier Shelf Bookcase
14110R120151111
MODEL : 14110R1
24.5”(W) x 71.2”(H) x 9.5”(D)DIMENSION :
Tool RequiredTool Required
Recomm. 2 Person
1
2
2pcs
4pcs
A
1pc
Top Panel
No Hardware List Qty No QtyParts List
Large Screw
Small Screw
B
C
1pc
3pcs
Shelf Panel
Bottom Panel
D
E
F
1pc
1pc
1pc
Top Left Side Panel
Bottom Bar
Center Panel
G
1pc
Top Right Side Panel
H
I
J
1pc
1pc
1set
Bottom Back Panel
Bottom Left Side Panel
Bottom Right Side Panel
K
1set
Top Back Panel
3 12pcs
Mini Fix Cam
4 12pcs
Mini Fix Bolt
8 2sets
Wall Mounting Set
5
6
46pcs
12pcs
Shelving Support
Power Pin
7 2pcs
L Bracket
STEP 2
2.1 Install L Bracket (7) to Bar (D) with Small Screw (2).
2.2 Attach assembled unit to Panel (B) with Small Screw (2).
STEP 1
Insert Mini Fix Cam (3) to Panel (A&B), as shown.
STEP 4
Insert Mini Fix Bolt (4) into Panel (H) and attach Panel (H) to Panel (B), as shown.
3.1 Insert Mini Fix Bolt (4) into Panel (I) using screwdriver.
3.2 Attach Panel (I) to assembled unit in Step 2, as shown.
STEP 3
Approx. 30 minutes
Customer Support
NEED HELP? For help with assembly, or if you are missing a
part, please call Furinno Customer Service, 1-773-299-8111
from Mon-Fri, 9am-5pm (CST) or email: support@furinno.com
www.furinno.com
Question and Answer IconNeed help?

Do you have a question about the Furinno 14110R1 and is the answer not in the manual?

Furinno 14110R1 Specifications

General IconGeneral
BrandFurinno
Model14110R1
CategoryIndoor Furnishing
LanguageEnglish

Summary

Furinno 5 Tier Shelf Bookcase Assembly Guide

Hardware and Parts Identification

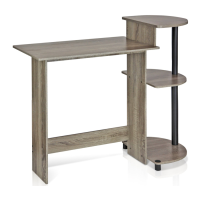
Lists all hardware components and furniture parts required for assembly.

Step 1: Insert Mini Fix Cam

Instruction to insert Mini Fix Cam into panels A and B.

Step 2: Install L Bracket

Attach L Bracket to Bar D and assemble unit to Panel B.

Step 3: Attach Panel I

Insert Mini Fix Bolt into Panel I and attach to the assembled unit.

Step 4: Attach Panel H

Insert Mini Fix Bolt into Panel H and attach it to Panel B.

Bookcase Assembly Continuation and Finalization

Step 5: Attach Panel G

Insert Mini Fix Bolt into Panel G and attach it to Panel A.

Step 6: Attach Panels E & F

Insert Mini Fix Bolt into Panels E & F, then attach them.

Step 7: Combine Assembled Units

Combine the two main assembled units from previous steps.

Step 8: Attach Back Panels

Secure Back Panels J & K to the assembled unit using Power Pins.

Step 9: Install Shelving and Wall Fixation

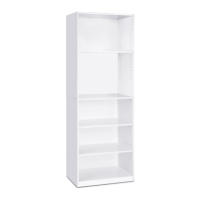
Insert shelving supports, place shelf panels, and fix unit to wall.

Step 10: Unit Placement and Usage

Guidance on vertical/horizontal placement and recommended weight limits.

Important Warnings and Safety

Safety warnings regarding load limits, climbing, and item placement.

Related product manuals