1. HOW TO INSTALL THE EQUIPMENT
3
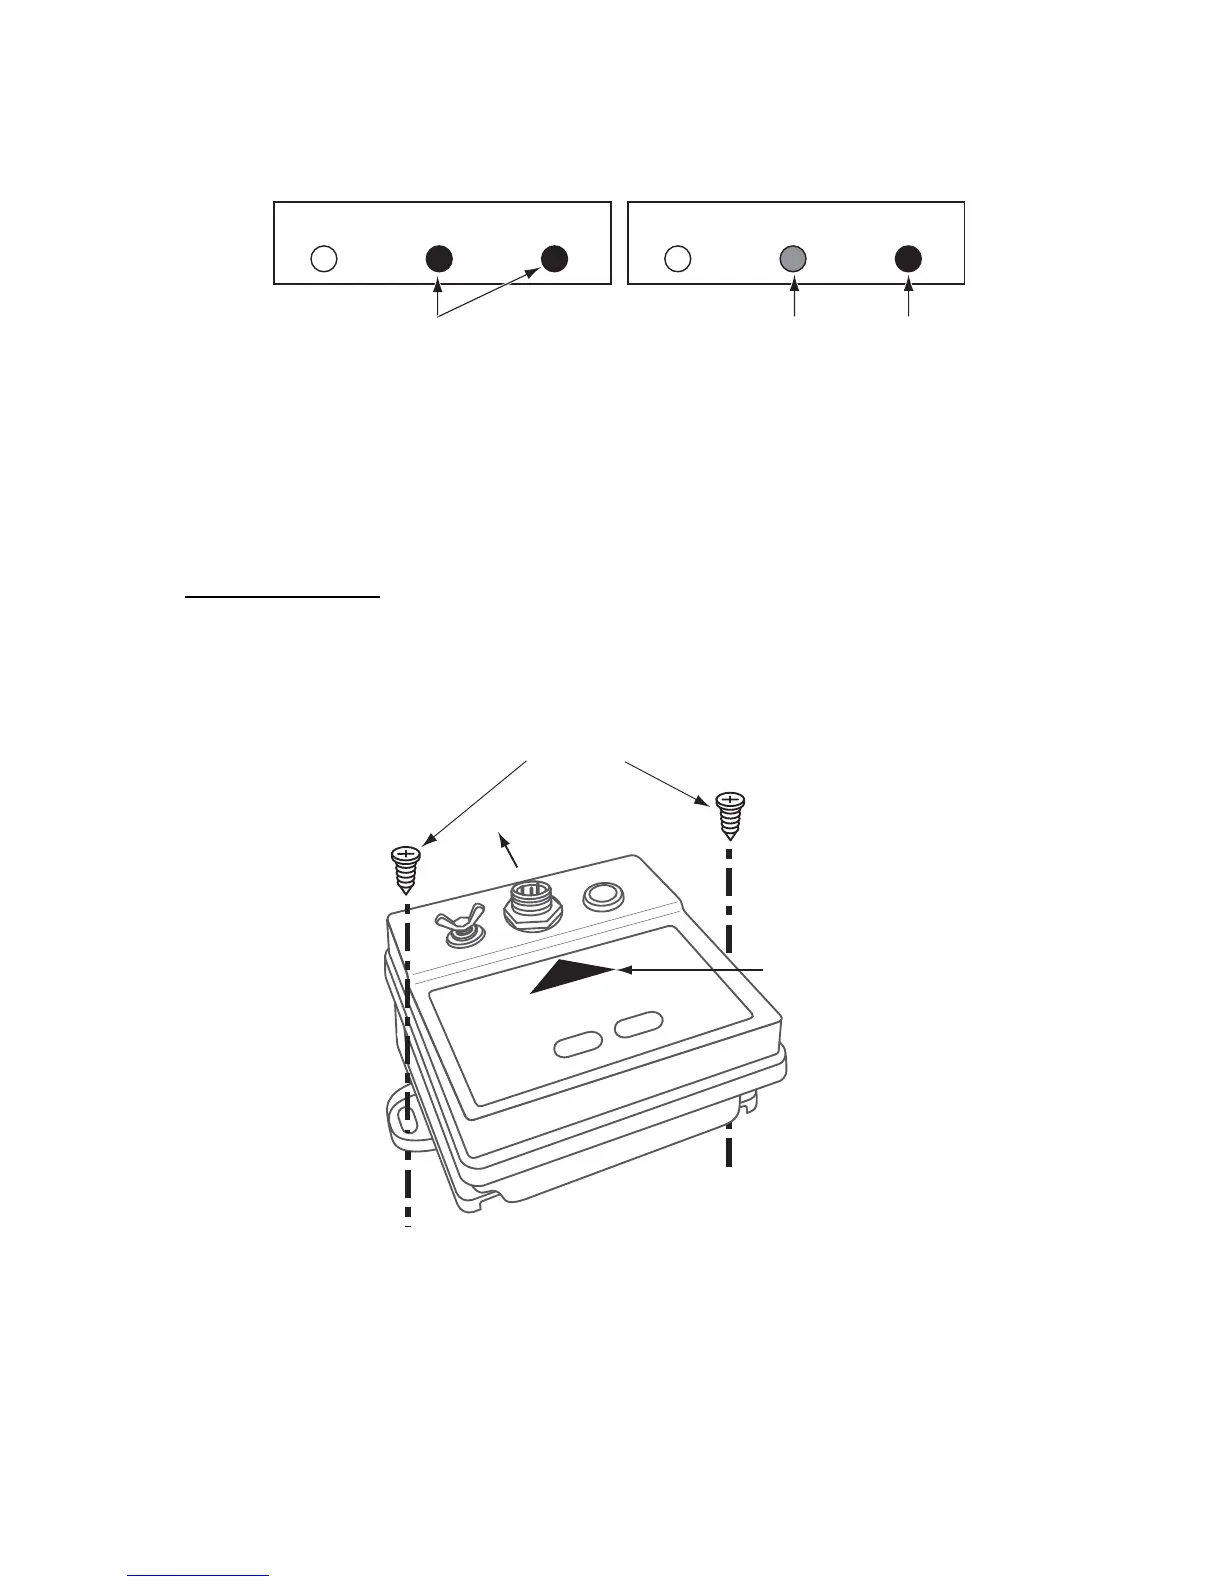
4. Slowly turn the unit (one turn per minute) at the mounting position (turn one - two times to
achieve the results as shown in the left figure below).
If successful, the STATUS and CHECK lamps light green. If fails, the STATUS lamp lights red.
If you interrupt the unit operation, press and hold the [+] and [-] keys simultaneously for three
seconds.
5. If fails, press and hold the [+] and [-] keys simultaneously for 3 seconds. Change the location,
and repeat steps 3 - 4 as above.
6. If successful, disconnect the power cable and follow the next steps to mount the unit firmly.
Tabletop mounting
Fix the unit with two self-tapping screws, facing the bow mark on the unit toward the bow (within
±10°) of the vessel. The long and round holes on the unit allow you to fine tune the direction of the
unit. See the outline drawing at the back of the manual for dimensions.
CALIB STATUS CHECK CALIB STATUS CHECK
(a) Installation site OK
(b) Installation site no good
On (green)
On (green)
On (red)
Self-tapping screws (supplied) (4x16)
BOW mark
BOW


 To Next Page