34
ڀ ŪŲŃƗƒŃŷŤťůŨŃŲũŃŦŲűŷŨűŷŶ
ŃůƌƑƎŃƓƕƒƆƈƇƘƕƈŃŋŷŕřŶŽŃƄƑƇŃŵŚŕœśŶťŃŒŵŚŖœśŶťŌ
Each transmitter has an individually assigned, unique ID code. In order to start operation, the receiver must
be linked with the ID code of the transmitter to which it is being paired. Once the link is made, the ID code
is stored in the receiver and no further linking is necessary unless the receiver is to be used with another
transmitter. When you purchase additional R7208SB /R7308SB receivers, this procedure is necessary;
otherwise the receiver will not work.
Lessthan0.5m
In"Link"Mode
ůƌƑƎŃƓƕƒƆƈƇƘƕƈ
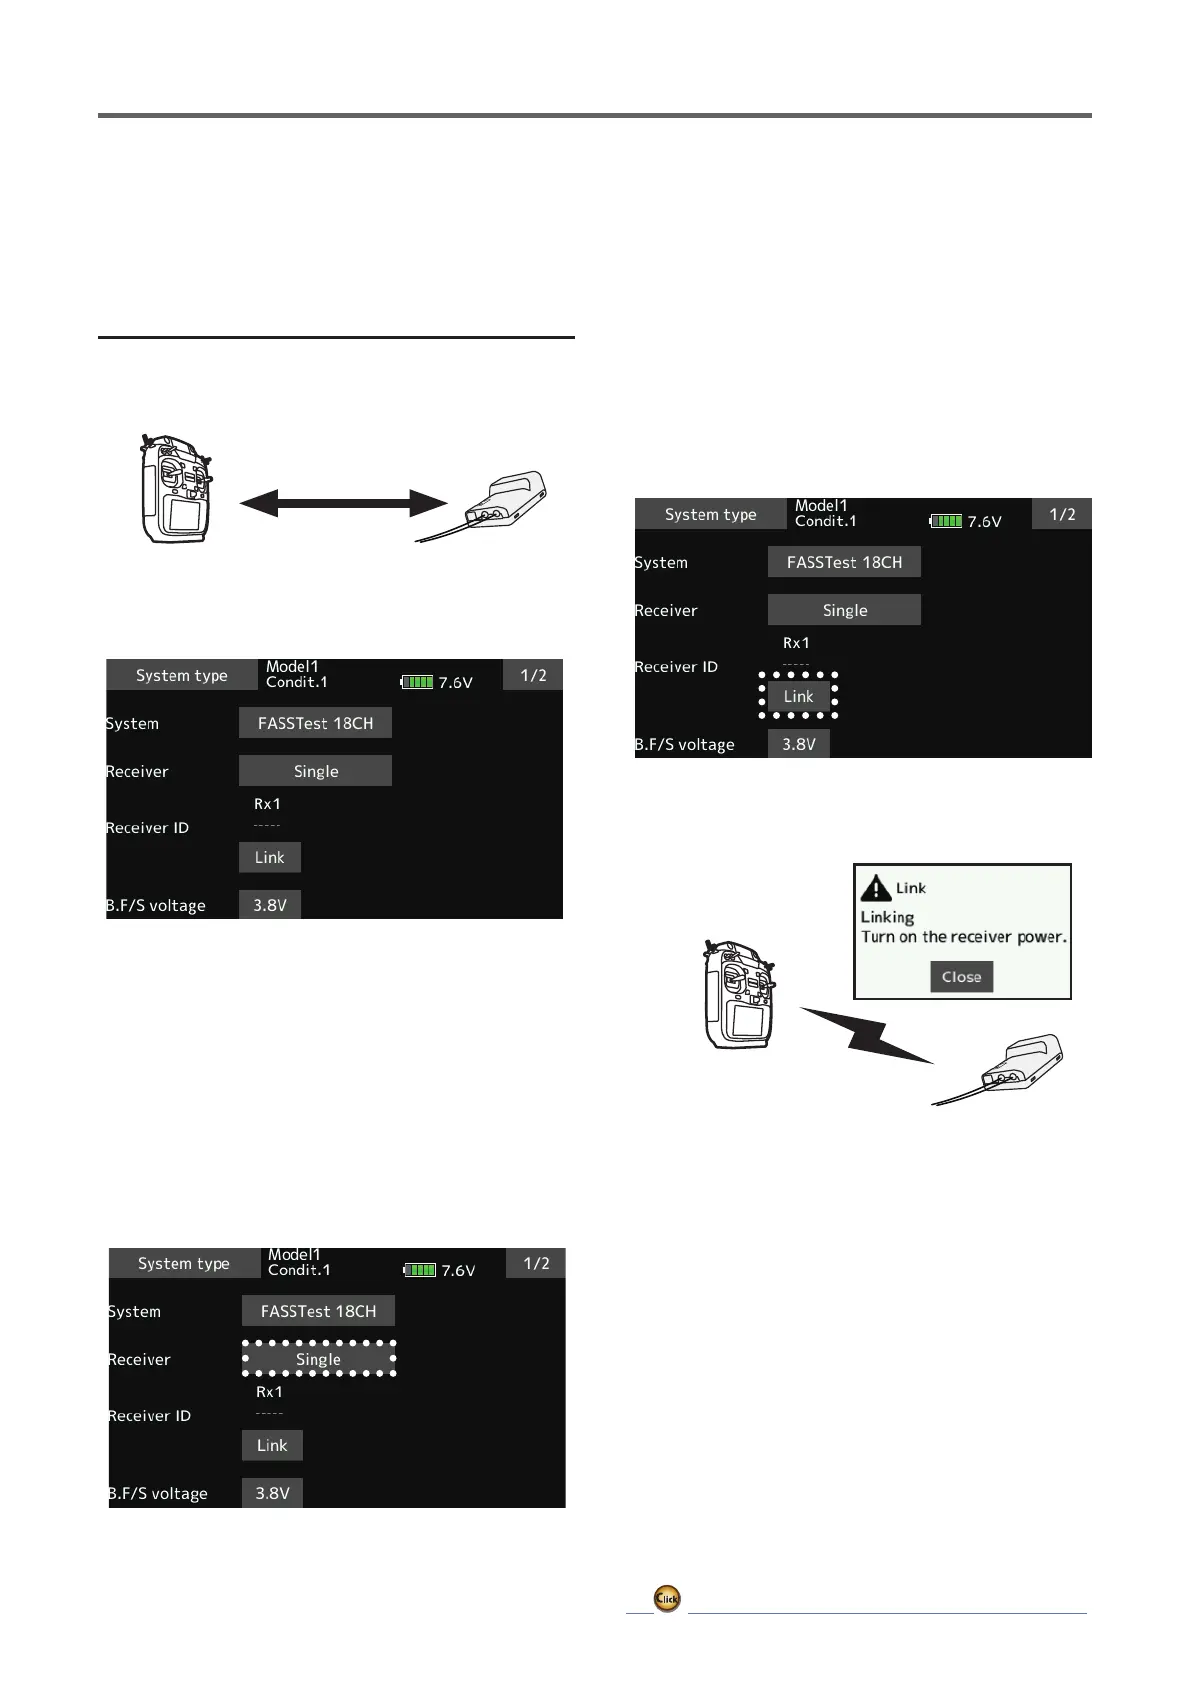
1.
Place the transmitter and the receiver close to each
other within half (0.5m) meter.
2.
Turn on the transmitter.
3.
Select [System type] at the Linkage menu and access
the setup screen shown below by tapping the screen.
4.
If using one receiver, select [Single]
[Dual] when using two receivers in one model
[Triple] when using three receivers in one model
Choose.
*Links with two receivers if dual.
*For triple, link with 3 receivers.
*Dual/triple cannot be selected for T-FHSS AIR.
5.
Battery fail-safe voltage can be changed from the initial
value of 3.8V here.
* Only in FASSTest/T-FHSS AIR Mode.
6.
[Link] is tapped. The transmitter will emit a chime as it
starts the linking process.
7.
When the transmitter starts to chime, power on the
receiver. The receiver should link to the transmitter
within about 1 second.
8.
If linking fails, an error message is displayed. Bring
the transmitter closer to the receiver and repeat the
procedure above from Step 2.
9.
ACT will be chosen if telemetry is used. It is INH when
not using it.
10.
When a telemetry function is enabled, the receiving
interval (down-link interval) of sensor data can be
changed. If a D/L interval is increased, the response
of the sensor data display becomes slower, but stick
response will improve.
Initial value: 1.0s
Adjustment range: 0.1s~2.0s
ReceiverON
 Loading...