BATTERIES:
Before initial hook-up and operational check, transmitter and receiver
batteries should be charged for 24 hours.
CHARGING INSTRUCTIONS:
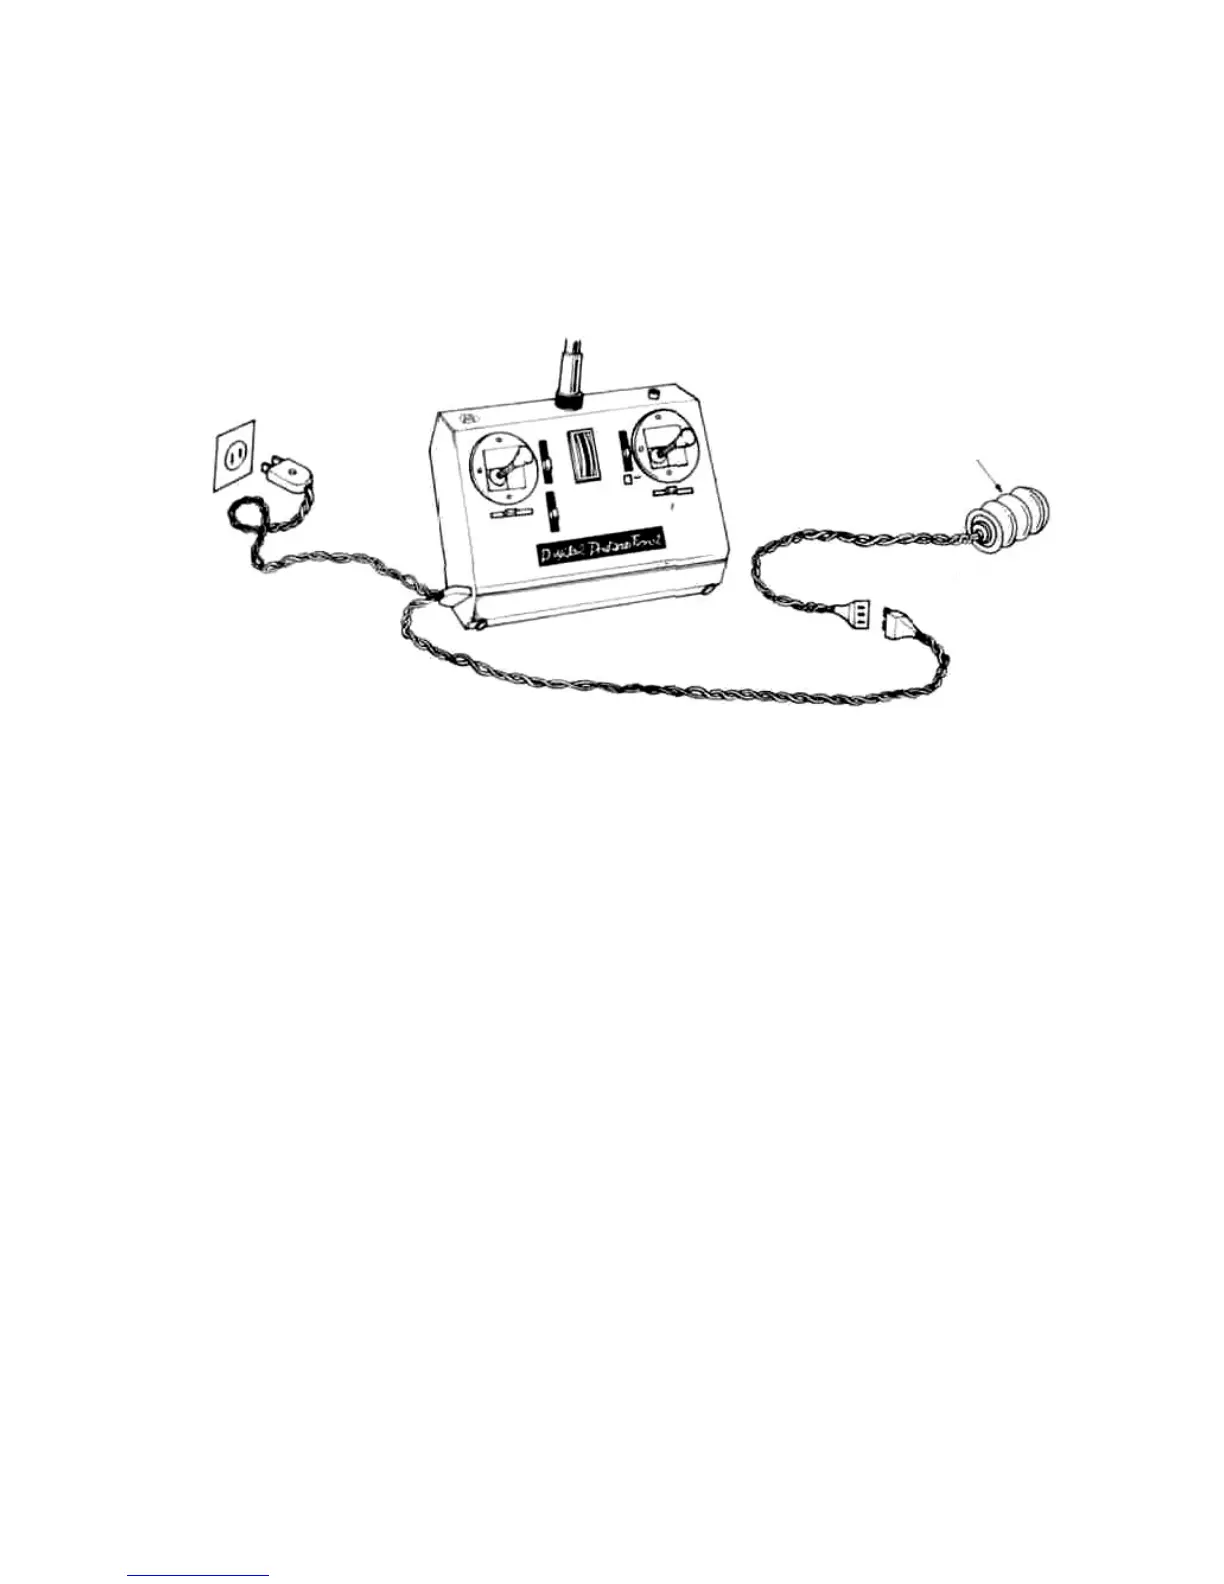
Your transmitter contains a built-in transformer type nickel cadmium
battery charger. A dual charging cord is packed with your radio cont-
rol system. If you will examine, the charging cord, you will note that
it is fitted with a standard 110 volt 2 prong line cord plug, a seven
pin male and a four pin female connector. The line cord plug connects
to
any 110-117
volt
AC. household outlet.The seven
pin
male
plug
con-
nects to the receiver battery pack. The female connector located on
the lower left-hand side on the transmitter case.
Before connecting the charging cord, turn the transmitter switch off
and turn the receiver switch to the on position, (if your switch aren't
in the proper position, your system won't charge.) Next, plug the 4
socket connector to the transmitter and then the 7 pin plug into the
receiver battery pack. Then you plug the line cord plug into 110 volts
AC household outlet. Check the charging indicator light located at the
top right hand side of the transmitter, when this light is on, it indicates
that both batteries are being properly charged 18 to 24 hours is suffi-
cient for 100% charge and this will operates your system for 3 hours.
"ON" FOR CHARGING
BATTERY PACK