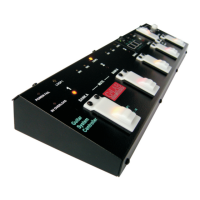
7
In case of necessity of returning without saving settings while the point e) it should be pressed
LOOP or MIDI button (SWITCH indicator stops to light and preset indicator stops to blink).
MIDI program No. programming
a) Connect MIDI cable between MIDI OUT output connector and MIDI IN input connector of the
controlled device.
b) Switch on controlled device and set the MIDI channel if not activated earlier (see: MIDI channel
setting).
c) Select bank and preset.
d) Memory access lock switch to UNLOCK position (LOCK indicator not lit).
e) Press MIDI button (MIDI and preset indicators will start to blink).
d) The No. 1 preset button decreases the program No. by 10,
the No. 2 preset button decreases the program No. by 1,
the No. 3 preset button sets the MIDI program No. to No. 1,
the No. 4 preset button increases the program No. by 1,
the No. 5 preset button increases the program No. by 10.
Accessible program numbers are from 1 to 128 (transmitted values from 0 to 127).
e) Press MIDI button to save. Quick blinking of MIDI and selected preset indicators confirm saving.
In case of necessity of returning without saving settings while the point d) it should be pressed
LOOP or SWITCH button (MIDI indicator stops to light and preset indicator stops to blink).
Preset’s copying
a) Select preset to copy.
b) Memory access lock switch to UNLOCK position (LOCK indicator not lit).
c) Press at the same time LOOP and MIDI buttons (LOOP, SWITCH and MIDI indicators will start
to blink).
d) Switch bank (if necessary) and choose preset No. where to copy selected preset.
e) Press at the same time LOOP and MIDI buttons to save preset. Successive quick blinking of
LOOP, SWITCH and MIDI indicators confirm saving.
In case of necessity of returning without saving settings while in the point d) should be pressed
SWITCH button (LOOP, SWITCH and MIDI indicators stop to blink).
Settings
Settings parameters have been divided between LOOP and SWITCH buttons. The setting
parameters of MIDI channel transmission are assigned to the MIDI button. Factory settings in the
below tables are bolded.
LOOP button settings
a) Memory access lock switch to LOCK position (pressed, LOCK indicator lit).
b) Press and keep LOOP button then memory access lock switch to UNLOCK position (LOCK
indicator stops lit). All three banks’ indicators start to blink and the LOOP indicator starts to light.
Presets indicators will show the current settings of the LOOP button. The meanings of these
settings are shown in the below table.
c) Pressing presets footswitches will effect in changing of particular settings.
d) Pressing the LOOP button will effect in saving settings (short, mutual blinking of bank indicators
confirm saving).