B
B
X
X
/
/
B
B
X
X
G
G
-
-
1
1
0
0
0
0
0
0
S
S
e
e
r
r
i
i
e
e
s
s
G
G
r
r
o
o
o
o
v
v
e
e
M
M
e
e
a
a
s
s
u
u
r
r
e
e
m
m
e
e
n
n
t
t
G
G
a
a
g
g
e
e
O
O
p
p
e
e
r
r
a
a
t
t
i
i
o
o
n
n
M
M
a
a
n
n
u
u
a
a
l
l
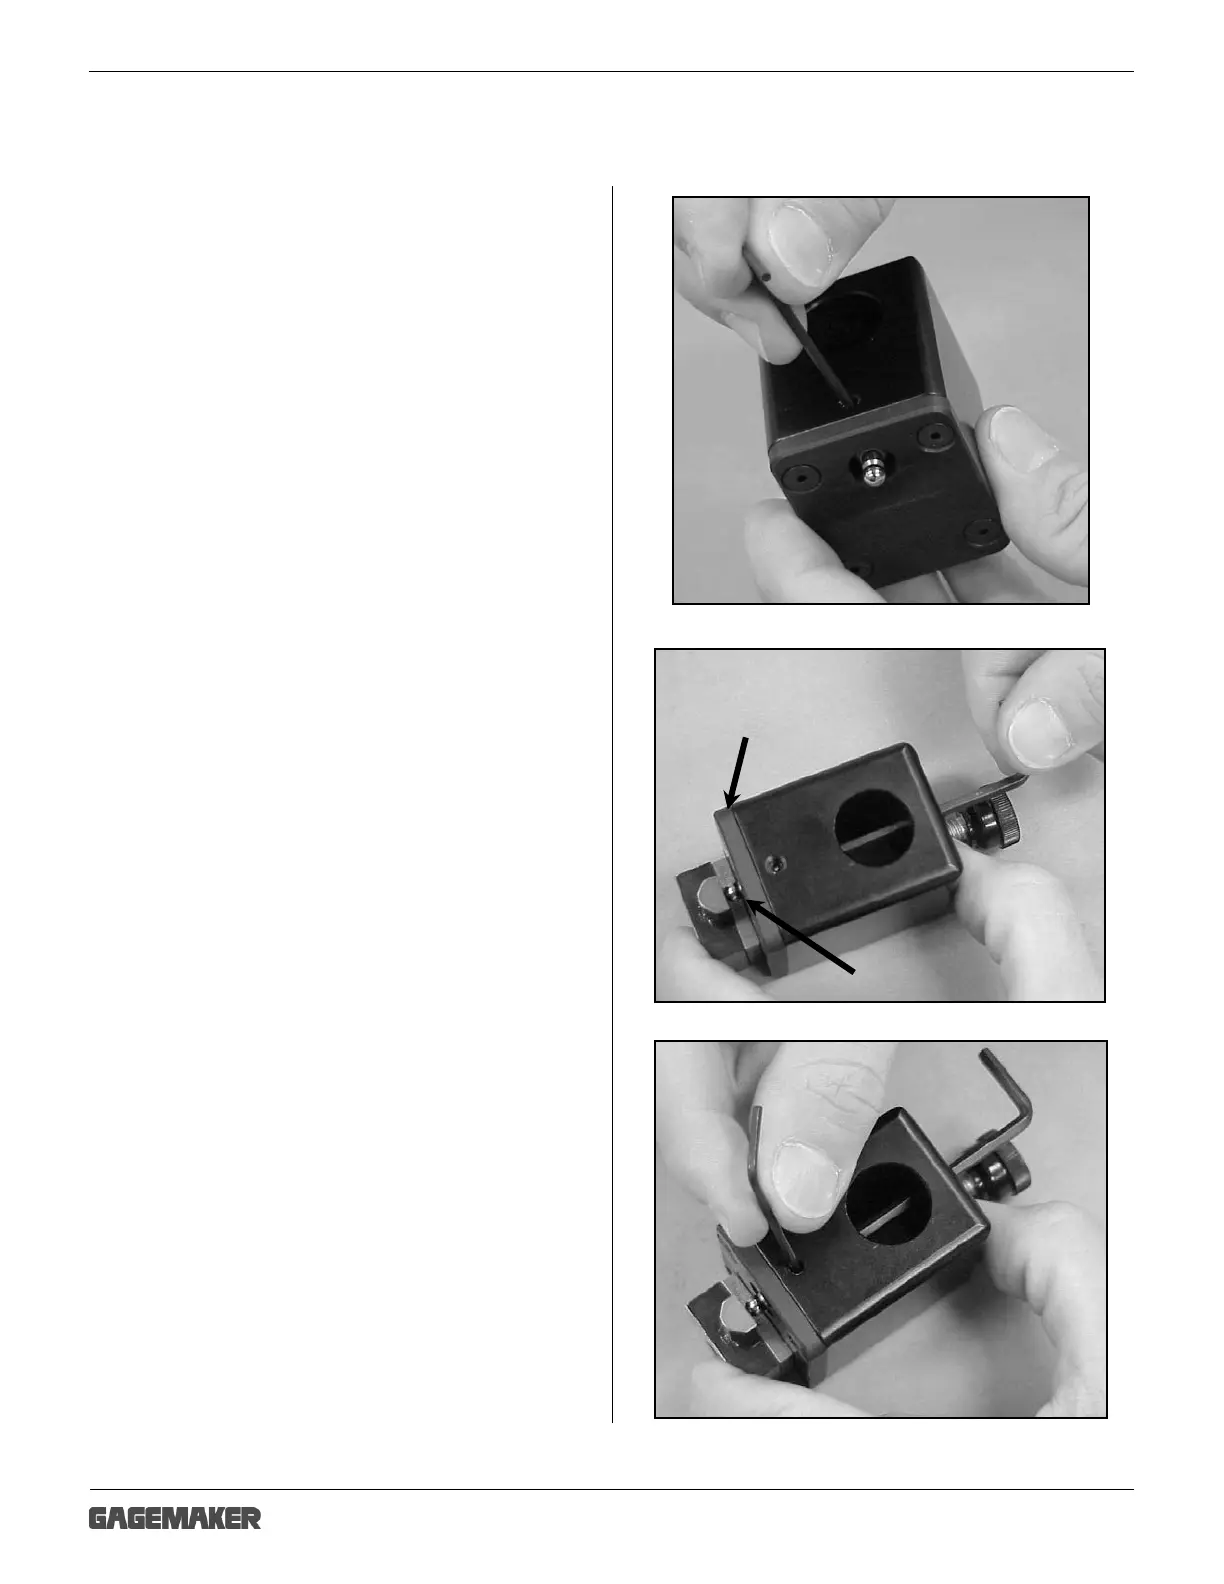
Setting Up the BX-1000 Gage (continued)
4. Using a 5/64” hex wrench, loosen the
contact point set screw in the lower
block.
5. Place a 1/8” hex wrench down the access hole
in the top of the lower block.
6. Using a .188” gage block, turn the hex wrench
to adjust the set screw so the distance from the
wear pad to the bottom of the contact point is
.188”.
7. Using the 5/64” hex wrench, tighten the contact
point in the lower block.
Wear Pad
Contact Point