B
B
X
X
/
/
B
B
X
X
G
G
-
-
1
1
0
0
0
0
0
0
S
S
e
e
r
r
i
i
e
e
s
s
G
G
r
r
o
o
o
o
v
v
e
e
M
M
e
e
a
a
s
s
u
u
r
r
e
e
m
m
e
e
n
n
t
t
G
G
a
a
g
g
e
e
O
O
p
p
e
e
r
r
a
a
t
t
i
i
o
o
n
n
M
M
a
a
n
n
u
u
a
a
l
l
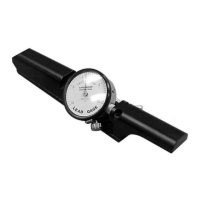
Setting Up the BXG-1000 Gage
Materials Needed:
• BXG-1000 gage
• Gage block
1. Inspect the contact points to ensure that they
are tight.
2. Loosen the rear contact point lock knob,
located on the top of the gage.
3. Turn the contact point adjustment knob, located
on the rear of the gage, to adjust the point
location until the rear lock screw is aligned with
the access hole in the side of the gage body.
Note: Aligning the lock screw allows you to place
a hex wrench in the access hole and loosen
the lock screw.
4. Using the 5/64” hex wrench, loosen the front
and rear lock screws.
Rear Lock Screw