FC66002179 – Rev.00
23
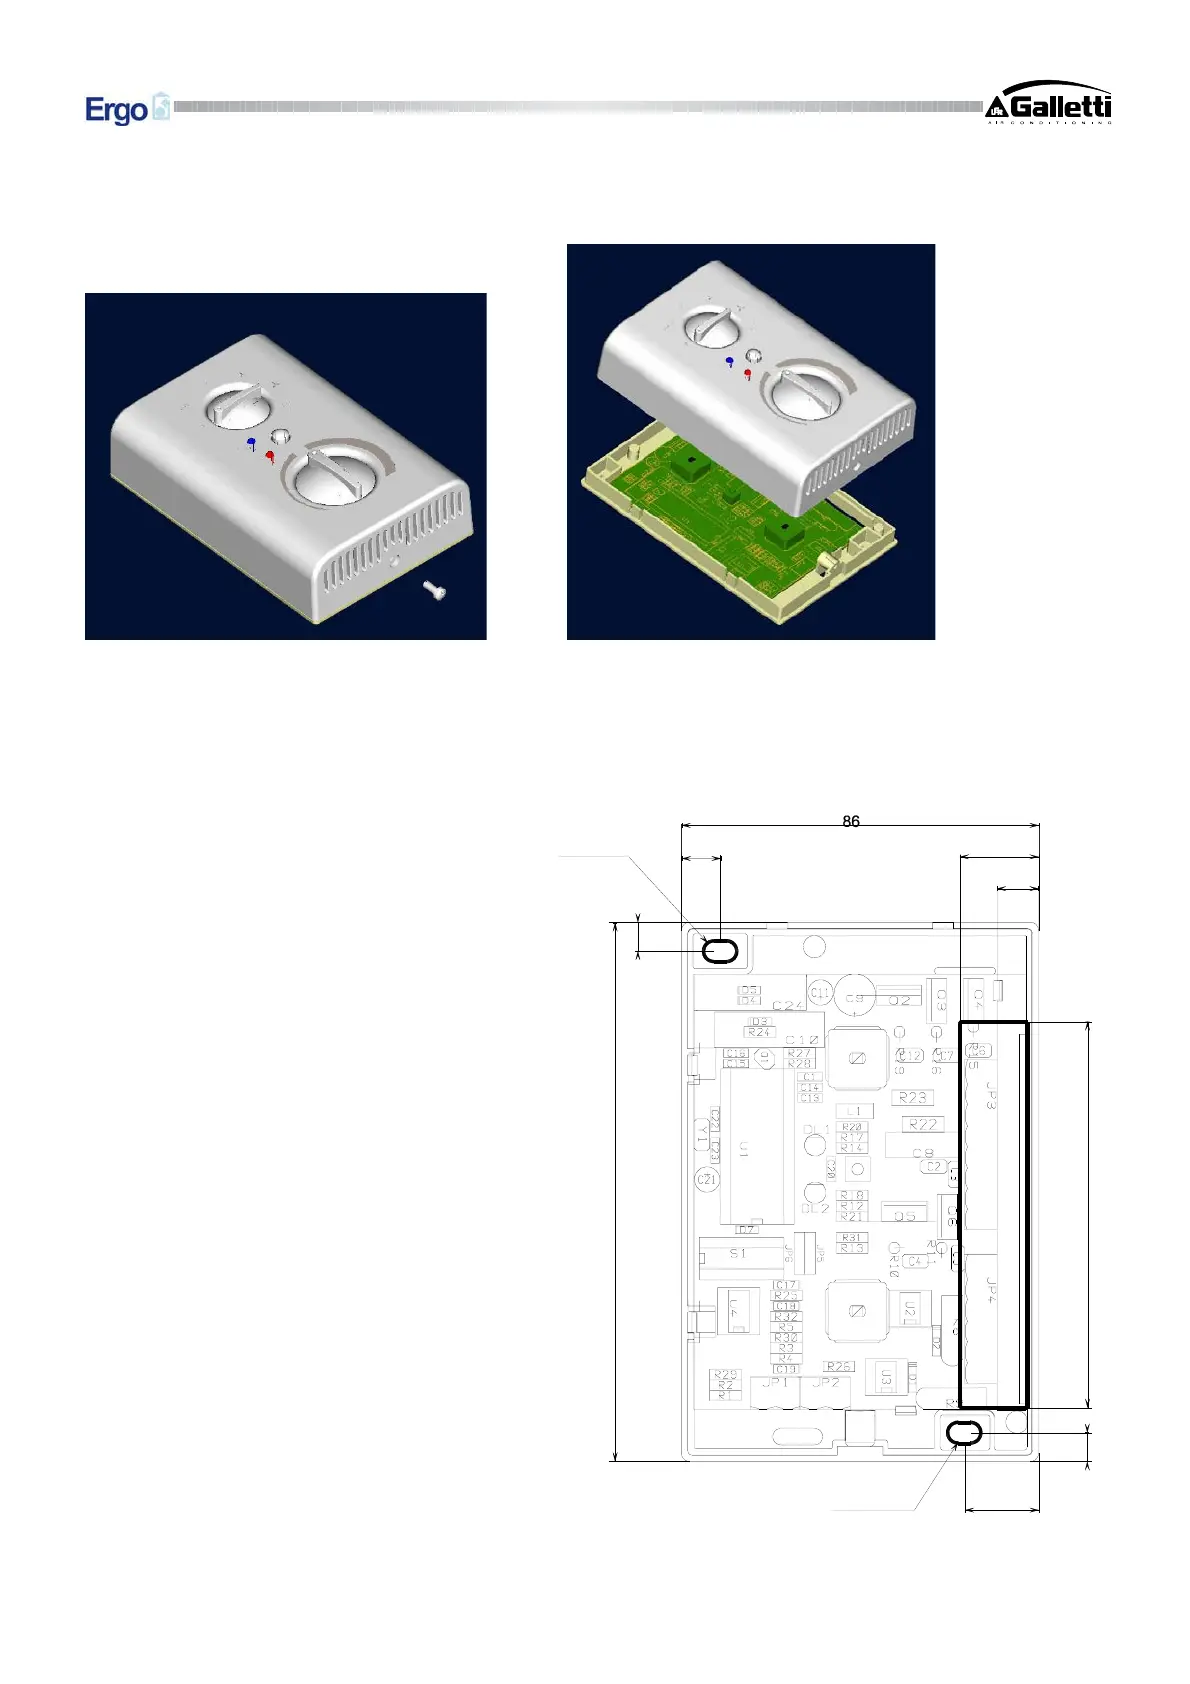
Instructions for wall mounting
1. Remove the fastening screw of the controller (fig. 5).
Fig.5 Fig.6
2. Make sure the speed selector is positioned on OFF and the temperature control is set in the comfort position;
then remove the top part of the controller (fig. 6).
3. Drill holes in the wall where you plan to install the controller, in positions corresponding to the fastening slots
(5 x 8 mm) on the controller base (fig.7).
Fig.7
4. Make the electrical connections to the control
terminal block.
5. Fix the controller base with screws to the
previously drilled wall.
6. Fit the top part of the controller back on its
base, taking care to ensure that the selectors
are in the same position as when the
controller was disassembled (see step 2) and
reapply the screw.
7. Make the electrical connections to the fan coil
unit as per the wiring diagram corresponding
to the selected operating configuration.
1
3
0
9.3
7
9
3
17.7
7
19
10
5 x 8
5 x 8
 Loading...