8
P R I M I N G A N E W W R A P O R C O O L I N G V E S T
A brand new Wrap or Cooling Vest should first be filled with water (“primed”) before it
is used. To prime a new Wrap or Vest, follow the Quick Set Up Instructions and then the
following:
1. Connect Wrap or Vest to Control Unit (Wrap or Vest need not be worn to prime).
2. Press the pressure button on the control panel to set the pressure on “no pressure”.
3. Turn the temperature control knob to maximum cold (3 snowflakes).
4. Press the start button.
5. Run for a minimum of two minutes.
Note: Often when priming a larger Wrap or vest, the Control Unit alarm will sound after
45 seconds, the low flow icon will flash and the Control Unit will stop. This is because
there isn’t enough water returning to the Control Unit, due to the new Wrap being filled.
To continue, simply restart the priming process following the steps above. After 2
minutes the Wrap or Vest is fully primed and ready to be used. Repeat the steps above
for each additional new Wrap or Vest.
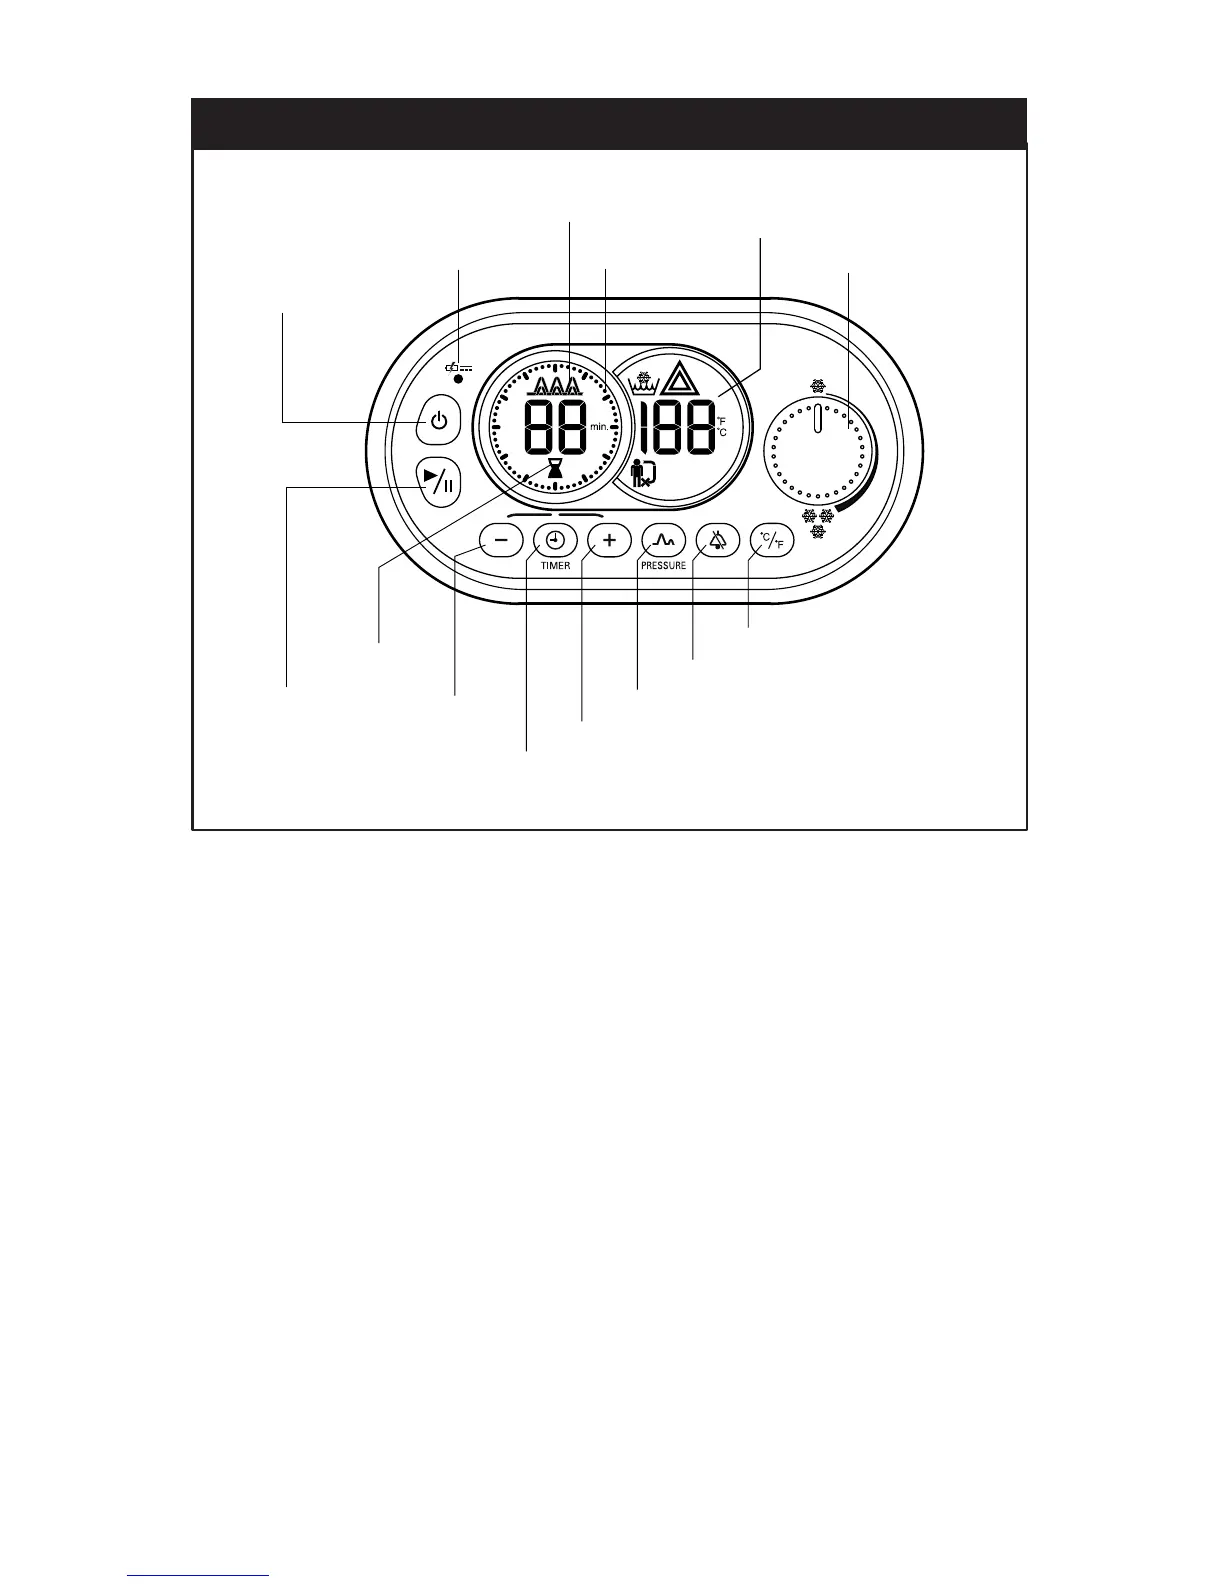
CONTROL PANEL / BASIC CONTROLS