EasyManua.ls Logo

Game ready 550550 - User Manual

Game ready 550550
22 pages
Print Icon
To Next Page IconTo Next Page
Loading...
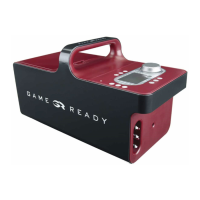
MODEL 550550
CONTROL UNIT
User’s Manual
This User’s Manual is also available online in
English, French, German, Italian, Japanese, and Spanish
at www.gameready.com under Products.

Questions and Answers

  • N
    Nancy ParkerSep 8, 2025
    What to do if Game ready 550550 displays a Pump Performance Error?
    • S
      Stephanie DavisSep 9, 2025
      If you encounter a Pump Performance Error with your Game Ready Control Unit, it could be due to ice or debris in the fluid circuit. Try turning the Control Unit off and back on. Also, check if the filter is clogged. If the issue persists, turn the unit off for 20 minutes to allow the pump to cool down before restarting.
  • C
    Christopher KnightAug 23, 2025
    What to do if my Game ready 550550 shows 'Dry Pump'?
    • T
      Tiffany HansenAug 23, 2025
      If your Game Ready Control Unit displays a 'Dry Pump' error, indicating the unit has detected a dry pump and stopped therapy to prevent damage, take the following steps: * Ensure there is water in the ice box. * Check that the ice box filter isn't clogged. * Make sure there are no kinks in the Wrap or Connector Hose. * Turn the Control Unit off and on again. * Turn the temperature knob to full cold until flow has been established. * Disconnect and reconnect the hose from the Control Unit and the Wrap. Prime the Wrap and System as described in the manual.
  • T
    Tamara FisherAug 25, 2025
    What to do if the Game ready 550550 displays 'Low Flow'?
    • P
      patricia63Aug 25, 2025
      If your Game Ready Control Unit shows a 'Low Flow' error, indicating an interruption in the water flow, you should: * Check all hose connections. * Ensure there is water in the ice box. * Verify that the ice box filter is not clogged. * Make sure there are no kinks in the Wrap or Connector Hose. * Turn the Control Unit off and on again. * Disconnect and reconnect the hose from the Control Unit and the Wrap.
  • Q
    qmatthewsAug 27, 2025
    What to do if my Game ready 550550 won't turn on?
    • M
      Michael SchneiderAug 27, 2025
      If your Game Ready Control Unit fails to turn on, ensure the AC Adapter is securely plugged into a working electrical outlet. Press the power button again. If the orange LED on the control panel is illuminated, but the Control Unit will still not turn on, call 1.888.426.3732. If no orange or green light is illuminated, check that the electrical outlet has power.
  • J
    Jennifer PetersenAug 28, 2025
    What to do if Game ready 550550 Control Unit shows 'Under Pressure'?
    • G
      gomezmichaelAug 28, 2025
      If the Game Ready Control Unit can’t reach its target maximum compression and shows 'Under Pressure', this often indicates a leak in the pneumatic compression circuit (Connector Hose, Wrap, or Control Unit) or worn hook and loop fasteners on your Wrap. Make sure the Wrap is tightly applied. Try using a different Wrap and Hose to isolate the problem.
  • K
    Kendra GarciaSep 22, 2025
    What to do if Game ready 550550 Control Unit displays Self-Test Error – Fluid Circuit?
    • T
      Theresa StephensSep 22, 2025
      If the Game Ready Control Unit shows a Self-Test Error related to the Fluid Circuit, disconnect the Wrap from the Control Unit. Then, turn the Control Unit off and on again without a Wrap connected.
  • M
    Matthew CarrollSep 16, 2025
    What to do if Game ready 550550 Control Unit displays a Deflation Error?
    • L
      Louis JordanSep 16, 2025
      If your Game Ready Control Unit shows a Deflation Error, turn the Control Unit off. If there is air left in the Wrap, disconnect the Wrap from the Connector Hose and manually deflate the Wrap.
  • M
    meganburnettSep 18, 2025
    How to fix Water Level Too Low on Game Ready Control Unit?
    • M
      Maria RogersSep 18, 2025
      If the Game Ready Control Unit indicates that the water level is too low, add water to the Control Unit ice box.
  • A
    Alison WardSep 7, 2025
    What to do if Game Ready Control Unit shows a 'Dry Pump' error?
    • E
      edwardsphillipSep 7, 2025
      If the Game Ready Control Unit displays a 'Dry Pump' error, ensure there is water in the ice box and that the ice box filter isn't clogged. Also, check for kinks in the Wrap or Connector Hose. Try turning the Control Unit off and on again, and disconnect and reconnect the hose from both the Control Unit and the Wrap. As a solution you can also prime the Wrap: select "No Pressure," attach the largest Wrap available, lay the Wrap open, and run the System for 1 minute. Alternatively, prime the System: disconnect the hose from the Control Unit and push the white prong on the bottom valve of the Wrap connection location until it's even with the metal connector.
  • S
    Stephanie PerezSep 4, 2025
    What does 'Self-Test Error – Fluid Circuit' mean on Game Ready Control Unit?
    • J
      Jeffrey BryantSep 4, 2025
      If your Game Ready Control Unit displays 'Self-Test Error – Fluid Circuit' upon start-up, it indicates an electronic problem in the fluid circuit. To resolve this: * Disconnect the Wrap from the Control Unit. * Turn the Control Unit off and on again without a Wrap connected.

Summary

Description of Device

Game Ready System Components

Lists and describes the components included in the Game Ready System.

Control Unit Interface and Controls

Overview of the Control Unit's display, buttons, and temperature adjustment knob.

Introduction to Game Ready

Register Your Product

Instructions and information on how to register the Game Ready product.

Contact and Support Information

Provides contact information for learning more or sharing experiences with the Game Ready System.

Detailed Instructions for Use

Manual Mode Operation

Details how to adjust time and pressure settings in Manual Mode.

Program Mode Operation

Explains how to select and use preset treatment programs.

Drain Mode Operation

Instructions for using the Drain Mode to empty water from the ice box.

Control Unit Buttons and Functions

Details the function of each button on the Control Unit for operation.

Adjusting Therapy Temperature

Guidance on how to adjust the cold therapy temperature using the control knob.

Detailed Instructions for Use (continued)

Display Indicators and Status

Explains the meaning of status bar icons, other icons, and temperature displays.

Temperature Adjustment Guide

Visual guide on turning the temperature knob for less or more cold therapy.

Detailed Instructions for Use (continued)

Program Mode Display Details

Shows how run time and sleep time countdown bars are displayed during Program Mode.

Manual Mode Display Details

Illustrates the display of run time countdown bars in Manual Mode.

Program Selection Display Details

Depicts the display when selecting a program, showing pressure and time.

Pressure Settings Display Details

Illustrates the different pressure level indicators on the Control Unit display.

Using Your Game Ready System

Required System Components

Lists the necessary components required to operate the Game Ready System.

Setup Step 1: Open Ice Box

Instruction to push the door release button to open the ice box door.

Setup Step 2: Fill Ice Box

Instruction to fill the ice box completely with ice and water.

Using Your Game Ready System (continued)

Setup Step 3: Close Ice Box Door

Instruction to close the ice box door securely, ensuring it clicks.

Setup Step 4: Position Control Unit

Guidance on placing the Control Unit in the correct upright orientation to prevent leaks.

Setup Step 5: Connect Power

Instructions for connecting the AC Adapter and checking the power indicator light.

Using Your Game Ready System (continued)

Setup Step 6: Connect Connector Hose to Unit

Instruction to connect the larger end of the Connector Hose to the Control Unit.

Setup Step 7: Apply Wrap

Advice on applying the selected wrap and important warnings regarding its use.

Setup Step 8: Connect Hose to Wrap

Instruction to connect the smaller end of the Connector Hose to the Wrap securely.

Using Your Game Ready System (continued)

Setup Step 9: Power On System

Steps to power on the Control Unit, check indicator lights, and establish cold flow.

Setup Step 10: Select Mode and Settings

Guidance on choosing between Manual and Program modes and setting time/pressure.

Setup Step 11: Start Treatment

Instruction to press the play/pause button to start the treatment session.

Setup Step 12: Adjust Temperature

Instructions on how to adjust the cold therapy temperature using the knob.

Indications for Use

Contraindications

Lists conditions and patient types for whom compression or cryotherapy should not be used.

General Warnings and Cautions

Patient-Specific Warnings

Lists specific patient groups and conditions that require caution or supervision during use.

Cryotherapy Use Warnings

Specific warnings for cryotherapy use under supervision for certain medical conditions.

General Operational Warnings

Provides critical warnings regarding tissue damage, wrap placement, and intended use.

General Safety Cautions

Lists precautions to prevent electrical shock, damage, or malfunction of the device.

UL Classification

Electric Shock Protection

Details the system's classification regarding protection against electric shock.

Water Ingress Protection

Describes the product's level of protection against water ingress.

Pollution Degree and Flammable Anesthetics

Classifies pollution degree and suitability for use with flammable anesthetics or oxygen.

Electromagnetic Interference Compliance

Explains compliance with medical device limits for electromagnetic interference.

Cleaning

Cleaning the Control Unit

Provides instructions and cleaning agents for the Control Unit exterior and reservoir.

Cleaning the Connector Hose

Details cleaning methods and recommended agents for the Connector Hose.

Cleaning the Wraps

Instructions for hand washing the Sleeve and cleaning the Heat Exchanger.

Cleaning (continued)

Cleaning the Carry Bag

Guidance on cleaning the Carry Bag using various cleaning agents.

Maintenance

Ice Box Filter Maintenance

Instructions for inspecting and cleaning or replacing the ice box filter.

Storage

Proper Storage Procedures

Steps for storing the Control Unit after use, including emptying water and drying.

Storage Conditions and Precautions

Details recommended storage temperature, humidity, and environmental precautions.

Specifications

Dimensions and Weight

Provides the physical dimensions and weight specifications of the Game Ready System.

Pressure and Power Specifications

Details the pressure levels and power requirements for the Control Unit.

Accessories

Compatible Accessories List

Lists compatible accessories that can be used with the Game Ready Control Unit.

Troubleshooting

Error 01: Air Pressure Sensor

Explains the meaning of an Air Pressure Sensor error and how to resolve it.

Error 02: Self-Test Error - Air Pump

Details the Self-Test Error for the Air Pump and troubleshooting steps.

Error 04: Dry Pump

Describes the Dry Pump error and actions to prevent damage to the fluid pump.

Error 06: Over Pressure

Explains the Over Pressure error and measures to take when target pressure is exceeded.

Troubleshooting (continued)

Error 07: Under Pressure

Addresses the Under Pressure error, indicating issues reaching maximum compression.

Error 08: Deflation Error

Explains the Deflation Error and steps to ensure the Wrap deflates properly.

Error 09: Pump Performance Error

Details the Pump Performance Error and potential causes like ice or debris.

Error 10: Low Flow

Describes the Low Flow error, indicating an interruption in water flow.

Error 12: Self-Test Error - Fluid Circuit

Explains the Self-Test Error for the Fluid Circuit and when the unit won't turn on.

Warranty

Warranty Coverage Details

Details the one-year warranty for the Game Ready Control Unit against defects.

How to Obtain Warranty Service

Provides instructions on contacting customer service and obtaining an RMA for warranty service.

Warranty Limitations and Exclusions

Outlines limitations and exclusions to the express and implied warranties provided.

Warranty (continued)

Limitations of Liability

Specifies limitations on CoolSystems' responsibility and remedies for warranty breaches.

Warranty Registration Process

Instructs users to complete warranty registration online using model and serial numbers.

Extended Warranties Information

Provides information on the availability of extended warranties for the Game Ready System.

Game ready 550550 Specifications

General IconGeneral
BrandGame ready
Model550550
CategoryControl Unit
LanguageEnglish

Related product manuals