17
GB
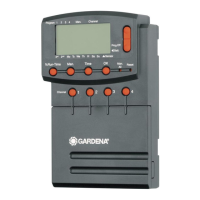
Connecting your Watering
Controller:
8
9
B
F
E
0
A
G
C
D
C
Sensor display:
If the sensor is inserted, the DRY or WET status report
appears. When WET is displayed the watering programs
are disabled.
D
Program / channel display:
Indicates which program of the particular channel is being
programmed. If a channel is currently open, the frame of the
opened watering channel flashes.
E
Display of watering times:
Indicates the start time and duration of watering.
F
Manual watering display:
When manual watering is selected, Run Time Man. is
displayed.
G
Watering cycles / watering days:
To display the watering cycles (24 h every day, 2nd every
2nd day, 3rd every 3rd day, Odd every odd day Even every
even day) or the programmed watering days (Mo, Tu, We, Th,
Fr, Sa, Su).
4. Initial Operation
ATTENTION !
A
The Watering Controller is ruined if the power
supply unit is connected to terminals other than
the 24 V AC terminals!
V Connect the power supply unit to the 24 V AC
terminals only!
Before programming your Watering Controller, install a 9-V
battery to prevent loss of data if a power failure occurs.
1. Release snap lock
1
and open cover
2
.
2. Connect the cable of the power supply unit to the 24 V AC
terminals.
3. Connect the cables for the valves (e.g. 7-wire GARDENA
Connection Cable Art. 1280 for up to 6 valves) to the
terminals for the channels (CHANNELS 1…) and C
(see also
“Connecting the valves”
).
4. If required, connect the sensor (e.g. GARDENA Moisture Sensor
Art. 1188) using the accompanying adapter cable
z
S
and connect
the latter to the SENSOR terminals.
5. If necessary (e.g. Art. 1273) connect the cable for the master
channel to the PUMP terminals (see
“Master channel”
).
6. Remove the empty battery as necessary: Depress the clip
z
L
(the battery is released) and remove the empty battery.
7. Attach the battery
3
to the battery clip
4
and insert it into the
battery compartment
5
.
8. Close cover
2
and let snap lock
1
engage.
9. Plug the mains plug of the 24 V (AC) power supply unit into a
mains socket.
After this it is necessary to set the date and time
(see 5. Operation “Setting the date and time”).
1
2
5
3
z
S
z
L
4