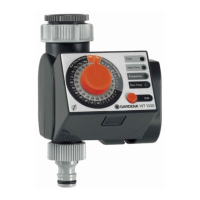
3. INITIAL OPERATION
Insert battery [ Fig. I1 / I2 ]:
The Water Control must only be operated with
a 9 V alkalimanganese (alkaline) battery type
IEC 6LR61.
1. Remove controller
z
from the housing of the
Water Control.
2. Insert battery in the battery compartment
u
.
Observe correct polarity
N
.
The display shows all the LCD-symbols for
2seconds and then moves to the time / day
of week level.
3. Install controller
z
on the housing again.
Set display to 24-hours or 12-hours (am / pm):
The factory setting is the 24-hour display.
v Press the Man. button continuously while
inserting the battery.
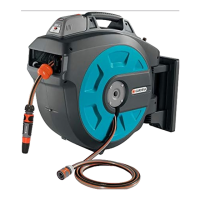
To connect the Water Control [ Fig. I3 ]:
The Water Control is fitted with a sleeve nut
o
for
taps with (G 1") (33.3 mm) thread. The adaptor
supplied
i
allows the Water Control to be con-
nected to taps with a (G 3/4") thread (26.5 mm).
1. For tap with a G 3/4" (26.5 mm) thread:
Screw adaptor
i
on to the tap manually
(do not use pliers).
2. Screw sleeve nut
o
of the Water Control on to
the adaptor thread by hand (do not use pliers).
3. Screw Tap Control
p
onto the two Water Control
outlets.
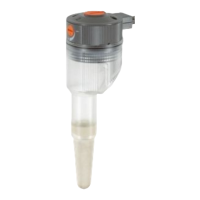
Connect the soil moisture sensor (optional):
In the case of rain, or when the soil is sufficiently
moist, a programmed, automatic watering pro-
gramme will be stopped or prevented from start-
ing. Manual operation is possible at all times.
Sensor assignment [ Fig. I4 ]:
<
A sensor in Connector 1:
Sensor only applies to Valve 1
y
A sensor in Connector 2:
Sensor applies to both valves
x
Sensor in Connectors 1 and 2:
Sensor 1 applies to Valve 1
Sensor 2 applies to Valve 2
1. Place the soil moisture sensor in the watering
area.
2. Remove controller
z
from the housing of the
Water Control.
3. [ Fig. I5 ]: If necessary, connect sensor to
Extension Cable or Adaptor at the sensor
connection
a
of the Water Control.
Activate sensor [ Fig. I6 ]:
A sensor will be automatically activated after 60 sec.
The sensor assignment
<
,
y
or
x
(arrow) and the
current sensor status dry / wet will be displayed.
E. g. Sensor 1 dry (dry) Valve 1
<
only.
Deactivate sensor [Level 6]:
If watering is to be without a sensor, although
asensor was previously activated, then this sensor
must be deactivated.
1. Remove sensor from the Water Control.
2. [ Fig. I6 ]: Press Menu button 5 times [Level 6].
The sensor assignment
<
,
y
or
x
(arrow)
and the current sensor status dry / wet will be
displayed.
3. [ Fig. I7 ]: Press OK button.
The sensor has been deactivated.
To connect older sensors (with 2-pin connector),
the GARDENA Adapter Cable
Art. 1189-00.600.45 is required, which can
be procured from GARDENA Service.
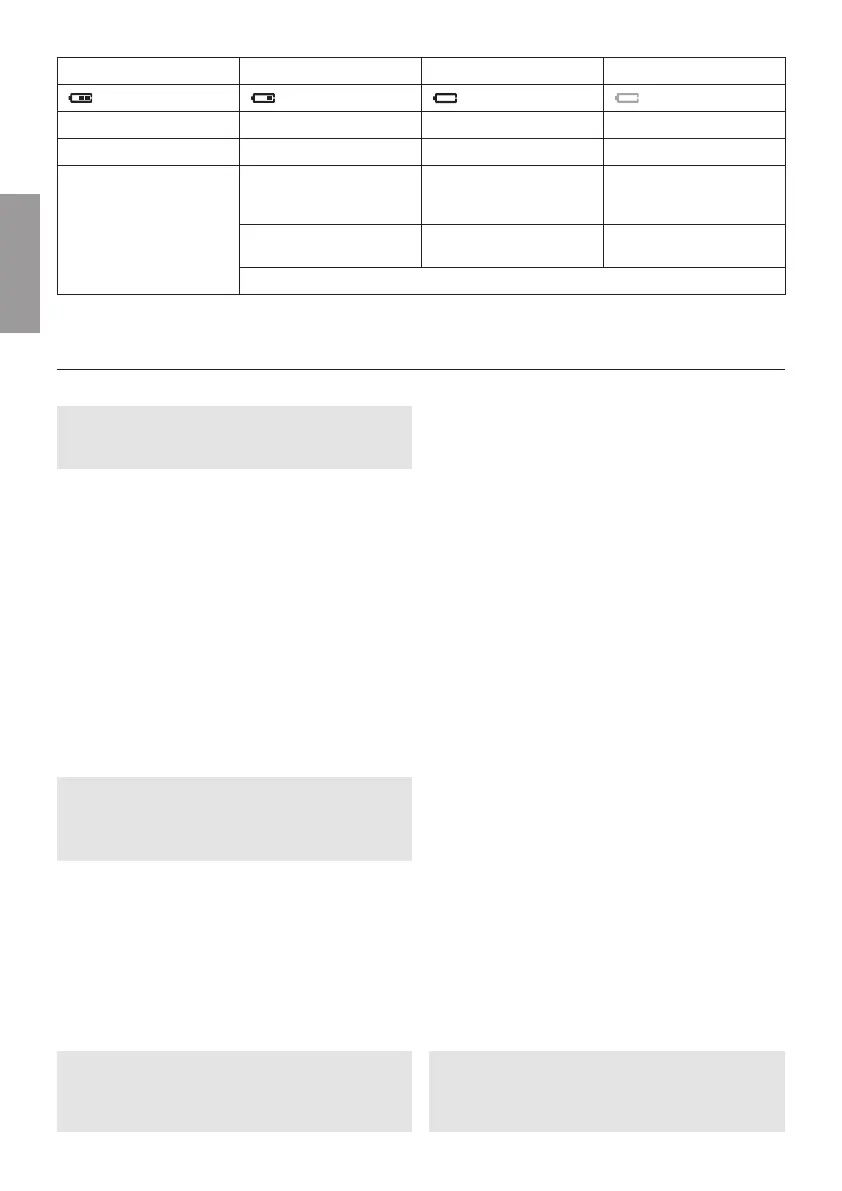
2 Bars 1 Bar 0 Bar Frame is flashing
Battery half full Battery low Battery almost flat Battery flat
Valve opens. Valve opens. Valve still opens. Valve does not open.
The Water Control is
guaranteed to work for
a minimum of 4 more
weeks.
The Water Control will
continue to work for no
more than 4 weeks.
The Water Control stops
working soon.
The Water Control stops
working.
It is advisable to change
the battery.
The battery must be
changed soon.
The battery must be
changed.
v Replace battery (see 3. INITIAL OPERATION Inserting battery).
16
EN
 Loading...