Mealstream Ovens Pt. No. 32Z3403 Issue 16
Page 29
Interlock Order
SW1 (Monitor) CLOSED
SW2 (Primary) OPEN
SW3 (Secondary) OPEN
Interlock Order
SW1 (Monitor) OPEN
SW2 (Primary) CLOSED
SW3 (Secondary) CLOSED
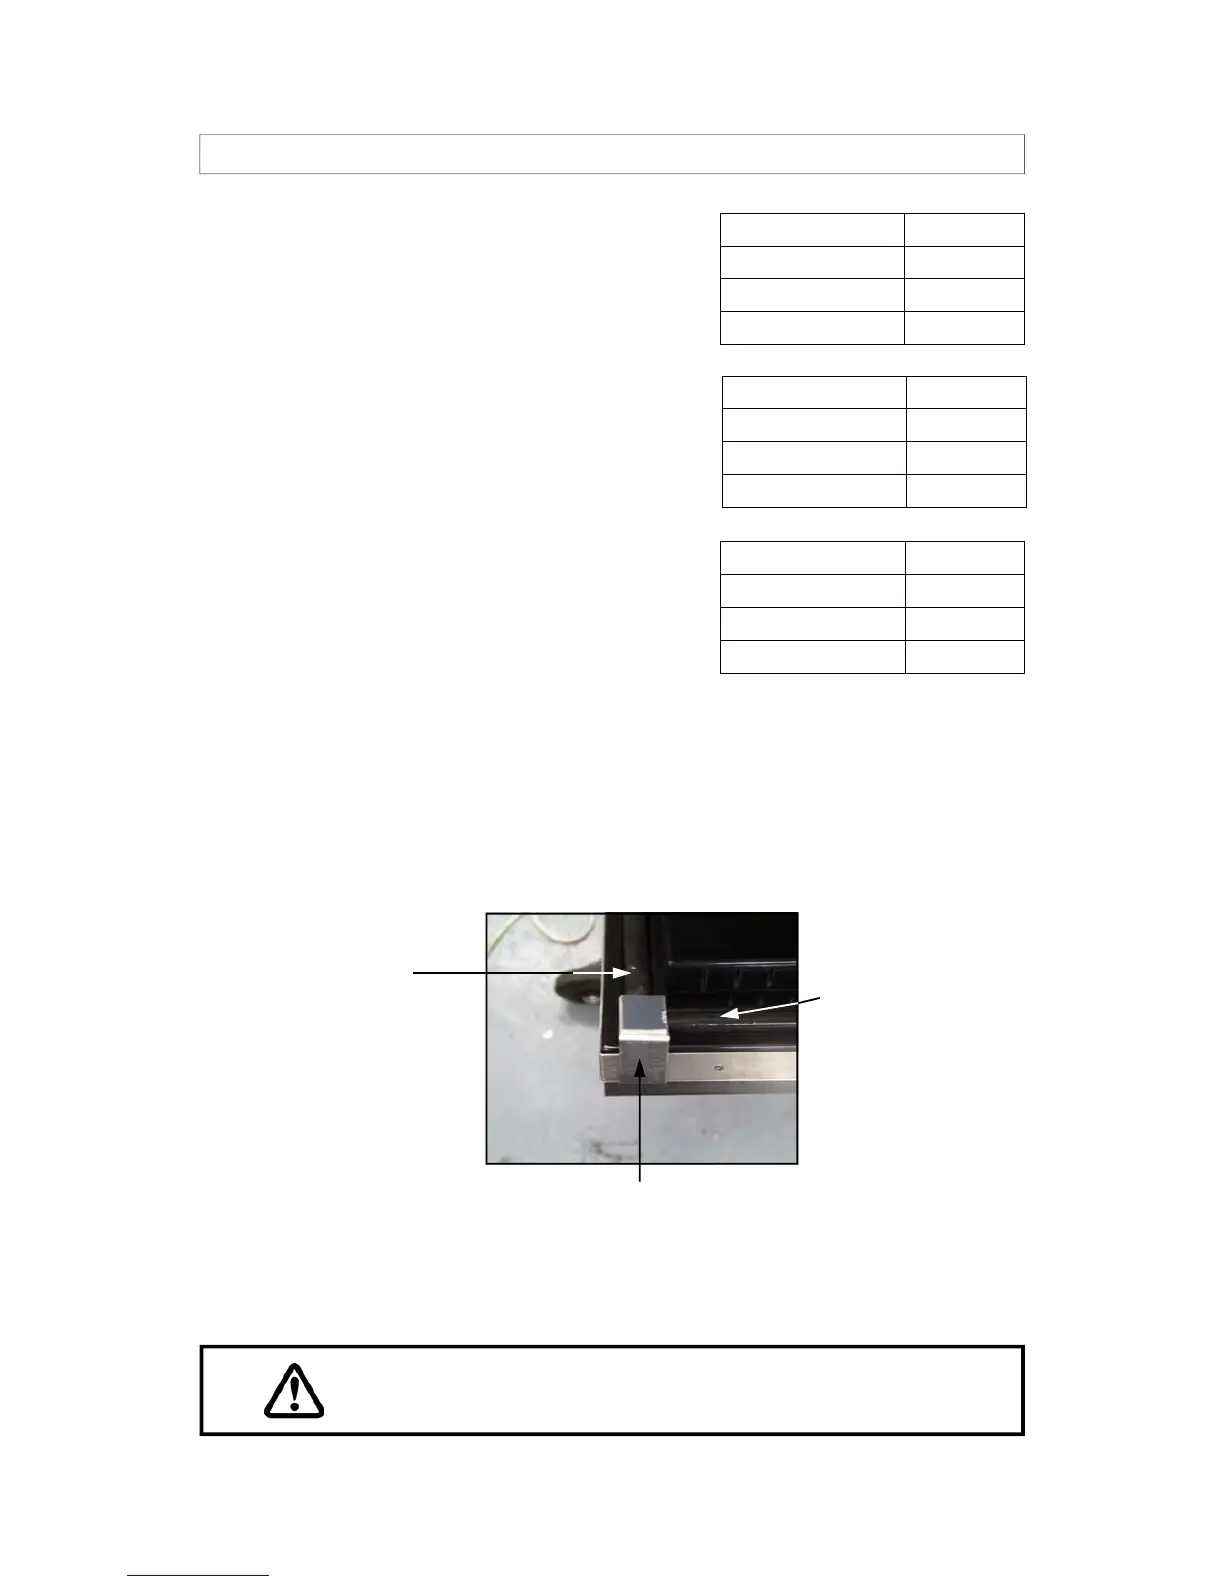
Step 2: Insert S10 10mm spacer into door.
(See figure 1 below for inserting spacer
correctly).
Step 3: Remove S10 10mm spacer and insert S1 1mm
spacer into the door and close the door.
The door spacer must always be
located on the point where the side
seals and top seals meet.
Figure 1
Door top seal
Door side seal
Door spacer
Interlock Order
SW1 (Monitor) OPEN
SW2 (Primary) OPEN
SW3 (Secondary) OPEN
Step 4: Remove S1 1mm spacer and insert S5 5mm
spacer into the door and close the door.
If an oven fails this sequence
then check the microswitches are functioning correctly and repeat steps 1 to 4.
PROCEDURE FOR DOOR INTERLOCK ADJUSTMENT AND TEST (3)
Please note.
It is very important after completing this procedure to carry out a
microwave leakage test procedure. See pages 22-23.
After carrying out this procedure make sure that the interlock monitor switch is properly connected
according to the circuit diagram on pages 44-46.
 Loading...