1) Date / wake-up time 1
2) Time
3) DCF-77 signal reception icon
4) Projection
5) Projector tube
6) Temperature, relative humidity / wake-up
time 2
7) TIME button
8) ALARM button
9) Day name abbreviation
10) Button +
11) Button -
12) Alarm 1 switch
13) Alarm 2 switch
14) Power USB port
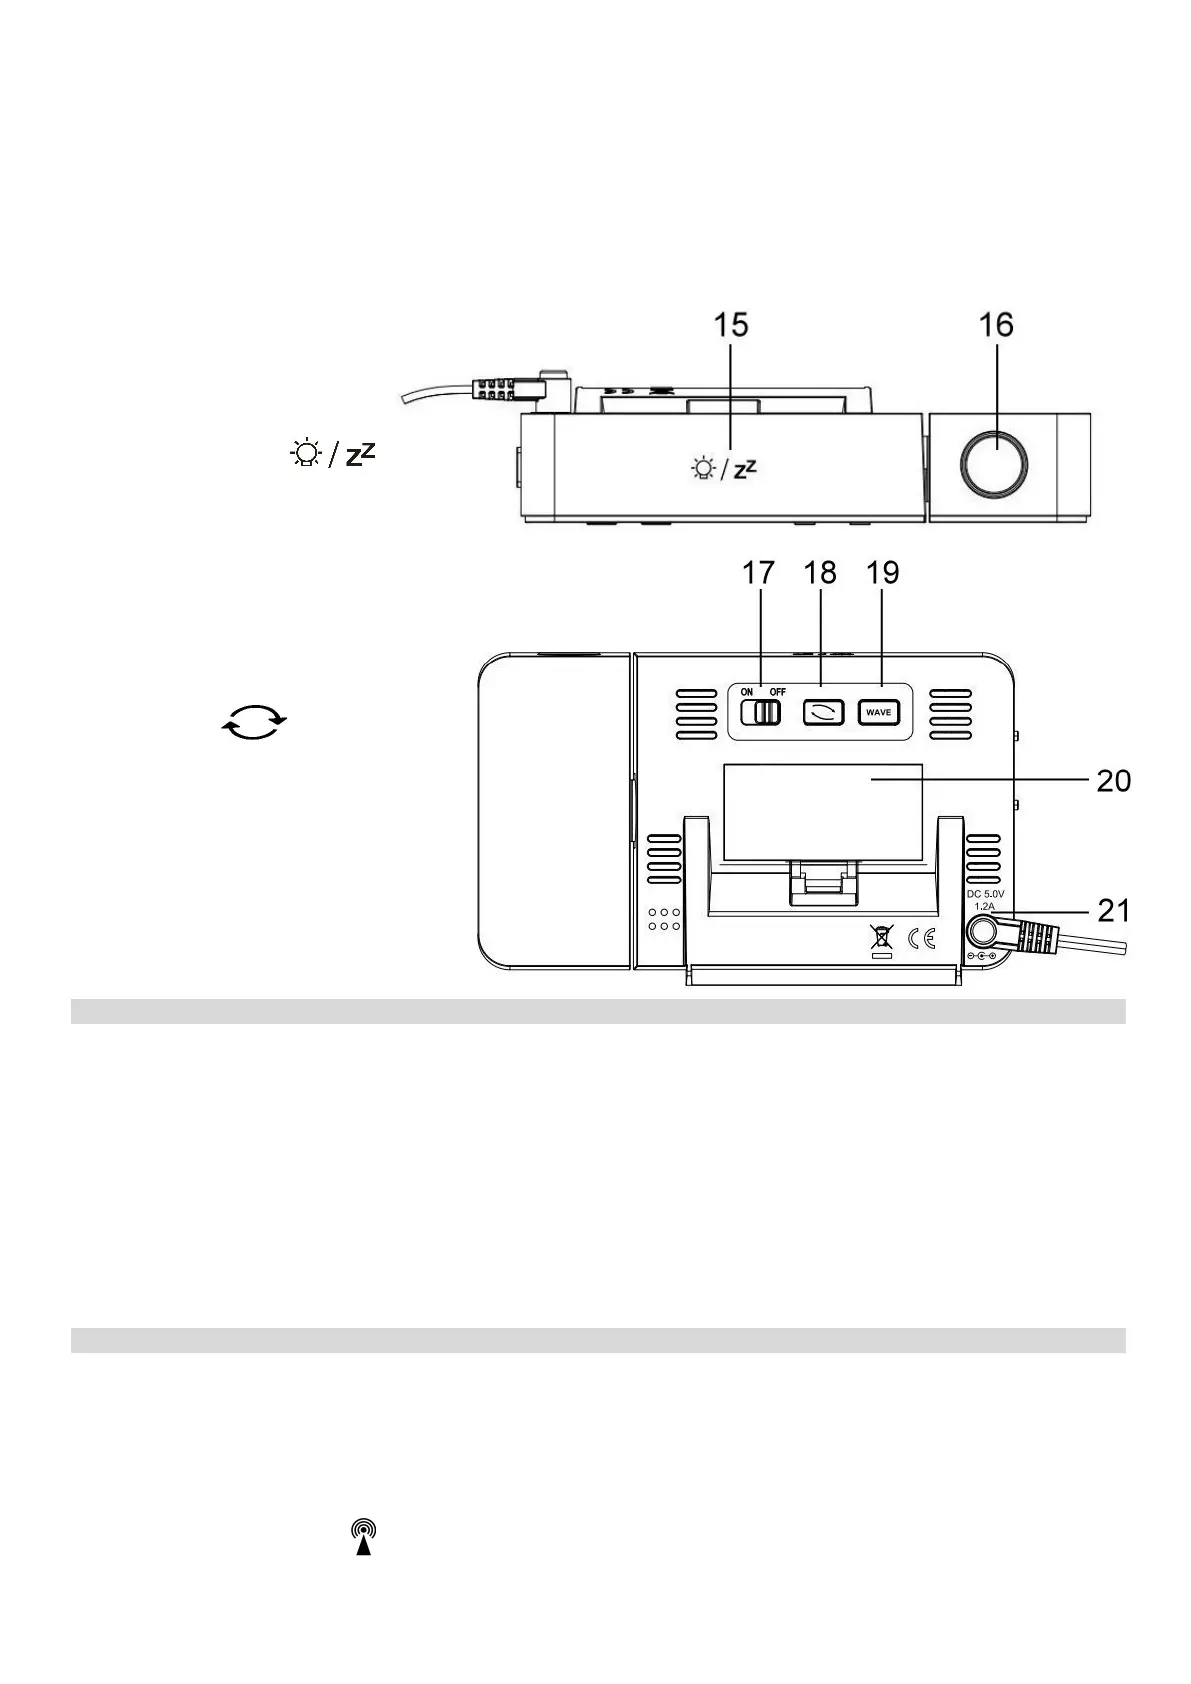
Top and rear view
15) Touch button
16) Projector
17) Projection ON OFF button
18) Button
19) Button WAVE
20) Battery compartment cover
21) Power supply socket
COMMISSIONING
The alarm clock can be powered by the AC adaptor or batteries. Use only the delivered AC adaptor.
Battery installation
1) Remove the battery compartment cover on the rear side of the alarm clock.
2) Insert 2 pcs AAA batteries (micro) – observe the correct battery polarity.
3) Close the battery compartment.
Connecting the AC adaptor
1) Connect the AC adaptor plug into the socket on the rear side of the main unit.
2) Connect the other side of the AC adaptor to a mains socket.
Time controlled by the DCF-77 radio signal
The weather station is equipped with the DCF-77 time/date control signal receiver, the signal is
broadcasted by a transmitter from Frankfurt am Main, Germany, with a range of about 1500 km. When
outside this range, the time and date can be adjusted manually. The time and date are adjusted every day.
After the power supply is connected, the display shows all segments for 3 seconds and a beep sounds.
Then the reception for the DCF-77 radio signal for adjusting the time and date commences, which is
indicated by a flashing icon
on the display. This process may take several minutes. The display
3