INFORMATION
All information in this guide is valid for both
GARO GNM3D-RS485 (GARO art nr 108047)
and
GARO GNM3D-LP RS485 (GARO art nr 109306).
Warnings
Make sure the electrical power is off before start of
installation process.
All electrical installation must be performed by an
auhorized electrician.
MODBUS CONNECTION
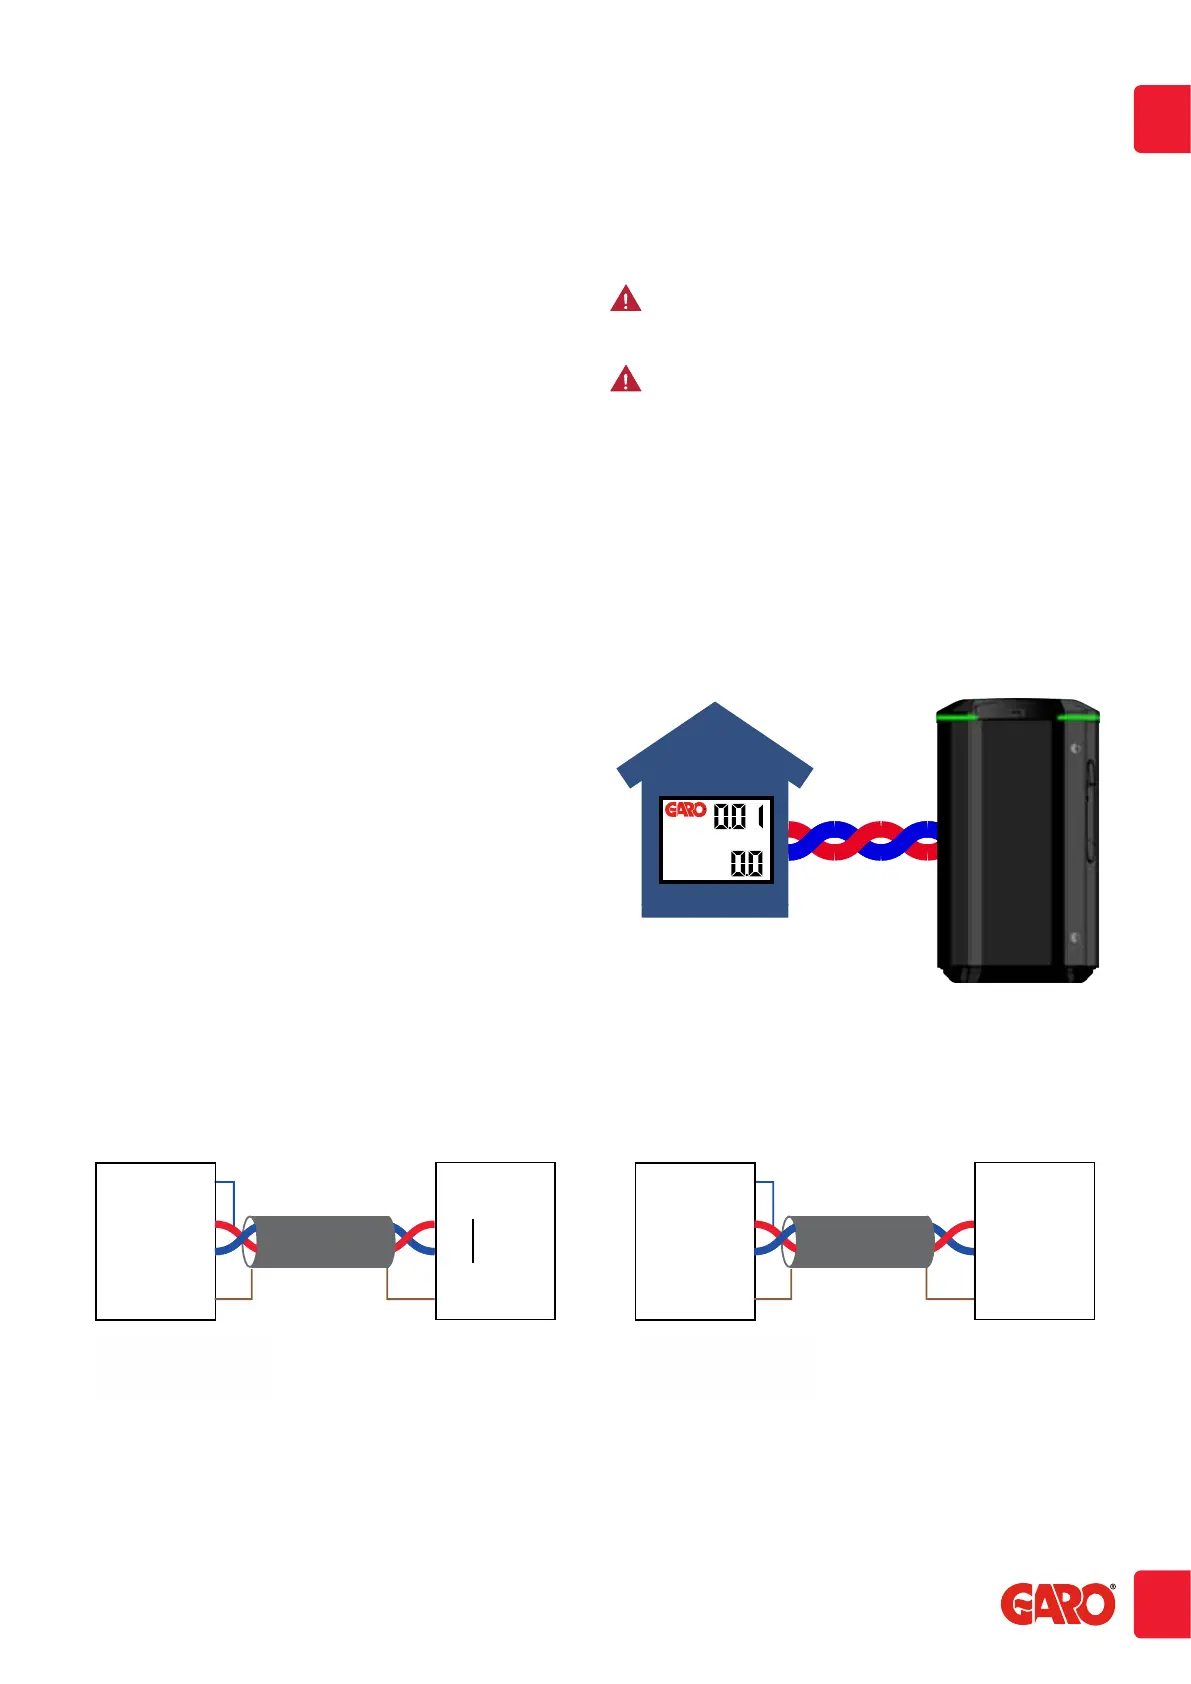
Install the DLM meter in the mains cabinet you want to monitor.
Use shielded twisted pair cable between the DLM meter and the
wallbox
Suitable cables:
CAT5 FTP, CAT5e FTP, CAT6 FTP, ELAKY-S, ELAQBY-S or similar.
3
EN
7 T
9 A-
8 B+
10 GND
A-
B+
PE
E-Meter
DLM Meter GLB
Shielded Twisted Pair
GNM3D-RS485, GNM3D-LP RS485
7 T
9 A-
8 B+
10 GND
A- 200
B+ 201
PE
DLM Meter TWIN
Shielded Twisted Pair
GNM3D-RS485, GNM3D-LP RS485
NOTE! JUMPER 7-9 NOTE! JUMPER 7-9
 Loading...