60 61
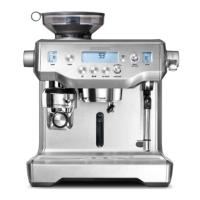
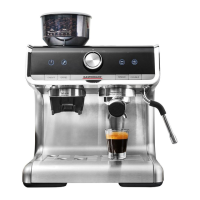
4. Press the -button once. The machine will commence normal pour function, and
-button surround will begin to flash.
5. When the desired amount of espresso has poured into the cup, press the
-button to
stop the pour. The machine will beep twice, indicating it has saved your preferred pour
quantityandexitedprogrammingmode.
6. The
-button will now pour the saved shot size when pressed, unless reprogrammed,
reset to the default settings, or overridden by the manual function.
PROGRAMMING DOUBLE ESPRESSO
Programming over-rides the preset shot sizes (1oz or 2oz), re-programming the button to
pour your preferred shot size.
1. Prepare to make a two cup of espresso by following steps 2 to 6 in ›Dual Wall Filters for
Beginners‹.
2. Place your cup underneath the group head.
3. To begin programming, press the PROGRAM-button once. The machine will beep once and
the program button will begin to flash. This indicates the machine is in programming mode.
4. Press the
-button once. The machine will commence normal pour function, and the
-button surround will begin to flash.
5. When the desired amount of espresso has poured into the cup, press the
-button to
stop the pour. The machine will beep twice, indicating it has saved your preferred pour
quantityandexitedprogrammingmode.
6. The
-button will now pour the saved shot size when pressed, unless reprogrammed,
reset to the default settings), or overridden by the manual function.
RESETTING DEFAULT VOLUMES
Toresetthemachinetothedefaultoneandtwoshotpourquantities,pressandholdthe
PROGRAM-button until the machine beeps three times. Release button. This indicates the
machine has returned to its original default settings.
MANUAL FUNCTION
The Manual function over-rides the preset shot size for one time only. It does not save the
shot size like in programming mode. Press and hold the
-button or -button. Release
the button once sufficient espresso has flowed into the cup.
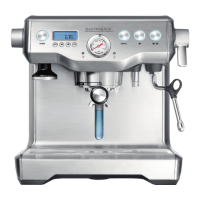
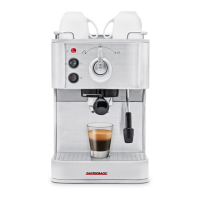
STEP 10 – EMPTYING THE PORTAFILTER
• Removetheportafilter from the group head by rotating the portafilter to the left until it
releases.
• Toemptytheusedgrounds,turntheportafilter upside down in a bin and gently knock out
the grounds. Used grounds should be thrown away with domestic waste. Discarding of used
grounds in a sink can cause drains to become blocked.
• Withthefilterstillinplace,holdtheportafilter underneath the group head, press and hold
down the one cup button to release hot water. Rinse the portafilter until water runs clear.
• Inserttheportafilter back into the group head to dry out and keep warm.
WARNING: THE METAL PARTS OF THE PORTAFILTER WILL BE VERY HOT.
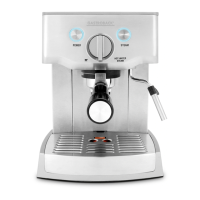
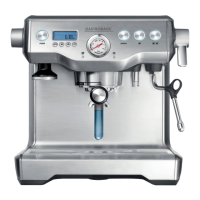
THE ART OF TEXTURING MILK
The appliance comes complete with a commercial style swivel steam
wand and stainless steel frothing attachment. When using the frothing
attachment on the steam wand a large amount of froth is easily created.
If less froth is desired, remove the frothing attachment from the steam
wandbeforetexturing.Toremovethefrothingattachment,ensureitis
cool then simply pull down and remove. The frothing attachment can
be stored in the storage tray located behind the drip tray, if not used
regularly. To refit the frothing attachment ensure it is securely attached to the steam wand
by inserting it, from either end, onto the steam wand and pushing firmly upwards onto the
rubber surround.
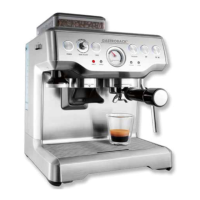
• Fillthestainlesssteelfrothingjugmaximum½fullwithcold,freshmilk.
• TurnthesteamselectordialtotheSteam-position.Theredsteamlight
will start to flash indicating that the machine is heating to create steam.
• Whenthesteamlightstopsflashingitisreadytouse.
• Beforeinsertingthewandintothemilk,pausethesteambyreturning
the dial back to the STAND BY-position. This will avoid splashing the
milkoutofthejug(thispausefunctionlastsfor6secondsbeforeexiting
steam mode).
• InsertthewandintothemilkandreturntheSteamdialbacktoSteam-position.
• Tostop,returnthesteamdialtotheSTANDBY-positionandremovethejug.
Note: When the espresso machine creates steam, a pumping noise can be heard. This is
the normal operation of the 15 Bar pump.
Note: After 5 minutes of continuous steaming, the machine will automatically disable the
steam function. The steam light will flash. When this occurs return the steam dial to the
STAND BY-position.
WARNING: Milk should not be allowed torun over the top of the frothing attachment,
otherwise it will not function properly. To avoid splattering of hot milk, do not lift the end of
the frothing attachment above the surface of the milk while frothing. Ensure the steam selec-
tor dia is in the STAND BY-position before removing the frothing jug.
 Loading...