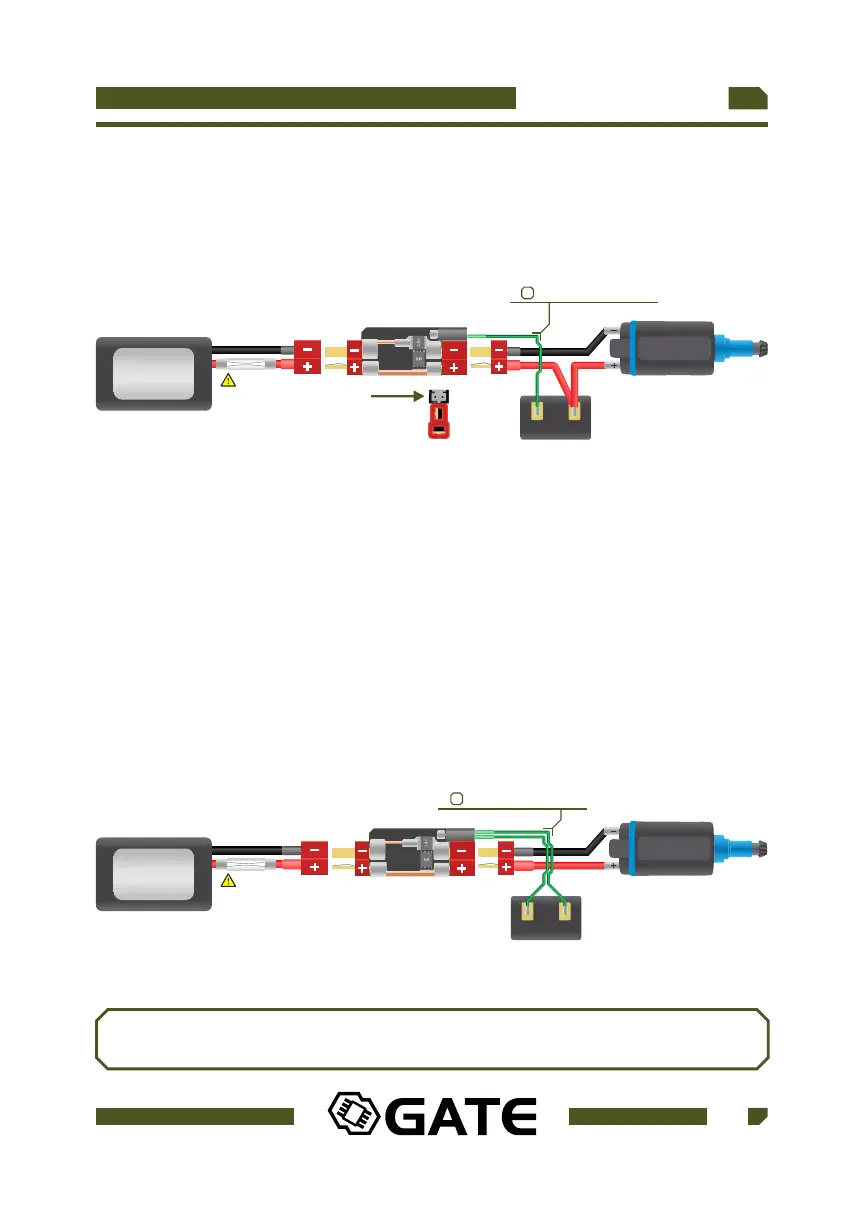
The trigger wire is very thin because it handles very low current and it is only used
for switch-detection. Now connect the device between the battery and AEG. Do not
forget about the trigger wire. Connect it to the top pin.
Fig 2. Connection-modification scheme
TOP PIN
AEG Motor
CONTACTS
BATTERY
UP TO 14.8V
single trigger wire
( – provided in the kit)
Replacing the existing AEG wiring with high-quality, low-resistance wiring in
conjunction with the installation of a MOSFET allows for the ultimate in system
efficiency. 16 awg or thicker wire is recommended. Solder the double trigger wire
(No. 7 – provided in the kit) to the trigger contacts. The trigger wire is very thin
because it handles very low current and it is only used for switch-detection. Now
connect the device between the battery and motor. Do not forget about the trigger
wire.
b) Installation of WARFET Power Module with replacement of wires
Fig 3. Complete re-wiring scheme
AEG Motor
CONTACTS
BATTERY
UP TO 14.8V
double trigger wire
( – provided in the kit)
06
07
Is your AEG firing without pulling the trigger?
Go to chapter 04. and switch mode to MODIFIED WIRING
17
WWW.GATEE.EU
USER GUIDE
WARFET
WARFET
WARFET
FUSE
FUSE