9
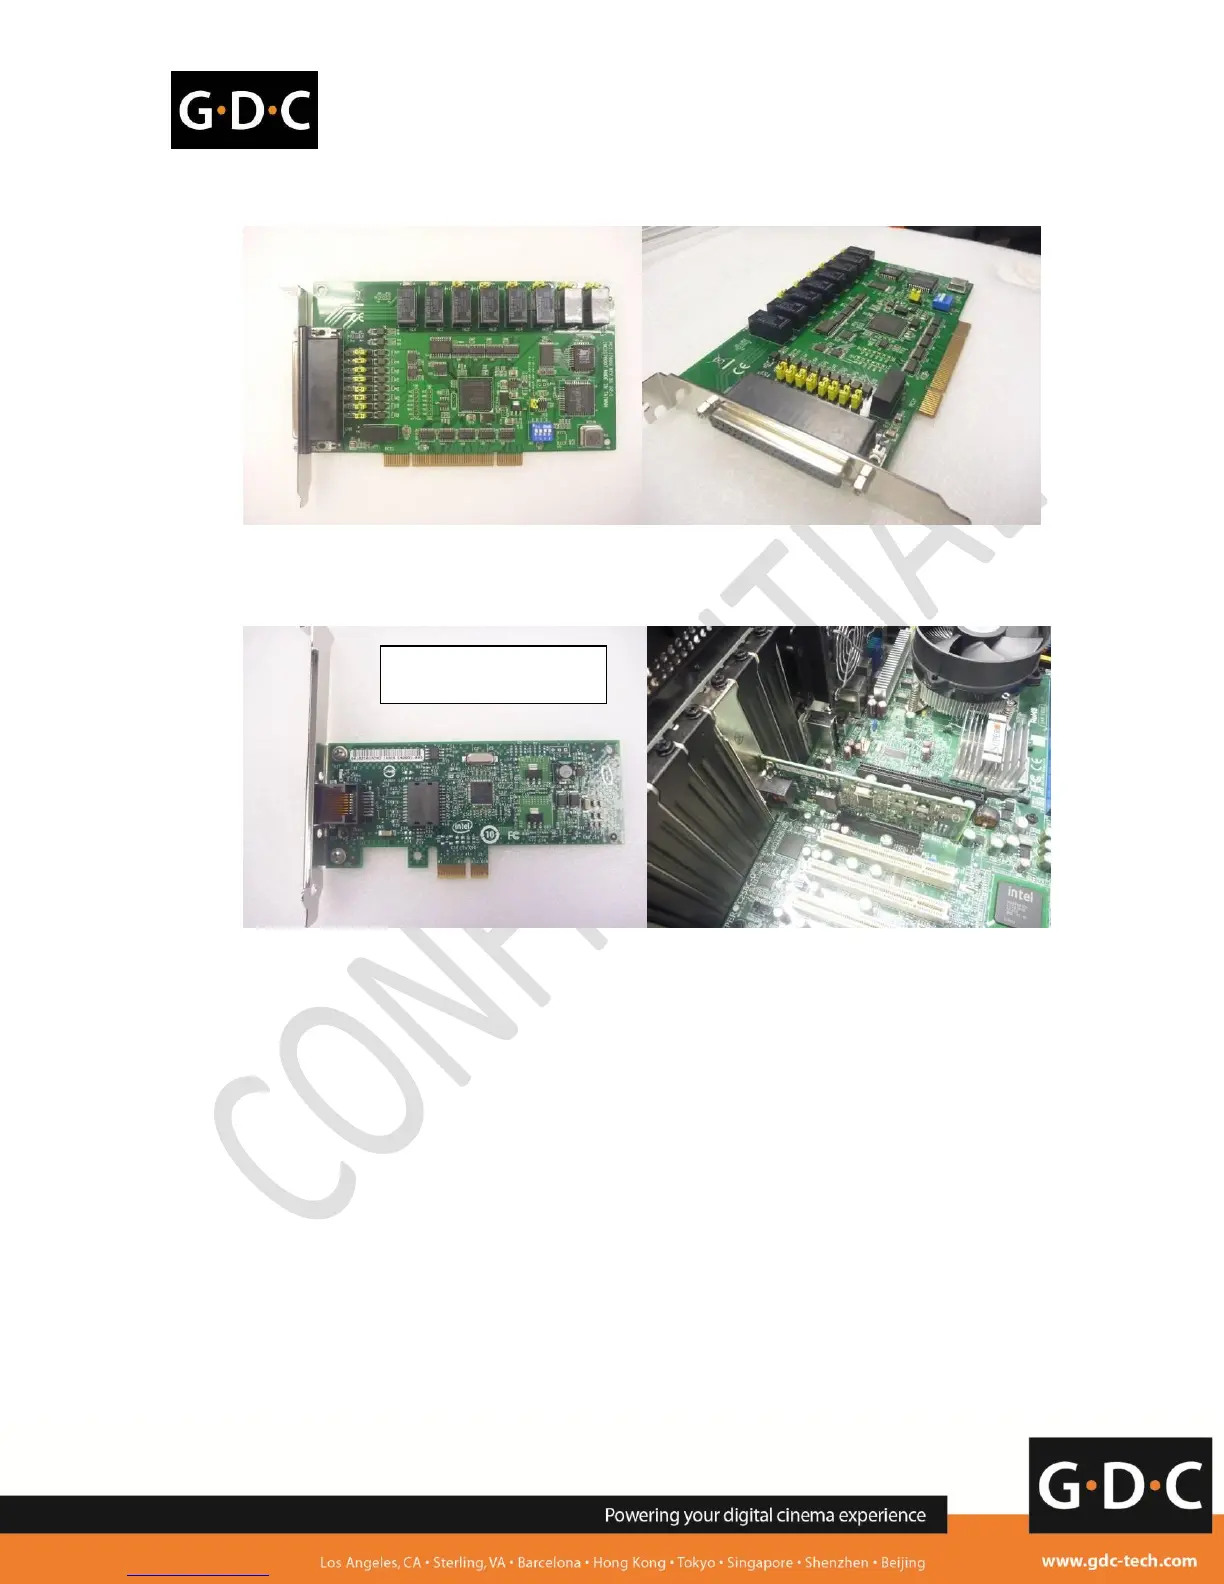
3. Remove GPIO card from the server (if it exists).
4. Insert the additional gigabit network card into the same PCIe slot that was used by the PCI-e
adaptor card. The tested gigabit network card model is 'INTEL Gigabit CT Desktop Adapter'.
5. Boot up the server and apply 'upgrade-SX2000AR-9x-networkcard-20121109.tgz.enc' on 7.8.X
Server SMSConfigurationAssistanceUSB. This upgrade prompts an error if the server
eth0 or eth1 has 192.168.1.x IP. After the upgrade and reboot on the server, eth2 appears on
the server Control Panel and AdminPanel Network as 192.168.1.13. Please do not change
this IP.
=================================================================
Link URL:
http://visitor:wiije67@ftp.gdc-tech.com/~service/9x/upgrade-SX2000AR-9x-networkcard-20121109.tgz.enc
User: visitor
Password: wiije67
md5sum: 2fc13509c8c172be25f24c73dd717e0e upgrade-SX2000AR-9x-networkcard-20121109.tgz.enc
Upgrade password: 20121109
=================================================================
6. Check that the HFR IMB is installed inside the projector properly and power up the projector and
IMB.
7. Server eth1 is directly connected to IMB Ethernet 2.
8. Server eth0 is connected to projector Ethernet port (either directly or via a switch).