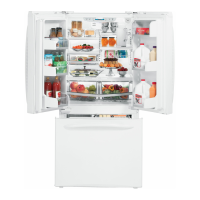
Careandcleaningof therefrigerator, a4ppliancescem
Cleaningthe Outside
Thedispenserdripare&,:'onsome modelsl beneadl
tile g'lq_e, shotdd be wiped &): l\ater left in this
area may leave deposits. Remove tile deposits by
adding mxliluted vinegar to the well. Soak until the
deposits disappear or become loose enot@l to tqnse
21\va} _.
Thedispensercradle,on some models;. Before
cleaning; lock the dispenser 1V pressing and holdi_ N
the t0Ckpad fbr 3 seconds. Clean _th warm water
and baking soda solution_bout
a tableN)oon (15 ml;; of baldng soda to a quart (1 1)
of watel: Rxlse thorot@_y and wipe dr):
Thedoorhandlesand_im.Cleanwith acloth
dampened with soapy ware1:D1T with a soft cloth.
Keeptheou'tsideclean,l\]pe _dth a dean cloth
lighdy dampened with ]dtchen appliance wax or
mild lkluid dish detergent. D1T and polish with a
clean, soft cloth.
The stainless steel door panels and handles.
Tile stahfless steel panels can be cleaned with
a eonm_erciaUy available stai_ess steel cleaner
or a similar pro&mr using a dean, soft cloth. Do
not use appliance wax, polish, bleadl or prodtmts
containing d_orine on stahfless steel doors and
handles.
Rn" best restflts, GE reconm_ends using sta_tfless steel
cleaner PM 10X311 with the 10X307 polishh_g
cloth, or for convenience the SS cleaning _dl)es, pmr
nuraber %\LN10X10001.
Donot wipetherefrigeratorwithasoileddishcloth
or wettowel Thesemayleavearesiduethatcan
erodethepaint.Donotusescouringpads,
powderedcleaners,bleachorcleanerscontaining
bleachbecausetheseproductscanscratchand
weakenthepaintfinish.
fill
Cleaningthe Inside
Tohelppreventodors,leave an open box of baking
soda in the refiigerator and fieezer compmtments.
Unplugtherefrigeratorbeforecleaning.If thisisnot
practical, _ng excess moisture €,tit of sponge or
cloth when cleaning around switches, lights or
controls.
Use warm water and ba]dng soda sohltio_al)out
a tal)lespoon (15 ml) of ba]&lg soda
to a quart (1 ll;of wateI: This both deans and
neutralizes odors. R_lse and wipe dry
AZter deani_ N tile door gaskets, apply a thh_ layer
of petroleumjeUy to tile door gaskets
at the hh_ge side. This helps kee l) the gaskets fi'om
sticl&_g and bending out of shape.
DrainopeninginfreezercompartmentDmSlg Farly
cleaning; remove bottom fi'eezer pan and flush a
solution of bald_N soda 1 teaspoon (5 ml) and 2
cups (500 nil) of hot 'not bo_ng_lwate_--throt@l
the drain line with the hel l) of a meat baste1: This
will hell) eliminate odor and re&me the likelihood
of a dogged drahl line. If drain becomes dogged,
use a meat baster and baldng soda solution to f}nce
the clog throt@l the chain line.
Avoidcleaningcoldglassshelveswithhot water
becausetheextremetemperaturedifferencemaycause
themto break.Handleglassshelvescarefully.Bumping
temperedglasscancauseit to shatter.Donot washany
plasticrefrigeratorpartsin thedishwasher.
Behind the Refrigerator
Be carefitl when moving the refrigerator away from the wall. All
bl)es of floor coverings can be damaged, particularly cushioned
coverings and those with embossed surt_aces.
Pull d_e refrigerator straight out m_d return it to posidon
by pushing it straight in. Moving the refrigerator in a side
direction may reaflt in damage to the floor covering or
refrigerator.
When pushing the refrigerator back, make sure you den? roll over
the power cord or icemaker supply line (on some models).
Preparingfor Vacation
For long vacations or absences, remove flood and m_plug d_e
refrigerator. Clean d_e interior wid_ a baking soda solution of
one tablespoon (15 ml) of baldng soda to one quart (l l) of water.
Leave the doors open.
Slide the icemaker power switch to the OFFpositionand shut off
the water supply to the refrigerator.
Preparingto Move
Secure all loose items such as grille, shelves and drawers by taping them securely in place to prevent damage.
Besuretherefrigeratorstaysin an uprightpositionduringmoving.
Replacingthe Light Bulbs
NOTETurningthe refrigeratorto the0(off)settingviathe controlsdoesnot shutoff electricalpowertotherefrigerator.
[ nplug the refrigerator. _ Replace with an appliance bulb of the same or lower
wattage.
Remove tl_eshelf just below tl_eli0_t shield.
Reinstall the shelf and plug the refrigerator back in.
9

 Loading...


