=-'--------------------------------------------
,~Eii-1186
Reclosing
Relay Type ACR
TOTAL TIME
The
Type ACR
relay
is
available
with a total
, of
three
minutes.
This
total
time
cycle
is
Jured
from
the
point
where
the
motor
starts,
to
in"
point following lockout
where
the
relay
will
again
reset.
BURDENS
The
burden
of the Type ACR driving motor
is
approximately
5
volt-amperes,
3.5 watts
at
rated
voltage
for
either
50
or
60
cycles.
The
burden
of the continuously
rated
anti-pump
unit 179Z
is
tabulated
below
for
various
volt.ages.
VOLTS
FREQ. V-A WATTS
·250
DC
--
8.6
125
DC
--
4.8
48
DC
--
4.6
24
DC
--
4.6
240
60
13.5
8
120
60
13.5
8
• Includes
series
resistor.
The
interlocking
unit 179E and clutch
release
unit 179R,
during
normal
operation
of
the lrelay,
are
only
momentarily
energized.
The approximate
burdens
of
the
two
units
are
shown below:
D-C
60
Cycles
179E
31
Watts
165
V-A
179R
48 Watts
240 V-A
RECEIVING,
HANDLING
AND
STORAGE
These
relays,
when not included
as
a
part
of
a
control
panel
will be shipped in
cartons
designed
to
protect
them
against
damage. Immediately upon
receipt
of a
relay,
examine
it
for
any damage
sustained
in
transit.
If
injury
or
damage
resulting
from
rough handling
is
evident, file a damage
claim
at
once with
the
transportation
company and
promptly
notify the
nearest
General
Electric
Apparatus Sales
Office.
Reasonable
care
should
be
exercised
in
un-
packing
the
relay
in
order
that
none of
the
parts
are
injured
or
the
adjustments
disturbed.
If
the
relays
are
not to be
installed
immediately,
they should
be
stored
in
their
original
cartons
in a
place
that
is
free
from
moisture,
dust
and
metallic
chips.
Foreign
matter
collected
on the outside of
the
case
may
find
its
way
inside
when the
cover
is
removed
and
cause
trouble in the operation of the
relay.
DESCRIPTION
The
Type ACR
relay
consists
of a synchronous
driving
motor,
a
gear
train
and
cam
shaft with
reset
spring
driven
through a crown
gear
dutch
4
with a magnetic clutch
release,
and
a
series
of
cam-operated
switches for
initiating
reclosures
and
reset
and
performing
the
various
auxiliary
functions
essential
to the
operation
of the
relay
.,
and
circuit.
A two-position
interlocking
unit and
an
auxiliary
anti-pump unit
are
also
included in
the
relay.
The mechanism
and
units
are
assembled
in
the
size
S-2
case.
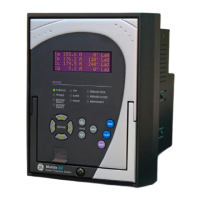
A Photograph of the
relay
in
its
case
with
cover
in
place
is
shown on the
cover
of
this
Instruction
Book. The
series
of photographs in
Fig.
1 shows
the prinCipal
parts
in the
relay
and
their
relative
positions in the
assembly.
All
units
and
parts
are
identified
by
the
nomenclature
or
device
numbers
used
throughout
the
text.
CASE
The
case
is
suitable for
either
surface
or
semi-flush
panel mounting and
an
assortment
of
hardware
is
provided for
either
mounting. The
cover
attaches
to
the
case
and
also
carries
the
reset
mechanism
when one
is
required.
Each
cover
screw
has
provision
for
a
sealing
wire.
•
The
case
has
studs
or
screw
connections
at
both ends
for
the
external
connections. The
electri-
cal
connections between the
relay
units
and the
case
studs
are
made through
spring
backed
contact
fingers
mounted in
stationary
molded
inner
and
outer
blocks between which
nests
a
removable
con-
necting plug which completes the
circuits.
The
outer
blocks,
attached
to the
case,
have
the studs
for
the
external
connections, and
the
inner
blocks
have
the
terminals
for
the
internal
connections. •
The
relay
mechanism
is
mounted in a
steel
framework
called
the
cradle
and
is
a complete unit
with
all
leads being
terminated
at
the
inner
block.
This
cradle
is
held
firmly
in
the
case
with a latch
at
the top and the bottom and by a guide pin
at
the
back of the
case.
The
cases
and
cradles
are
80
constructed
that
the
relay
cannot
be
inserted
in
the
case
upside down. The connecting plug,
besides
making the
elecirical
connections between the
re-
spective
blocks of the
cradle
and
case,
also
locks
the
latch
in
place.
The
cover,
which
is
fastened to
the
case
by thumbscrews, holds
the
connecting plug
in
place.
To draw out the
relay
unit,
the
cover
is
first
removed, and the plugs drawn out. The
latches
are
then
released
and the
relay
unit
can
be
easily
•
drawn out. To
replace
the
relay
unit,
the
reverse
order
is
followed.
A
separate
testing
plug
can
be
inserted
in
place
of the connecting plug to
test
the
relay
in
place
on
the panel
either
from
its
normal
source
of power
or
from
other
sources.
Or, the
relay
unit can be
withdrawn
for
testing
and
replaced
by a
spare
relay
unit.
INSTALLATION
LOCATION
AND
MOUNTING
The
relay
should be mounted
on
a
vertical
sur-
face in a location reasonably
free
from
excessive
•
 Loading...