INSTALLATION, OPERATIONS AND MAINTENANCE MANUAL 29
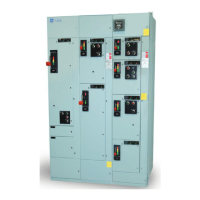
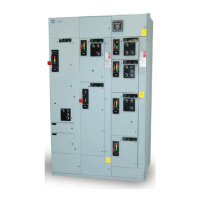
NEMA 3R Installation Instructions
1. Remove left rear cover on right shipping module
(Figure 35A, previous page.) Save the screws for
later reassembly of the cover. Note that the left
module right rear cover has a flange that will
be underneath the removed covered with it
is replaced. This provides an overlapping
connection in the rear of the two spliced
modules (Detail C in Figure 35B).
2. Slide adjoining shipping modules as close
together as possible while carefully aligning
the modules front-to-back.
3. Join shipping modules together using (4 sets)
1/2 hardware (front only). Hardware kits shipping
with modules.
4. Assemble bus splices per splice instructions
(included in splice kit).
5. Install wireway transition channel barrier by
sliding it though the 5 x 5 wireway cutout
and attaching it using (1) 1/4-28 x 3/8 thread
rolling (Figure 35C).
6. Re-attach right, rear cover by re-attaching
1/4-20 x 5/8 sealing screw (Figure 35B, Detail C).
7. Attached center cap using (8) 1/4-20 x 5/8 thread
rolling screws (Figure 35A).
—
35B
—
35A
NEMA 3R Outdoor
Enclosure Installation
—
35B
Assembly module line-up
—
35C
Wireway transition channel
barrier installation
—
35D
Floor plate member
installatio
—
35C
—
35D
1. 3-inch floor members can be installed similarly
to standard MCC floor members (Figure 35D).
2. Module doors can be removed by removing
1/4-20 x 3/8 thread rolling screws from door
hinge bracket (Detail D in Figure 35B).