EasyManua.ls Logo

GE GDT655SSJSS - User Manual

GE GDT655SSJSS
16 pages
Print Icon
To Next Page IconTo Next Page
Loading...
Installation Instructions
Built-In Dishwasher
If you have questions, call 800.GE.CARES (800.432.2737) or visit our Website at: GEAppliances.com.
In Canada, please call 1.800.561.3344 or visit www.geappliances.ca
READ CAREFULLY
KEEP THESE INSTRUCTIONS
FOR YOUR SAFETY
Read and observe all WARNINGS and CAUTIONS shown
throughout these instructions. While performing installations
described in this booklet, gloves, safety glasses or goggles
should be worn.
IMPORTANT – Observe all governing codes and
ordinances.
Note to Installer – Be sure to leave these instructions for the
consumer’s and local inspector’s use.
Note to Consumer – Keep these instructions with your
Owner’s Manual for future reference.
Skill Level – Installation of this dishwasher requires
basic mechanical, electrical and plumbing skills. Proper
installation is the responsibility of the installer. Product
failure due to improper installation is not covered under
the GE Appliance Warranty. See warranty information.
Completion Time – 1 to 3 Hours. New installations require
more time than replacement installations.
IMPORTANT – The dishwasher MUST be installed to
allow for future removal from the enclosure if service is required.
Care should be exercised when the appliance is installed or removed,
to reduce the likelihood of damage to the power supply cord.
If you received a damaged dishwasher, you should immediately
contact your dealer or builder.
Optional Accessories – See the Owner’s Manual for available
custom panel kits.
Your dishwasher is a water heating appliance.
BEFORE YOU BEGIN
Read these instructions completely and carefully.
31-31560 02-16 GE
Printed in the United States
7RUHGXFHWKHULVNRIHOHFWULFVKRFN¿UHRULQMXU\WR
persons, the installer must ensure that the dishwasher is
completely enclosed at the time of installation.
FOR PERSONAL SAFETY: Remove house fuse or open
circuit breaker before beginning installation. Do not use an
extension cord or adapter plug with this appliance.
The improper connection of the equipment grounding
conductor can result in a risk of electric shock. Check with
DTXDOL¿HGHOHFWULFLDQRUVHUYLFHUHSUHVHQWDWLYHLI\RXDUH
in doubt that the appliance is properly grounded.
If house wiring is not 2-wire with ground, a ground
must be provided by the installer. When house wiring
is aluminum, be sure to use UL-Listed anti-oxidant
compound and aluminum-to-copper connectors.
Do not remove wood base until you are ready to install the
dishwasher. The dishwasher will tip over when the door is
opened if base is removed.
CHECK THE FOLLOWING
Tub trim does not interfere with the door
Dishwasher is square and level at both the top and bottom
of the cabinet opening, with no twisting or distortion of the
tub or door
$OOOHJVRIWKHGLVKZDVKHUDUH¿UPO\LQFRQWDFWZLWKWKH
ÀRRU
Drain hose is not pinched between the dishwasher and
DGMDFHQWFDELQHWVRUZDOOV
7XEWULPLVIXOO\VHDWHGRQWKHWXEÀDQJH
CAUTION
WARNING
Question and Answer IconNeed help?

Do you have a question about the GE GDT655SSJSS and is the answer not in the manual?

Summary

Pre-Installation Safety and Setup

Before You Begin Checklist

Read instructions completely and carefully before starting installation.

Safety Warnings and Important Notes

Observe all safety warnings, cautions, and installer/consumer notes.

Installation Preparation

Parts, Materials, and Tools Checklist

Lists of parts supplied, necessary materials, and required tools for installation.

Enclosure and Utility Preparation

Preparing cabinet opening, drain requirements, and electrical wiring.

Hot Water Line Preparation

Instructions for preparing and connecting the hot water supply line.

Dishwasher Installation Steps

Initial Preparation and Leveling

Parts check, door balance, base removal, and leveling leg installation.

Plumbing and Electrical Connections

Installing water lines, drain hoses, and electrical power supply.

Cabinet Mounting and Final Positioning

Sliding unit into cabinet, installing trim, mounting brackets, and final placement.

Testing and Final Checks

Performing wet test, pretest checklist, and final verification.

Overview

This document provides comprehensive installation instructions for a GE Appliances built-in dishwasher, ensuring proper setup and operation. The manual emphasizes safety, detailing necessary precautions and skill levels required for installation.

Function Description:

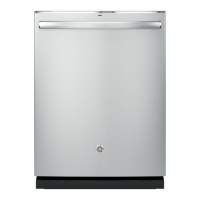
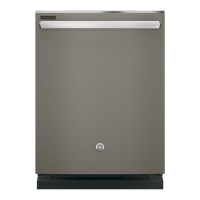
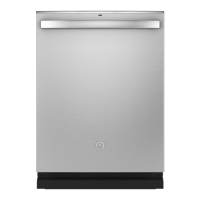
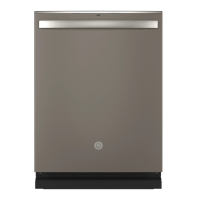
The GE Appliances built-in dishwasher is designed to efficiently clean dishes within a kitchen cabinet enclosure. It is a water-heating appliance that requires connections to hot water supply, electrical power, and a drain line. The dishwasher is intended for permanent installation, integrating seamlessly into kitchen cabinetry. Its primary function is to automate dishwashing, offering convenience and efficiency in household chores.

Usage Features:

The dishwasher is designed for ease of use once installed. It features a door that opens and closes smoothly, with adjustable spring tension to ensure proper balance. The internal dish racks are designed to roll in and out without obstruction, provided the appliance is correctly leveled. The control panel, which may be covered by a protective film during installation, provides access to various wash cycles and settings. The appliance is designed to operate quietly, with sound insulation features that require proper positioning during installation to maximize effectiveness. The drain system is engineered for efficient water removal, incorporating options for air gaps or high drain loops to prevent siphoning and ensure hygienic operation. The water heating capability ensures optimal wash performance, requiring a hot water supply within a specified temperature range.

Maintenance Features:

The manual highlights several features and considerations that contribute to the long-term maintenance and performance of the dishwasher.

  • Leveling: The dishwasher must be perfectly level both front-to-back and side-to-side to ensure proper dish rack operation, water circulation, and door closure. Adjustable leveling legs (and rear wheels on some models) facilitate this, and the manual provides detailed steps for adjustment. This prevents issues like racks rolling out on their own or the door hitting the tub.
  • Drain System: Proper installation of the drain hose is crucial. The manual specifies a maximum drain hose length of 12 feet and provides two methods for connection (air gap or high drain loop), emphasizing the importance of removing the disposer drain plug if connecting to a disposer. This prevents drainage issues and potential service calls. The high drain loop on the side of the tub is a design feature for better wash performance and should not be removed.
  • Water Supply: The hot water supply line should be 3/8" minimum copper tubing or a flexible braided hose (GE Part # WX28X326 recommended). A hand shut-off valve is recommended for easy maintenance and emergency shut-off. Flushing the water line before connection helps clean out debris, preventing potential clogs. Flexible braided hoses, elbows, and gaskets should be replaced every 5 years to prevent leaks.
  • Electrical Connection: The dishwasher requires a dedicated 120V, 60 Hz, 15- or 20-ampere grounded branch circuit. Proper grounding is critical for safety and to prevent electric shock. The manual details connections for both permanent wiring and power cord models, including the use of UL-listed wire nuts and strain relief.
  • Sound Insulation: On some models, a sound insulation piece is provided to reduce noise during operation. Correct positioning of this piece under the control box and behind the toekick attachment screw holes is essential for effective sound dampening.
  • Leak Prevention: The installation process includes a "Wet Test" to check for leaks under and around the dishwasher. This proactive step helps identify and correct potential issues before full operation, preventing water damage. Some models also include a floor protect pan and leak sensor, which must be correctly installed and connected.
  • Cabinetry Protection: The mounting brackets are designed to secure the dishwasher to the countertop or adjacent cabinets without damaging the door panel or control panel. Instructions are provided for trimming brackets if necessary for short overhangs or for side mounting on granite countertops.
  • Accessibility: The dishwasher is designed to be removable from its enclosure for future service, highlighting the importance of not permanently affixing it in a way that would hinder removal.
  • Pretest Checklist: A comprehensive pretest checklist is provided to ensure all installation steps are correctly completed, from power supply and door operation to water supply, drain lines, and alignment. This checklist helps prevent common installation errors that could lead to service calls not covered by warranty.

GE GDT655SSJSS Specifications

General IconGeneral
TypeBuilt-In
Capacity16 Place Settings
Drying SystemHeated Dry
Control TypeElectronic
ColorStainless Steel
Racking MaterialNylon
Water Filtration SystemYes
DispenserDetergent and Rinse Aid
Leveling LegsYes
ADA CompliantNo
Energy Star CertifiedYes
Third RackNo
Soil SensorYes
Dimensions (H x W x D)34 in x 24 in x 24 in
Wash SystemPiranha Hard Food Disposer
Wash Arms3
Upper Rack FeaturesAdjustable
Delay StartYes
Dry OptionHeated Dry

Related product manuals