18 49-60698-4
INSTALLING THE WATER LINE (Continued)
Installation Instructions
5
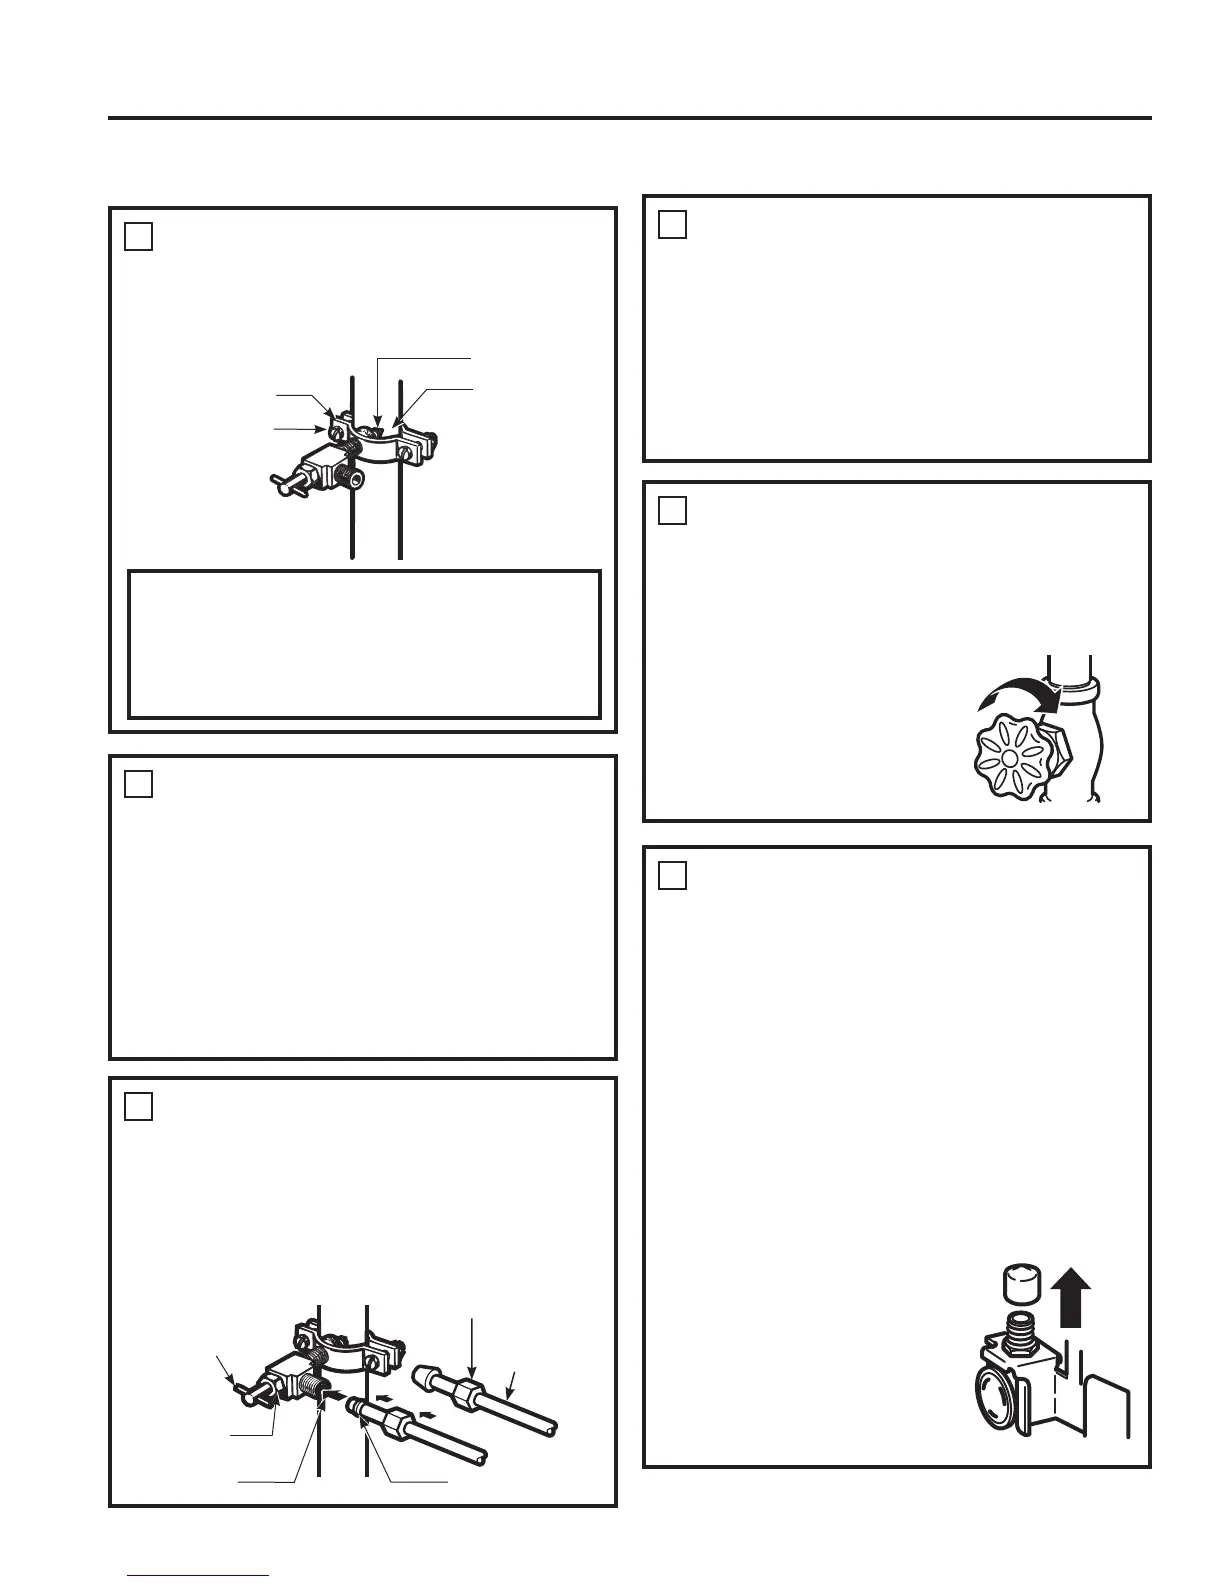
TIGHTEN THE PIPE CLAMP
Tighten the clamp screws until the sealing
washer begins to swell.
NOTE: Do not overtighten or you may crush
the tubing.
8
FLUSH OUT THE TUBING
Turn the main water supply on and flush out the
tubing until the water is clear.
Shut the water off at the water valve after about
RQHTXDUWOLWHURIZDWHUKDVEHHQIOXVKHG
through the tubing.
9
CONNECT THE TUBING TO THE
REFRIGERATOR
NOTES:
Ɣ%HIRUHPDNLQJWKHFRQQHFWLRQWRWKH
refrigerator, be sure the refrigerator power cord
is not plugged into the wall outlet.
Ɣ,I\RXUUHIULJHUDWRUGRHVQRWKDYHDZDWHUILOWHU
we recommend installing one if your water
supply has sand or particles that could clog the
VFUHHQRIWKHUHIULJHUDWRU¶VZDWHUYDOYH,QVWDOOLW
LQWKHZDWHUOLQHQHDUWKHUHIULJHUDWRU,IXVLQJ
6PDUW&RQQHFW5HIULJHUDWRU7XELQJNLW\RX
ZLOOQHHGDQDGGLWLRQDOWXEH:;;
to connect the filter. Do not cut plastic tube to
install filter.
5HPRYHWKHSODVWLFIOH[LEOH
cap from the water valve
UHIULJHUDWRUFRQQHFWLRQ
NOTE:&RPPRQZHDOWKRI0DVVDFKXVHWWV
3OXPELQJ&RGHV&05VKDOOEHDGKHUHGWR
Saddle valves are illegal and use is not permitted
LQ0DVVDFKXVHWWV&RQVXOWZLWK\RXUOLFHQVHG
plumber.
6
ROUTE THE TUBING
5RXWHWKHWXELQJEHWZHHQWKHFROGZDWHUOLQHDQG
the refrigerator.
5RXWHWKHWXELQJWKURXJKDKROHGULOOHGLQWKHZDOO
RUIORRUEHKLQGWKHUHIULJHUDWRURUDGMDFHQWEDVH
cabinet) as close to the wall as possible.
NOTE: Be sure there is sufficient extra tubing
DERXWIHHW>FP@FRLOHGLQWRWXUQVRIDERXW
>FP@GLDPHWHUWRDOORZWKHUHIULJHUDWRUWR
move out from the wall after installation.
CONNECT THE TUBING TO
THE VALVE (Continued)
For plastic tubing from a SmartConnect™
5HIULJHUDWRU7XELQJNLWLQVHUWWKHPROGHGHQG
of the tubing into the shutoff valve and tighten
compression nut until it is hand tight, then tighten
one additional turn with a wrench. Overtightening
may cause leaks.
CONNECT THE TUBING TO
THE VALVE
3ODFHWKHFRPSUHVVLRQQXWDQGIHUUXOHVOHHYH
for copper tubing onto the end of the tubing and
connect it to the shutoff valve.
0DNHVXUHWKHWXELQJLVIXOO\LQVHUWHGLQWRWKH
valve. Tighten the compression nut securely.
Washer
,QOHW(QG
Pipe Clamp
Clamp
Screw
Saddle-Type
6KXWRႇ9DOYH
Compression Nut
SmartConnect
™
Tubing
Packing Nut
Outlet Valve
)HUUXOHVOHHYH
INSTALLATION INSTRUCTIONS