– 18 –
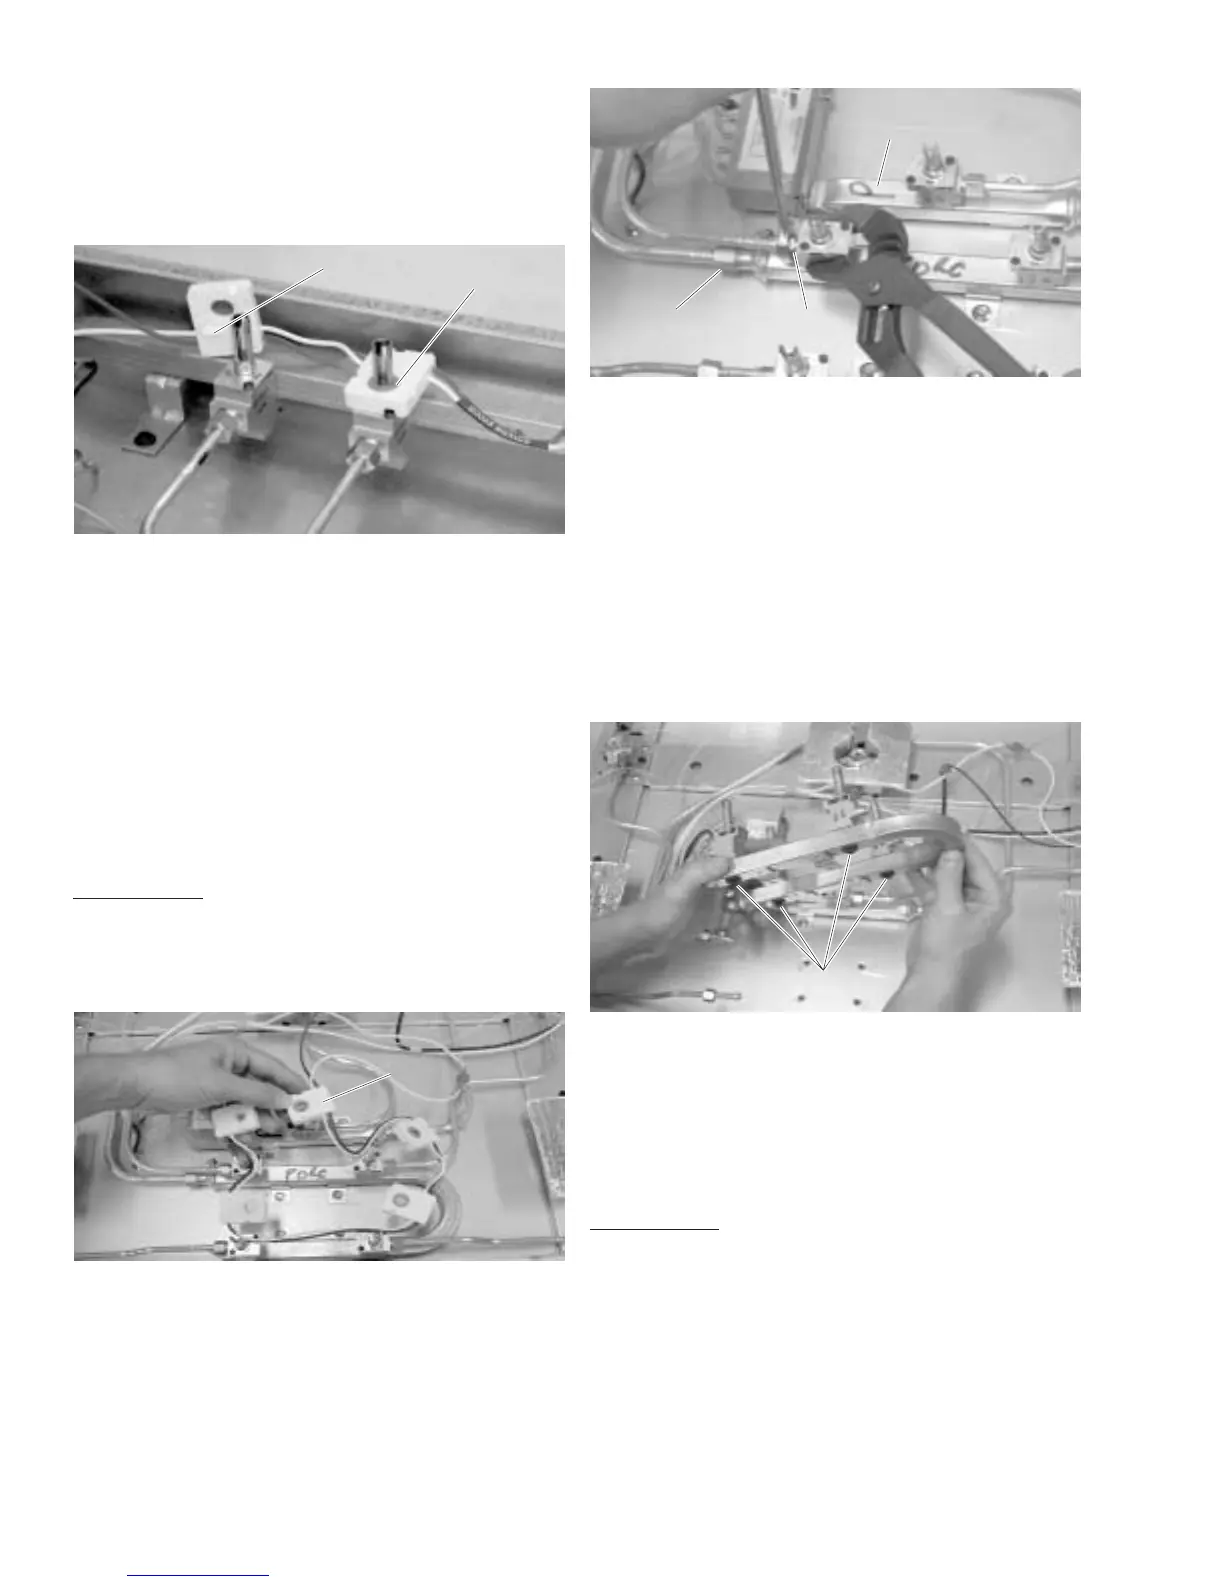
Igniter Switch Removal
1. Remove the burners and top (see Burner and
Top Removal).
2. Unplug the wires to the igniter switch.
GEA00777
Color
Indicator
Color
Indicator
Molded
Lock Fit
Molded
Lock Fit
Note: On 36-in. models, note the color and posi-
tion of switches.
3. Lift each igniter switch off the valve stem.
Note: When replacing the switch, replace the
entire harness with colors in same positions. The
bottom of the switch is molded to conform to the
top of the valve for a locked-in fit.
Valve Removal
36-in. Models
1. Remove the burners and top (see Burner and
Top Removal).
GEA00778
Igniter
Switch
Igniter
Switch
2. Lift the igniter switches off the valve stems.
(Note the color and positions of the switches.)
GEA00779
Straight
Manifold
Straight
Manifold
5/8-in. Nut
5/8-in. Nut
1/2-in. Nut
1/2-in. Nut
3. Remove the 1/2-in. nut on the gas line to the
valve and remove the gas line.
4. Remove the 5/8-in. nut on the gas line to the
horseshoe-shaped manifold or the 9/16-in. nut
on the gas line to the straight manifold and
remove the gas line.
5. Remove the 1/4-in. screws and the manifold
from the burner box.
GEA00780
1/4-in. Screws
1/4-in. Screws
6. Remove the 1/4-in. screw from the manifold
and remove the valve.
Valve Removal
30-in. Models
1. Remove the burners and top (see Burner and
Top Removal).
 Loading...


