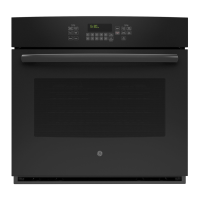
careandcleating
—
~Donotimmerseplug-insurface ‘
unitsinliquidsofanykind.
~
Propercareandcleaningare
importantsoyourRangewillgive
youe~lcientandsatisfactoryservice.
Followthesedirectionscarefillyin
cuing foryourrangeto assuresafe
andpropermaintenance.
grease,maycatchfire.Tomake
cleaningeasier,theplug-insurface
unitsareremovable.
@Donotbendtheplug-insurface
unitplugterminals.
R
R
@Donotattempttoclean,adjust
or inanywayrepairtheplug~in
receptacle.
mlt-bek 3-h-l
surfaceHeatingUtit
Theporcelainenamelfinishis
sturdybutbreakableif misused.
Thisfinishisacidresistant.
However,anyacidfoodsspilled
(suchasfruitjuices,tomato,or
vinegar)shouldnotbe permitted
toremainonthefinish.
TheTilt-Lock3-in-1surfaceunitis
ToCaean:
stationaryandcannotberemoved.
Itcanbelifiedupwardandlocked
inthatpositionforcleaningunder
theunit.Becertain the unit is
coolbeforeliftingthe CON.
@Wipearoundtheedgesofthe
surfaceunitopeningintherange
top.Cleantheareabelowtheunit.
Rinseallwashedareaswithadamp
clothor sponge.
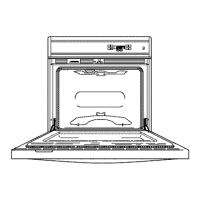
ovenventDud
Afierliftingcoilunit,removetrim
ringanddrippantocleanunder
unit.Cleanpanandtrimringas
recommendedonCleaningGuide
YourRangeisventedthrougha
ductlocatedundertherightrear
Calrod@unit.Cleantheductoften.
Caution:Besureallcontrolsare
turnedOFFbeforeattemptingto
cleanunderthecooktopor
removingtheCalrod”units.
onpage28.
ToCleanUpperOven
To remOve:
@Raisetheunitcoiloppositethe
receptacle.Liftaboutoneinch
abovethetrimringandpullaway
fromthereceptacle.Caution:Be
surethecoilsarecoolbefore
removinga Calrod@unit.
hwer Oven
Placeshelffromupperovenona
shelfoftheself-cleanoven.(The
shelfmayhavetobeshiftedslightly
soshelfstopsdonotinterferewith
placementofpanels.)
Toremove:
@Afier removingtheplug-in
surfaceunit,liftthetrimringand
drippanto cleanundertheunit.
~Makesureunitiscool.
~Liftuprightrear surfaceunit.
@Removetrimringanddrippan.
~Liftoutovenventduct.
Slideoutovenbottom;liftingbake --
unitslightlymakesthiseasiertodo.
Lifibackpanelandremove.Place
bottomandbackpanelsback-to-
backsosoiledsidesfaceoutward.
It isimportantthatpanelslayflat
onshelf.
To replace:
@Placethedrippaninthesurface
unitopeningintherangetop.Line
upthedrippansotheunitreceptacle
canbeseen.Putthetrimringin
placeoverthedrippan.
Toreplace:
@Placethepartovertheovenvent
locatedbelowthecooktopwiththe
openingoftheductundertheround
openinginthedrippan. It is
importantthattheductisinthe
correctpositionsomoistureand
vaporsfromtheovencanbe
releasedduringovenuse. NOTE:
Nevercovertheholeintheoven
ventductwithaluminumfoilor
anyothermaterial.Thisprevents
theovenventfromworking
properlyduringanycookingcycle.
Liftsidepanelsupandoutofoven.
Placeback-to-backonremaining
self-cleanshelf.
@Inserttheterminalsoftheplug-in
unitthroughtheopeninginthepan
andintothereceptacle.
ToReplaceWneIs
Inupperoven
~Guidethesurfaceunitintoplace
soitfitsevenlyandfitssnuglyinto
thetrimring.
Replacepanelsinanyorder
desired.Becertainovenbottom
isreplacedsonotchisatright,
and“feet”onbakeunitrestin
N~E: Thedrippanmust be
underthetrim ring.
CAUTION
depressionsinpanel.Replace
broilerreflectorso “openside”
@Do notattempttocleanplug-in
surfaceunitsinanautomatic
dishwasher.
istowardbottomofoven.
-—
Cleantheareaunderthedrippans
often.Built-upsoil,especially
..—.
26
 Loading...