BAKING
Your oven temperature is controlled very accurately
using an oven control system. It is recommended that
you operate the oven for a number of weeks using the
time given on recipes as a guide to become familiar
with your new oven’s performance.
If you think an adjustment is necessary, see the Adjust
the Oven Thermostat section. It lists easy Do It
Yourself instructions on how to adjust the thermostat.
Using Your Lower Oven Baking
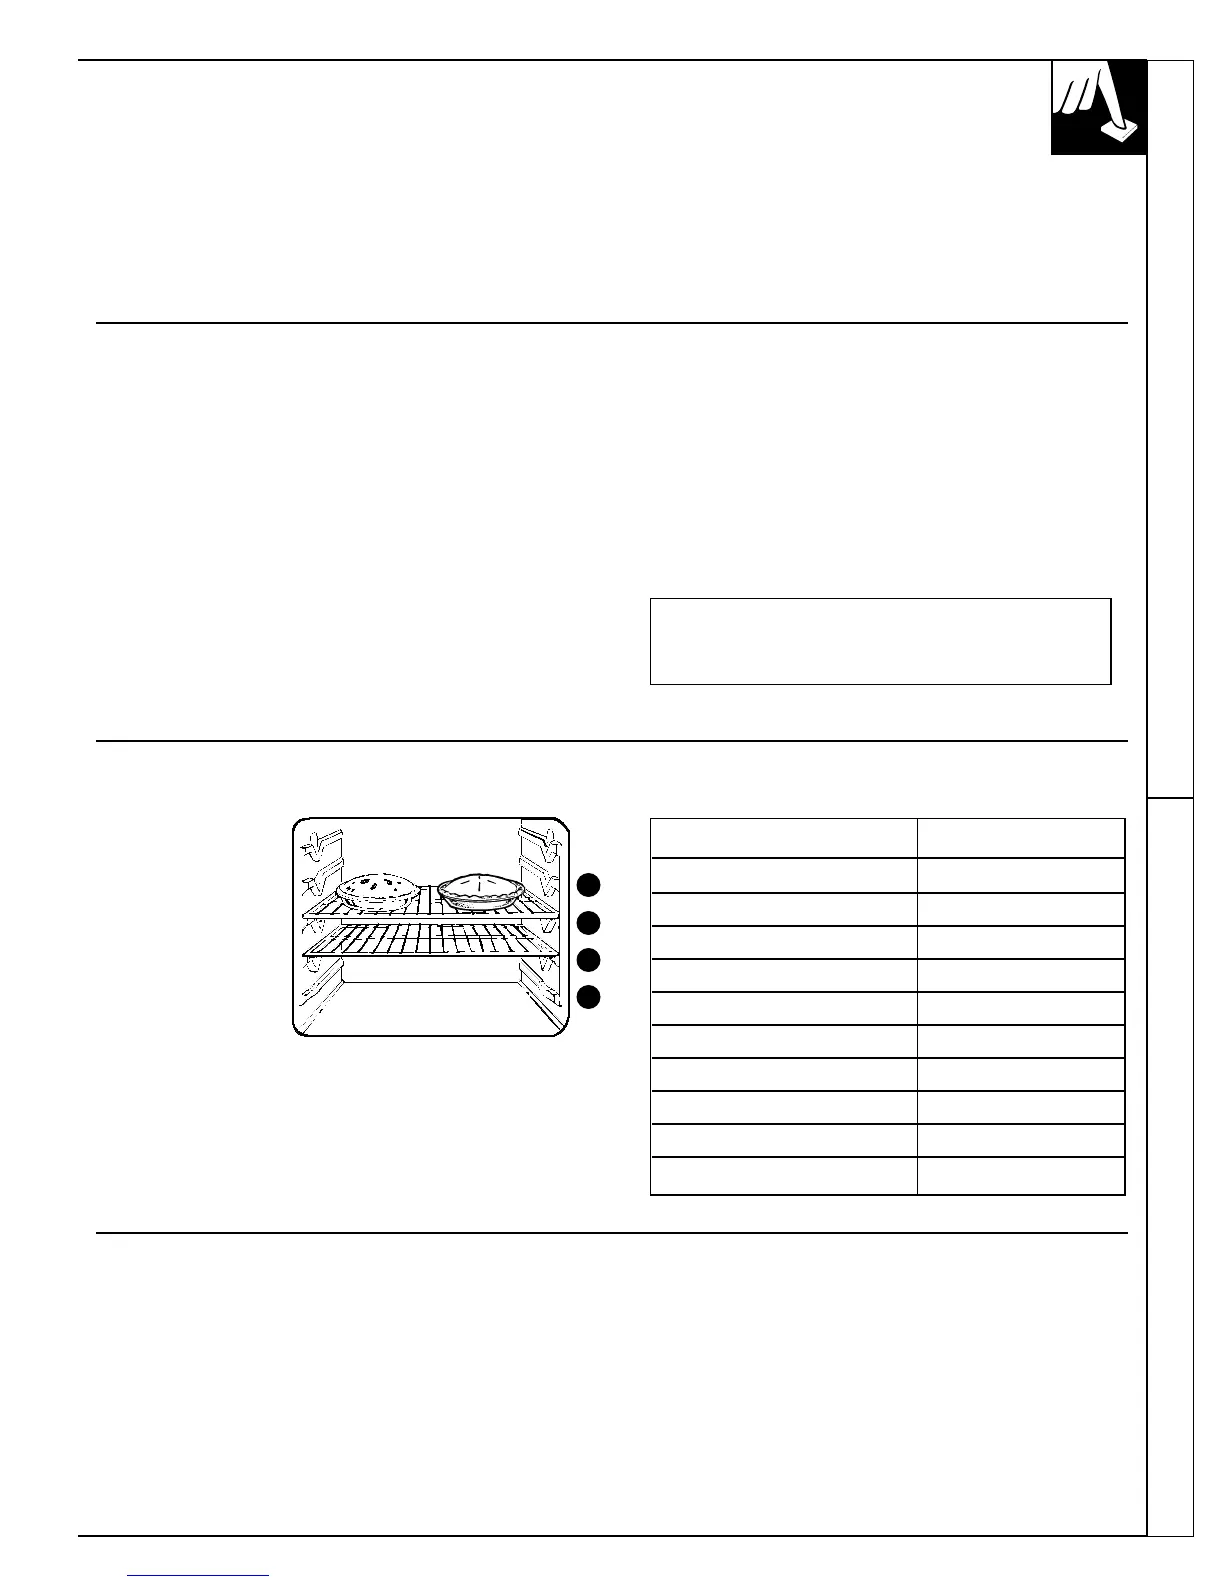
Oven Shelves
Arrange the oven
shelf or shelves in
the desired locations
while the oven is
cool. The correct
shelf position
depends on the kind
of food and the
browning desired.
As a general rule,
place most foods in
the middle of the oven, on either shelf position
B or C. See the chart for suggested shelf positions.
Type of Food Shelf Position
Angel food cake A
Biscuits or muffins B or C
Cookies or cupcakes B or C
Brownies B or C
Layer cakes B or C
Bundt or pound cakes A or B
Pies or pie shells B or C
Frozen pies A (on cookie sheet)
Casseroles B or C
Roasting A or B
D
C
B
A
Preheating
Preheat the oven if the recipe calls for it. Preheat means
bringing the oven up to the specified temperature
before putting the food in the oven. To preheat, set the
oven at the correct temperature—selecting a higher
temperature does not shorten preheat time.
Preheating is necessary for good results when baking
cakes, cookies, pastry and breads. For most casseroles
and roasts, preheating is not necessary. For ovens
without a preheat indicator light or tone, preheat 10
minutes. After the oven is preheated, place the food
in the oven as quickly as possible to prevent heat
from escaping.
(continued next page)
How to Set Your Oven for Baking
To avoid possible burns, place the shelves in the
correct position before you turn the oven on.
1. Press BAKE.
2. Press the INCREASE or DECREASE pad. The last
temperature used will appear in the display. Continue
pressing until the desired temperature is displayed.
3.
Press START. When the oven starts to heat, the words
“BAKE” and “TEMP” the temperature you have set
and the changing temperature, starting at 100°F., will
be displayed. When the oven reaches the temperature
you set, a tone will sound and “BAKE PrE”
(preheated) flashes in the display. The display then
shows the set temperature continuously.
4. Press CLEAR/OFF when baking is finished and
then remove the food from the oven.
NOTE:
• You may set the timer to the desired cooking time.
See the Oven Control, Clock and Timer section.
• A fan may automatically turn on and off to cool
internal parts. This is normal, and the fan may
continue to run even after the oven is turned off.
To change the oven temperature during the
bake cycle, press the INCREASE or DECREASE
pad to set the new temperature.
35