I
MICROWAVE OVEN
I
Automatic
Romting
Auto Roast uses the temperature
probe to cook to the desired
serving temperature. Unlike
Temp
Coo~old,
which uses a
single
power level, Auto Roast
uses up to 3 power settings which
automatically switch during
roasting, thus providing even,
tender cooking results without
overcooking.
Just as in conventional roasting,
only tender roasts should be Auto
Roasted until specified internal
temperatures are reached. Less
tender roasts should be microwaved
by time, according to the cookbook
that comes with your oven.
Preparing
Roas@
for
Auto Roasting
Place tender beef roast on trivet in
microwave-safe dish. Insert probe
horizontally into the center meaty
area without touching bone or fat.
Make sure the handle does not
touch the food or top or sides of
the oven. Cover with wax paper.
Pork or ham roasts need no trivet.
Add 1/2 cup water to roast dish
and cover with plastic wrap. Allow
room for probe when covering.
Place meat in oven with probe to
the right. Insert cable end of probe
firmly into receptacle on oven
wall.
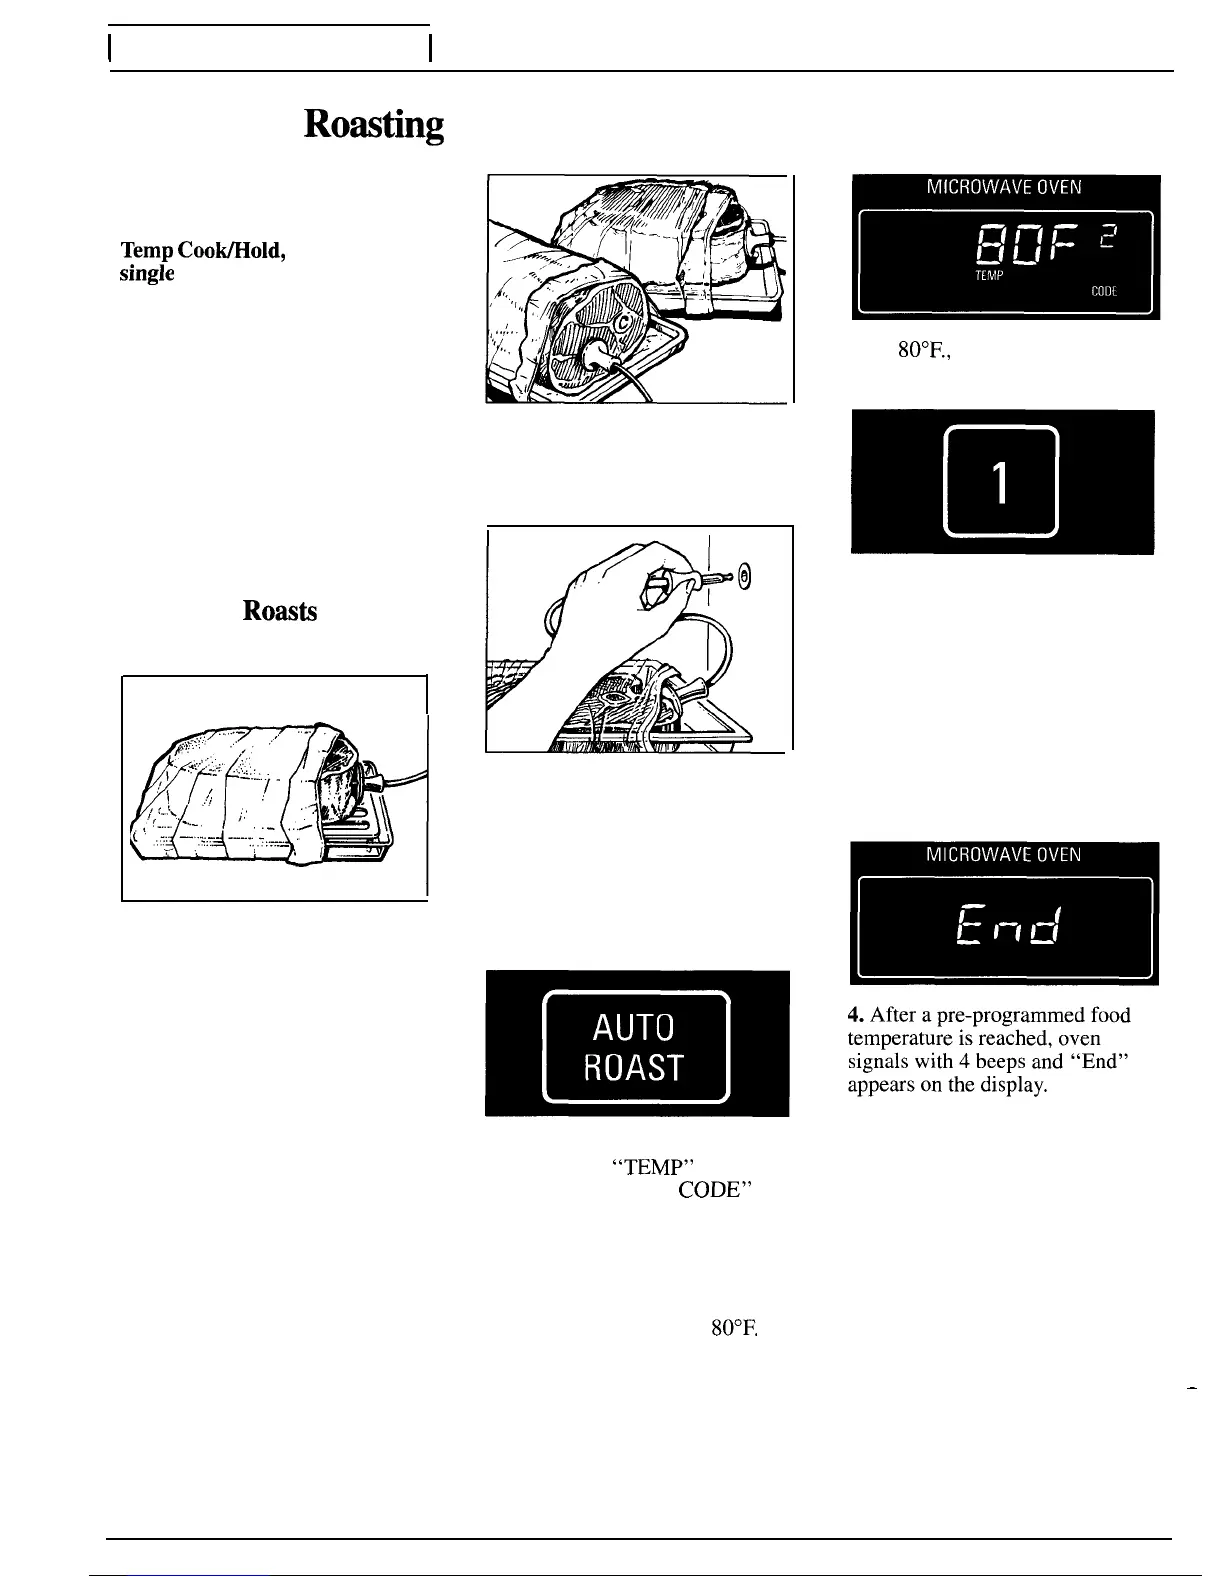
How to Auto Roast
Beef Roast to Medium
~m
A
o
‘1A
1. Touch the AUTO ROAST pad.
“AUTO” and
“TEMP” appear on
display and “ENTER
CODE7’
flashes. Touch number pad 2.
“CODE 2“ appears on display and
“START” flashes. Touch the
START pad. Display shows
“COOL” and “CODE 2“ until
food temperature reaches
80°F.
m
2. At
80°F.,
display switches to
show meat’s internal temperature.
~n~
3. When you select Auto Roast
Codes 1, 2, 3 or 4, the oven signals
with 4 beeps and “TURN” flashes
on the display when it’s time to
turn the roast over. After you turn
the roast, close the door and touch
the START pad, food temperature
appears on the display. (Note:
Oven continues to cook after the
signal whether or not roast is
—
turned over.)
—
16