LOWER OVEN
Operating the
self-cleating
Lower
Oven
(continued)
To Set Your Oven
for Self-Cleaning
Quick Reminder:
1. Prepare oven for cleaning.
2. Close oven door completely.
3. Touch CLEAN pad.
4. Touch number pads to enter
Clean Time.
5. Touch START pad.
Step 1: Close the oven door
completely.
Note: You might smell a slight
odor, especially during the first
few cleanings. This is normal
during the self-cleaning cycle
and is no cause for alarm.
You can cancel the Self-Clean
cycle at any time by pressing the
CLEAWOFF pad. However,
you cannot program any other
functions, such as Bake, until
the oven cools to
500°F.
Step 4: When cleaning is done, the
oven starts cooling down. When it
cools down to
500°F.,
the LOCKED
light goes out and you can open
door. Display shows time of day.
~m~
How to Delay Start
A
of Cleaning
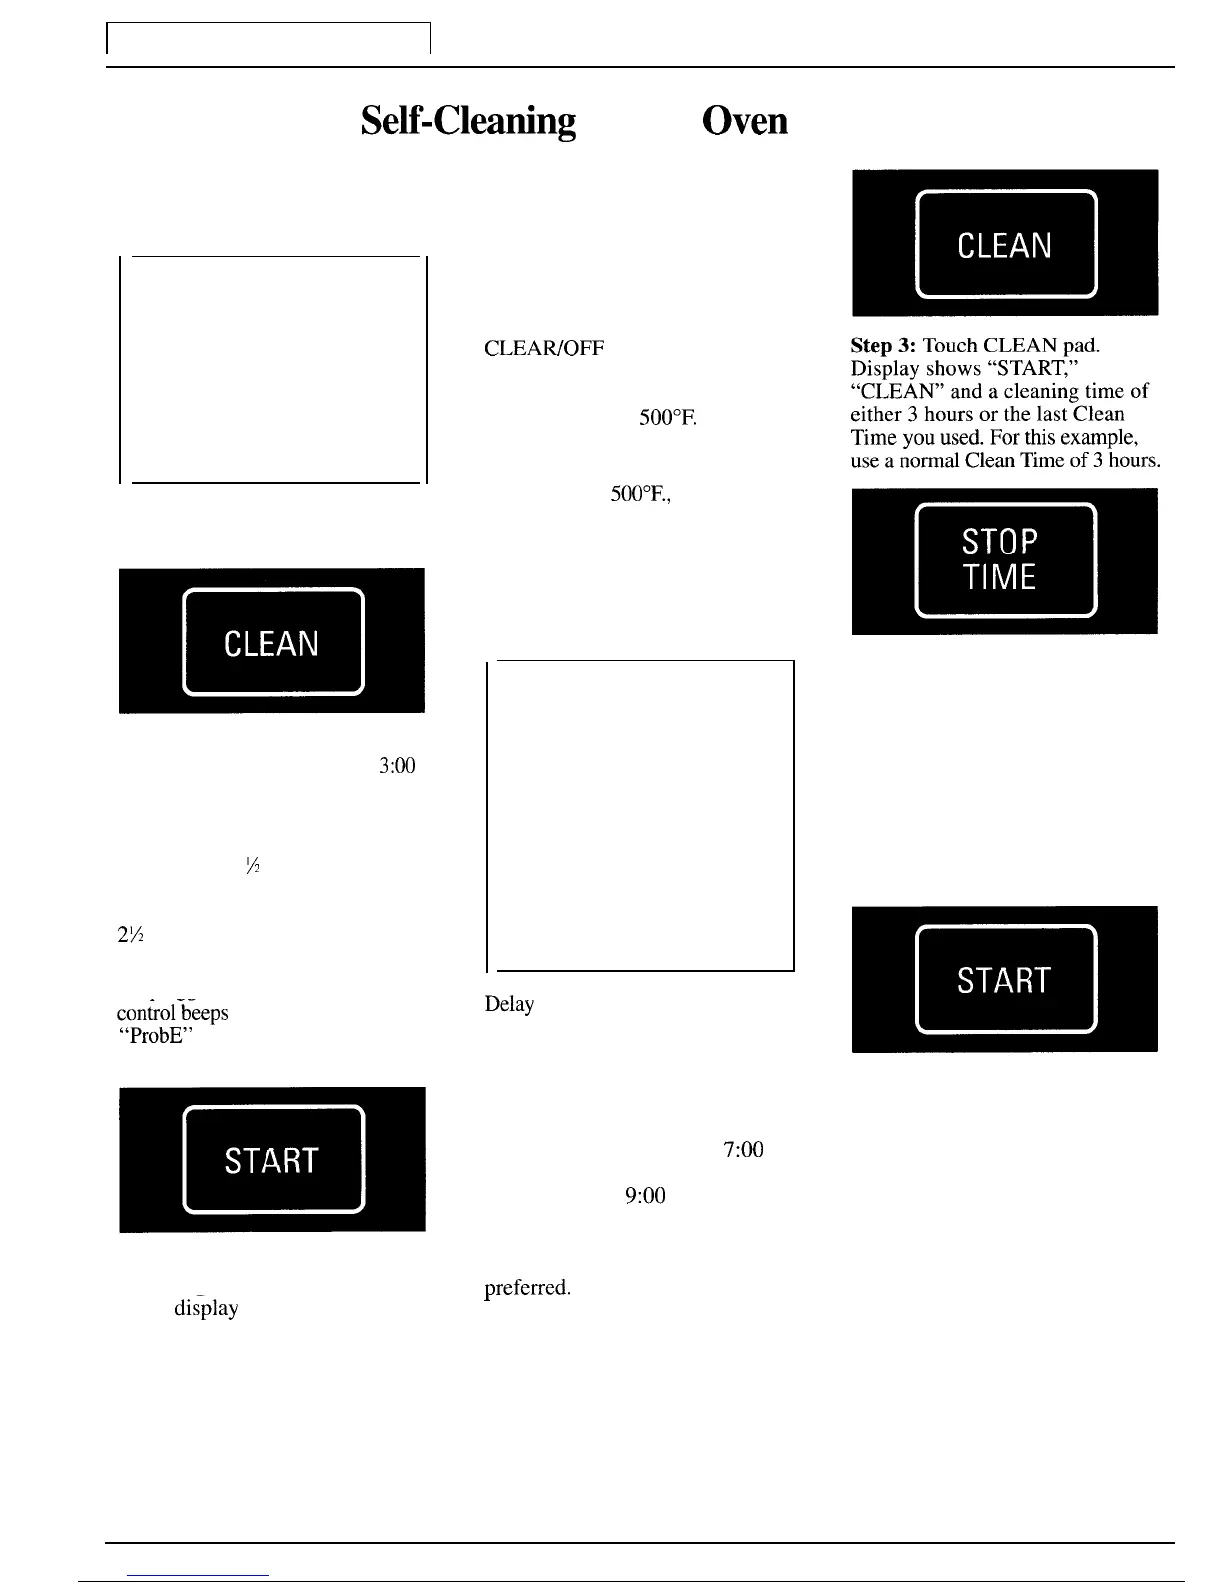
Step 2:
Touch the CLEAN pad. The
lower left display shows either
3:00
(the default cleaning time of 3 hours)
or the cleaning time you last used.
You can change the cleaning time
to as little as 1
X
or as much as 4
hours by touching the appropriate
number pads. For example, to enter
2M
hours, touch pads 2,3 and O.
(If temperature probe is accidentally
left plugged into the oven receptacle, _
Quick Reminder:
1. Prepare oven for cleaning.
2. Close oven door completely.
3. Touch CLEAN pad.
4. Touch number pads to enter
Clean Time.
5. Touch STOP TIME pad.
6. Touch number pads to enter
Stop Time.
7. Touch START pad.
con~rol-b;eps
and display shows
Delay
Start is setting the oven timer
“ProbE” briefly. Remove the probe
to start the clean cycle automatically
and repeat steps 1 and 2 to reset.)
at a later time than the present time
of day. NOTE: Before beginning,
make sure the oven clock shows the
~m~
correct time of day.
Am
For example: Let’s say it’s
7:00
and you want the oven to begin
self-cleaning at
9:00
after you’re
finished in the kitchen. The oven is
Step 3: Touch START to begin
just soiled a normal amount so the
normal Clean Time of 3 hours is
cleaning immediately. The lower
~referred.
~m@
0’
Step 4: Touch STOP TIME pad.
Step 5: Use number pads to enter
desired Stop Time. (Since you are
using the normal Clean Time of 3
hours, you may enter any time
between 3 hours and 11 hours and
59 minutes from the current time
of day.) The lower left display
shows Clean Time and the lower
right display shows Stop Time.
~m~
Am
Step 6: Touch START pad. The
lower left display now shows Start
Time and the lower right display
shows Stop Time. “LOCKED”
flashes in the display for 15
seconds while the door locks
automatically, then it appears
steadily. The light will turn
off automatically.
right
dis-play
shows calculated stop
‘
time. “LOCKED” flashes in the
Step 1: Follow steps under
display for 15 seconds while
“Prepare the Oven Before Setting
door locks automatically, then it
the Controls” to prepare the oven
appears steadily.
for cleaning.
Step 2: Close the oven door.
46