
K
Kelsey RamirezSep 2, 2025
Why is the display flashing on my GE JS645FLDS?
- JJoseph NortonSep 2, 2025
If the display on your GE Ranges flashes, it typically indicates a power failure. Reset the clock to resolve the issue.
Why is the display flashing on my GE JS645FLDS?
If the display on your GE Ranges flashes, it typically indicates a power failure. Reset the clock to resolve the issue.
What to do if food does not broil properly in my GE JS645FLDS oven?
If food isn't broiling properly in your GE Ranges oven, ensure you've selected the appropriate broil mode and are using the correct rack position as suggested in the Cooking Guide. Also, make sure your cookware is cool and specifically designed for broiling. If using aluminum foil, ensure it's properly fitted and slit as recommended. In areas with low voltage, preheat the broil element for 10 minutes.
Why is my GE Ranges oven not clean after self-cleaning?
If your GE Ranges oven isn't clean after running a clean cycle, it might be due to improperly set oven controls. Please refer to the Cleaning the Oven section for guidance. Also, heavily soiled ovens may require a second cleaning cycle or a longer cleaning time. It's best to clean up any significant spillovers before starting the self-clean cycle.
Why does my new GE Ranges oven cook differently?
If your new GE Ranges oven cooks differently than your old one, it's because it has a different cooking system. Carefully follow recipe times and temperatures for the first few uses. If you still think the oven is too hot or cold, you can adjust the temperature in the Special Features section to match your cooking preferences. This adjustment affects Bake and Convection Bake temperatures only.
What causes food to not bake properly in GE JS645FLDS?
If food doesn't bake properly in your GE Ranges oven, start by checking the oven controls to ensure they are set correctly, referring to the Cooking Modes section. Also, verify that the rack position is correct and level, consulting the Cooking Modes section and Cooking Guide. Ensure you're using the correct cookware of the proper size, as described in the Cookware section. If needed, adjust the oven temperature as explained in the Special Features section. Finally, be aware that ingredient substitutions can affect the recipe's outcome.
How do I turn off the DOOR LOCK light on my GE JS645FLDS?
If the DOOR LOCK light is on when you want to cook on your GE Ranges, it means the oven door is locked because the temperature inside the oven hasn't dropped below the locking temperature. To resolve this, press the Cancel/Off pad and allow the oven to cool down.
Ensures the range is secured to prevent tipping hazards and associated risks.
Provides essential guidelines for safe operation, installation, and maintenance.
Precautions for flammable items, fire prevention, and spread control during use.
Guidelines for safe operation of the range's cooking surface and heating elements.
Specific safety measures for radiant glass cooktops and general oven operation.
Safety precautions and instructions for using the self-cleaning oven feature.
Instructions for safely removing protective shipping film and packaging tape.
How to set and use surface elements, including dual units and control knobs.
Instructions for using the warming zone to keep food at serving temperature.
Advice for canning, cooktop maintenance, and temperature limiter function.
Guidance on suitable cookware, what to avoid, and usage tips for glass cooktops.
Descriptions of various oven control pads and their functions for operation.
Features for adjusting temperature, sound, clock display, and auto shutoff.
Instructions for setting, using, and exiting Sabbath mode, including power outage notes.
Guidance on rack placement, foil use, and cookware performance.
Explanation of traditional bake, broil (Hi/Lo), and warm modes for cooking.
Instructions for cleaning control knobs, panel, oven exterior, and surfaces.
Guidance for manual cleaning, self-clean mode, racks, and heating elements.
Daily cleaning, removing burned-on residue, and heavy residue removal.
Removing marks, cleaning seals, and handling sugary spills/melted plastic.
Step-by-step instructions for replacing the oven light bulb.
Instructions for removing/replacing the oven door and storage drawer.
Details on warranty coverage, exclusions, and information on purchasing extended warranties.
List of optional accessories, replacement parts, and cleaning products.
Contact information and resources for product support, registration, and service.
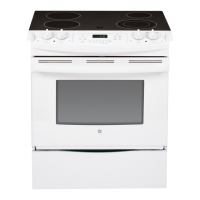
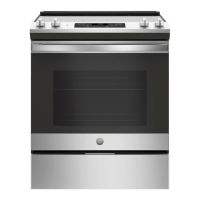
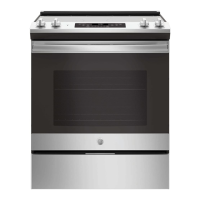
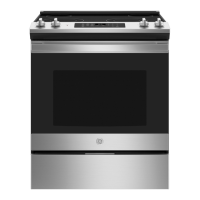
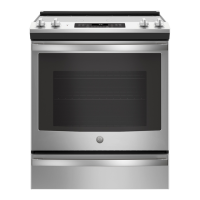
| Fuel Type | Electric |
|---|---|
| Number of Burners | 5 |
| Oven Capacity | 5.3 cu. ft. |
| Self-Cleaning | Yes |
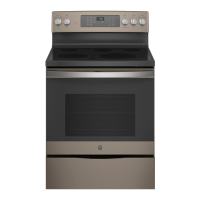
| Color | Stainless Steel |
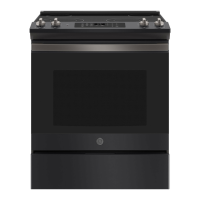
| Type | Slide-In |
| Wi-Fi Connectivity | No |
| Cooktop Surface | Glass |
| Width | 30 inches |