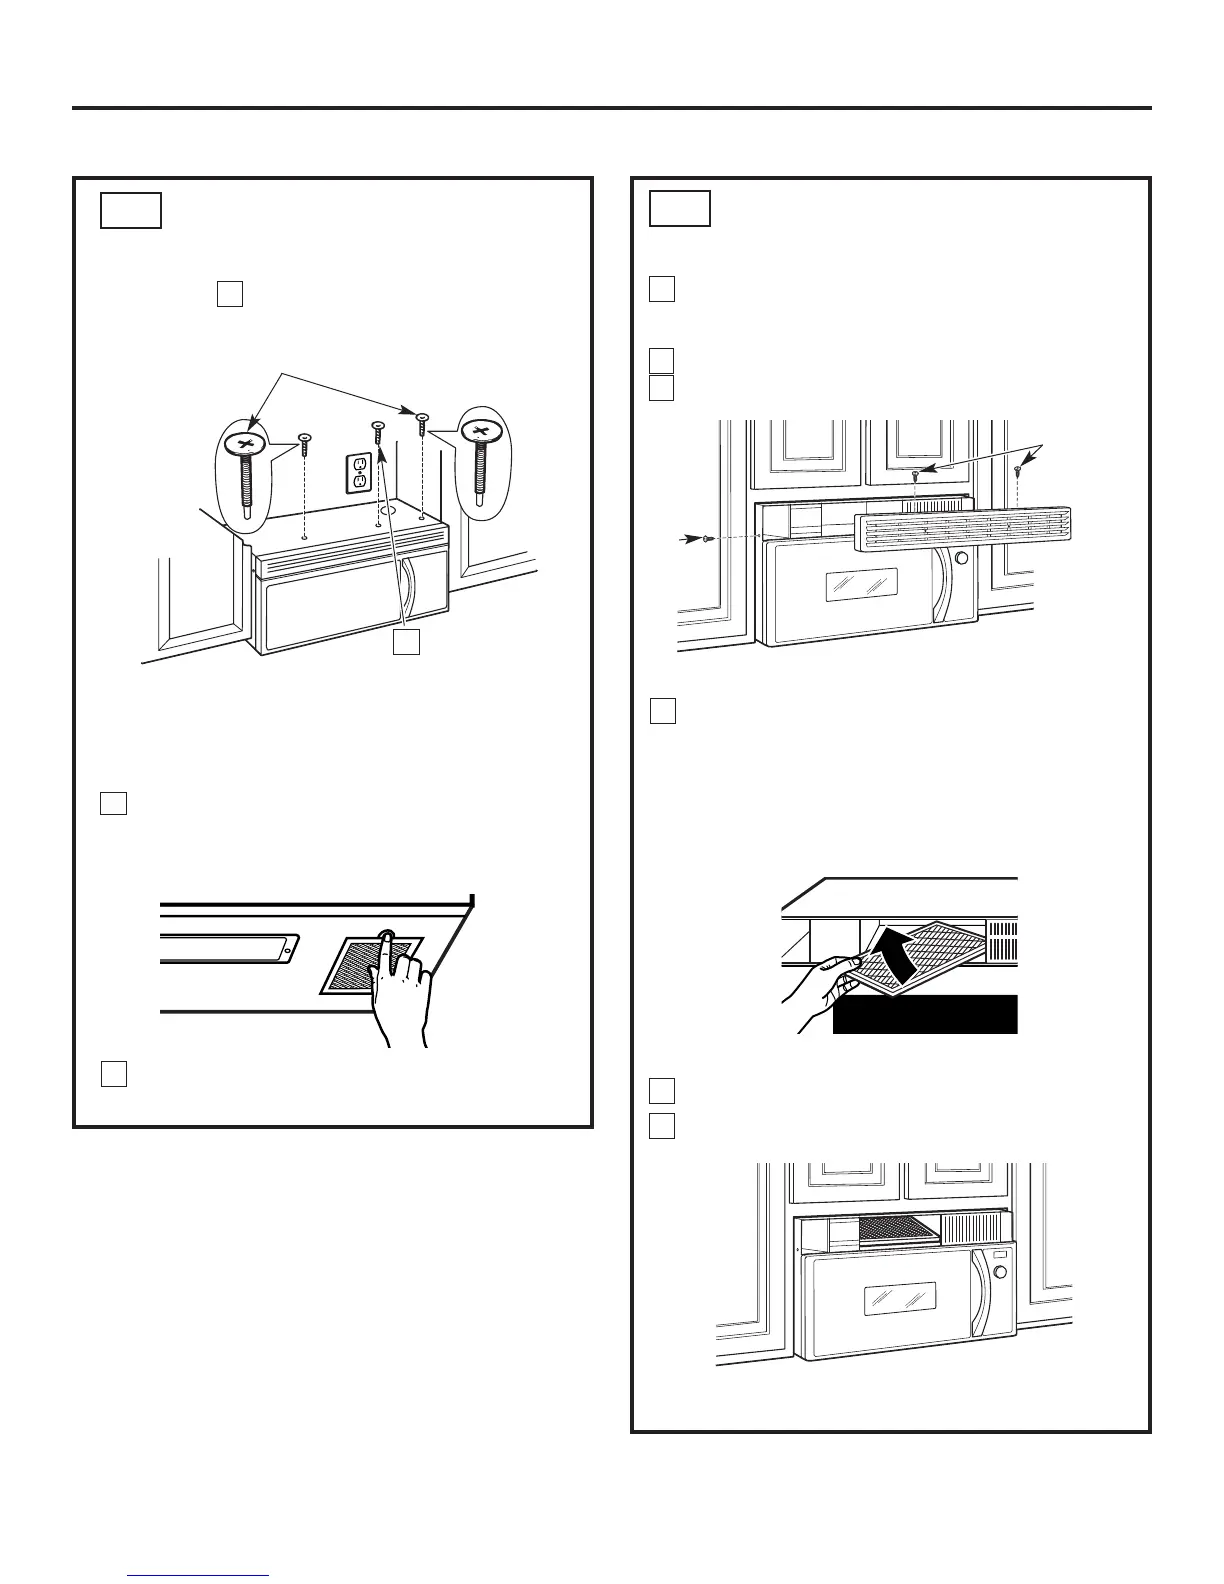
Remove 2 screws on top of oven, just above the
grille panel, using a Phillips screwdriver. Remove
one screw on the left side.
Open the door.
Remove the grille.
Insert the filter into the oven as shown,
maneuvering it behind the plastic grille until it fits
squarely into place. It will rest at an angle behind
the plastic grille on two side support tabs and in
front of the right rear tab. When properly
installed, the wire mesh of the filter should be
visible from the front.
5
4
2
1
INSTALLING THE
CHARCOAL FILTER
C6.
MOUNT THE OVEN
(continued)
C5.
22
Screws
Insert mesh-side down
Installation Instructions
8
7
6
Tighten the outer two screws to the top of the
oven. (While tightening screws, hold the oven
in place against the wall and the top cabinet.)
Insert 2 self-aligning screws
(
1
⁄4″-28 x 3
1
⁄4″) through outer
top cabinet holes. Turn two
full turns on each screw.
Tighten center
screw completely.
Install grease filters. See the Owner’s Manual
packed with the oven.
Replace the grille and the 2 top screws.
Close the door and replace left side screw.
6
5
3
Side
Screw
NOTE: Use self-aligning screw,
1
⁄4″-28 x 2
5
⁄8″, on
JVM1790 and self-aligning screws,
1
⁄4″-28 x 3
1
⁄4″,
on JVM1490, SCA1000, and SCA1001.
 Loading...