Yourbuilt-inovenIspackedwithashippingbasepadon
thebottomoftheunit. The lower front trim and end caps
are shipped separately and should not be used until you
are ready to Install the oven with door removed after
making electrical connections.
Sse Stop 3.
Step 1:
Remove the oven door,
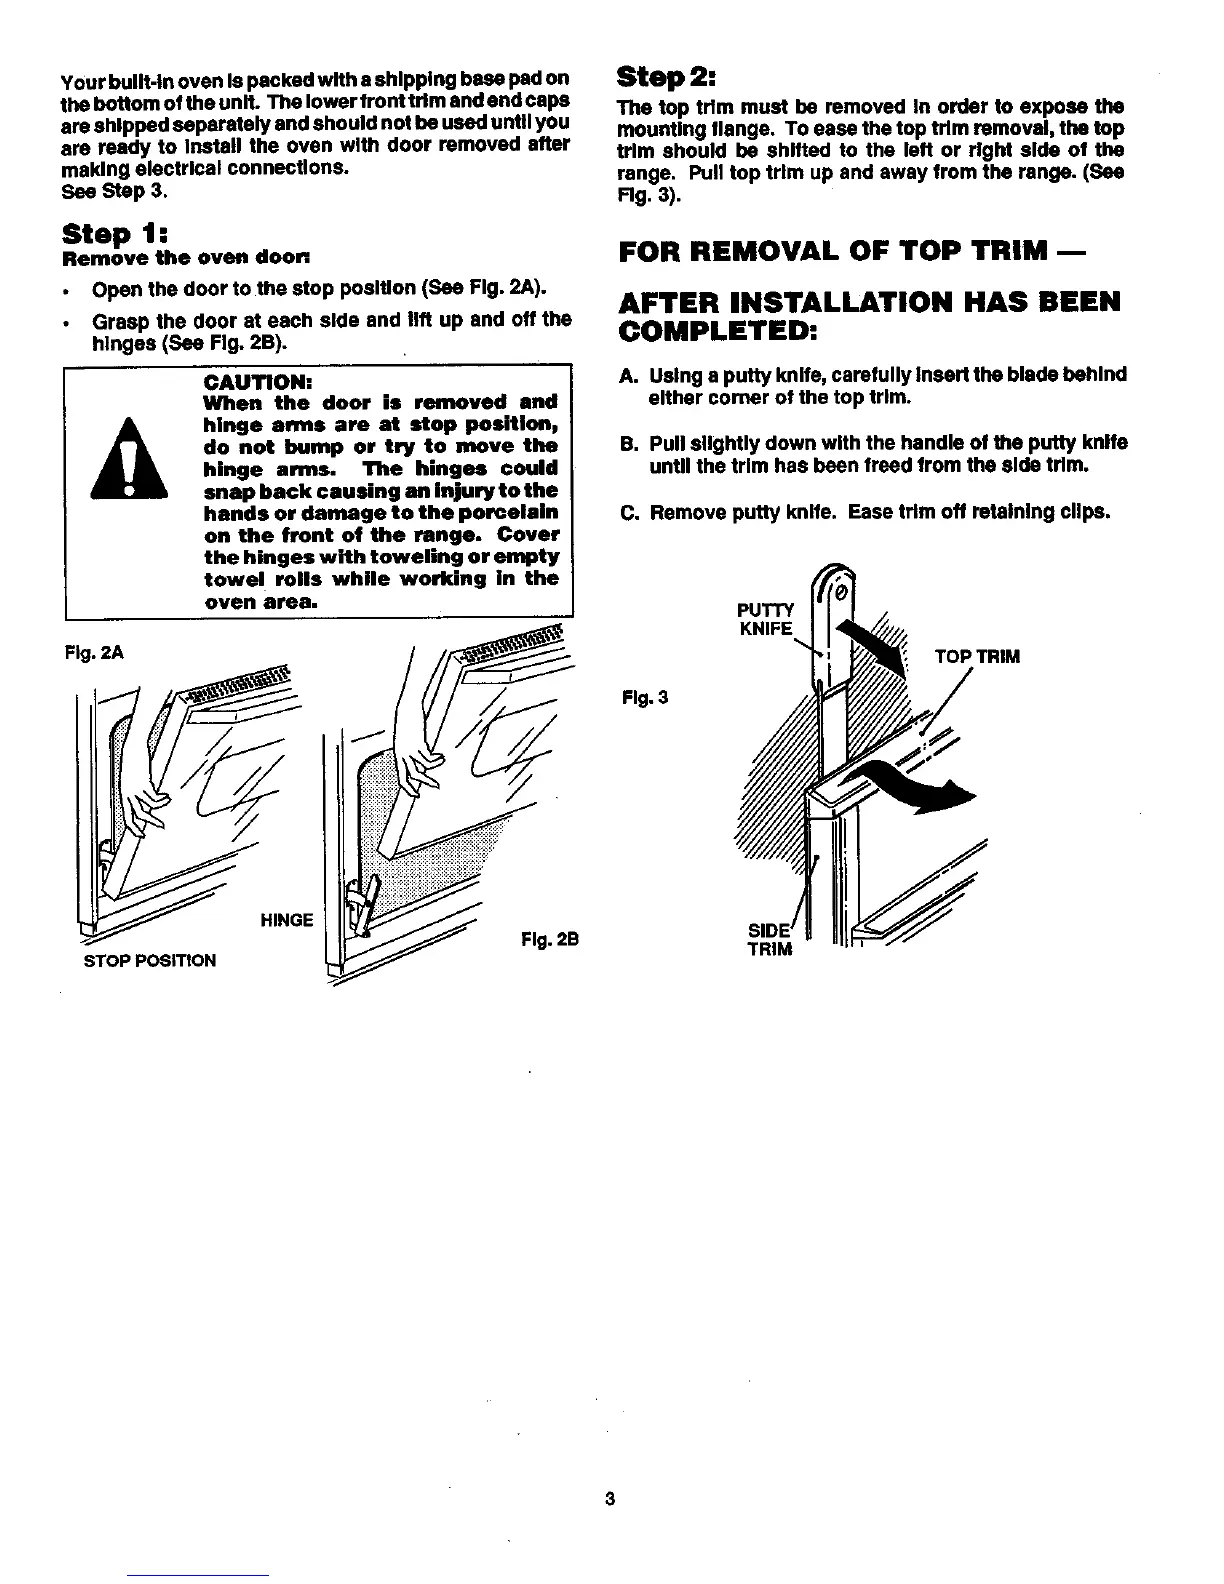
Open the door to the stop position (See Fig. 2A).
Grasp the door at each side and lift up and off the
hinges (See Fig. 2B).
Fig. 2A
CAUTION=
When the door is removed and
hinge arms are at stop positlonp
do not bump or try to move the
hinge am. The hinges oould
snap back causing an injury to the
hands or damage to the porcelain
on the front of the range. Cover
the hinges with toweling or empty
towel roils while working in the
oven area,
Step 2:
The top trim must be removed In order to expose the
mounting flange. To ease the top trim removal, the top
trim should be shifted to the left or right side of the
range. Pull top trim up and away from the range. (See
_g. 3).
FOR REMOVAL OF TOP TRIM m
AFTER INSTALLATION HAS BEEN
COMPLETED:
A. Using a putty knife, carefully Insert the blade hehlnd
either corner of the top trim.
B. Pull slightly clown with the handle of the putty knife
until the trim has been freed from the side trim.
C. Remove putty knife. Ease trim oft retaining clips.
PUTTY
KNIFE
TOP TRIM
Fig. 3
STOP POSITION
HINGE
Fig. 2B
TRIM
3




 To Next Page