– 45 –
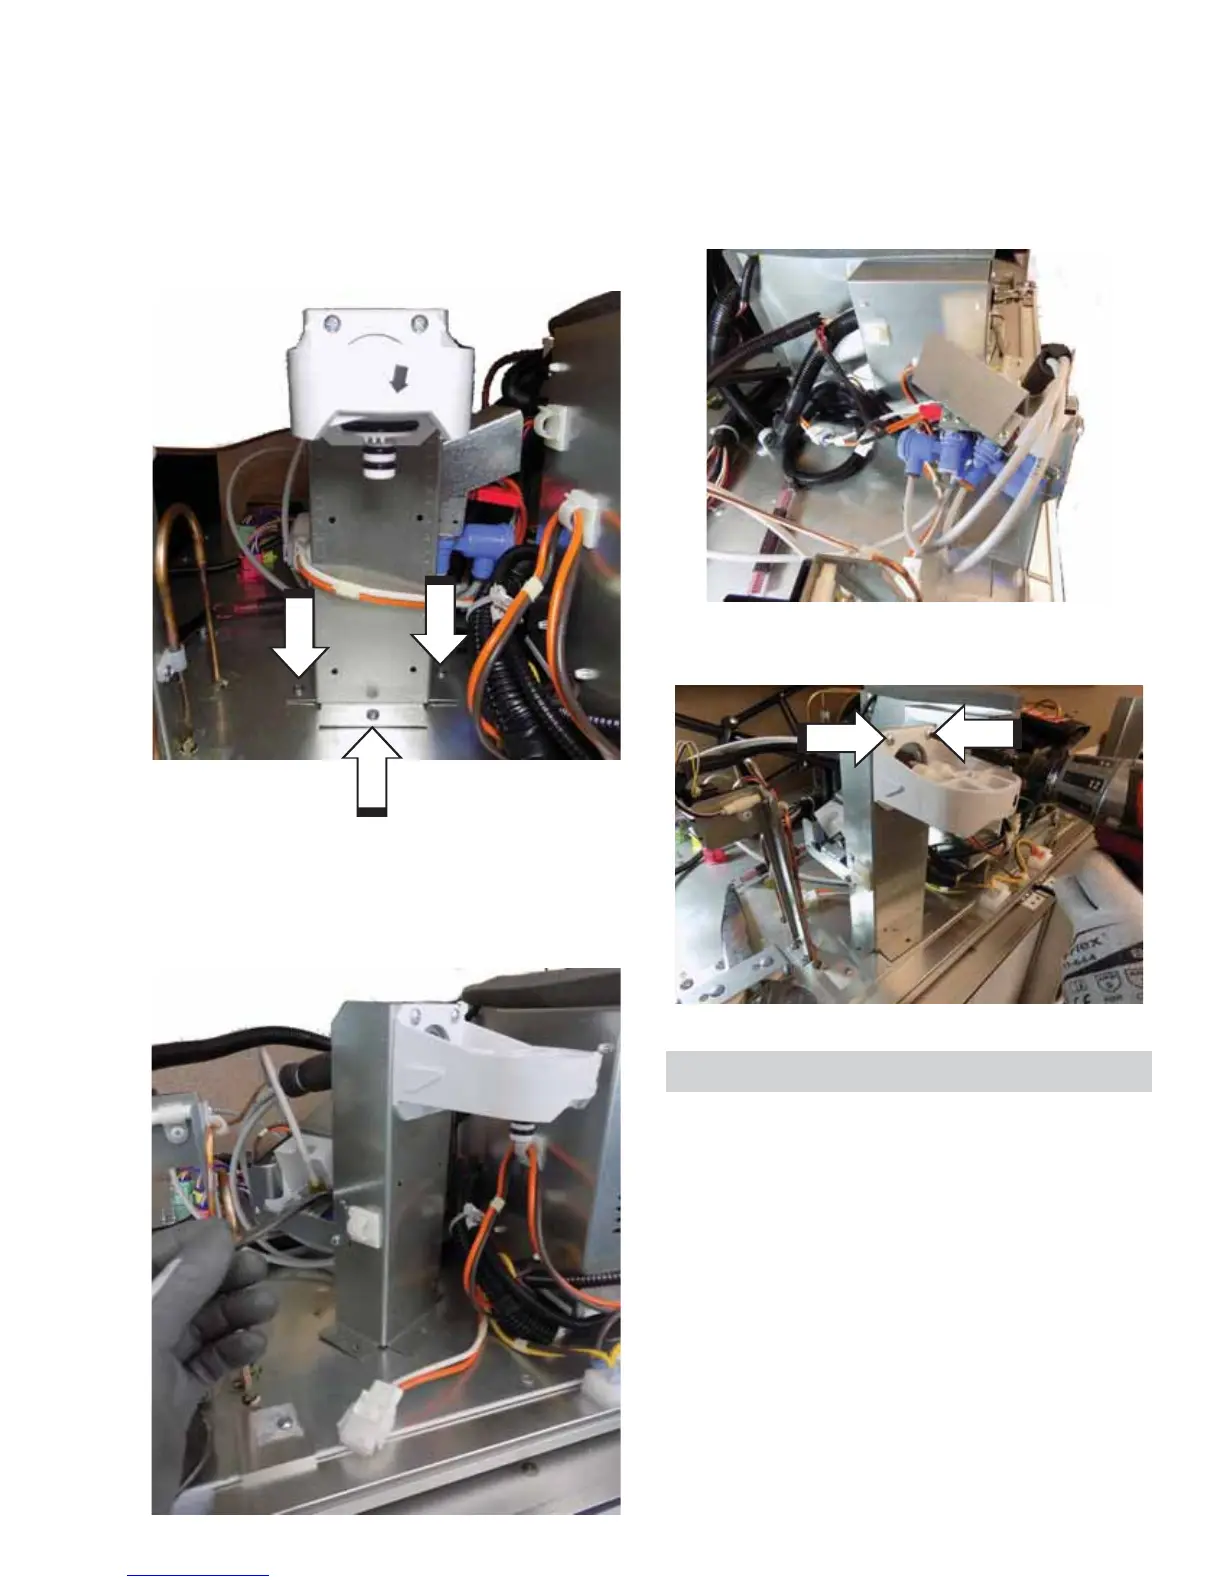
6. Tip the bracket down to access the tubing
connections on the valve assembly.
7. Push in on the collar and pull on the water line
to remove the ¿OWHUKHDGOLQHVPDNHQRWHRIWKH
colors on the lines for installation of the new
assembly).
8. Remove two Philips screws from the ¿OWHUKHDG
and pull the assembly away from the bracket.
Filter Head Assembly Removal
1. 5HPRYHWKH¿OWHURUE\SDVVSOXJ
2. Unclip the AC harness from the left of the ¿OWHU
head assembly.
3. Remove three Philips screws securing the ¿OWHU
head assembly to the cabinet.
4. Turn the assembly slightly to the left to access
the nut for the supply line.
5. Remove the supply line from the isolation valve
using a 1/2 in. wrench.
The water valve assembly is made up of an isolation
valve and dual valve. One side of the valve is not
used, and has a plug on the unused port.
Water Valve Assembly Removal
1. Follow steps 1 through 7 of the Filter Head
Assembly Removal section in this service guide.
2. Remove one Philips screw and remove the valve
assembly from the bracket holding the ¿OWHU
head assembly.
3. Disconnect the connectors from the valve
assembly.
Water Valve Assembly
 Loading...