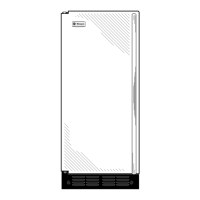
10
ZIP75WW, ZIP75BB Kit
For 3/4" Custom Panel
Step 1:
Disconnect power to the ice machine.
Step 2:
Remove handle and nameplate
• Remove the door handle by removing the
two top mounting screws. Set screws aside.
Discard handle.
• The Monogram nameplate is held in place
with adhesive. Remove the nameplate.
Step 3:
Mark mounting screw locations.
• Align and hold the side trim pieces against
the ice machine door and mark screw
locations on the sides.
• Drill 1/8” pilot holes into the door sides of
the ice machine.
Step 4:
Secure custom handle to custom panel.
(Skip this step if you are using the supplied
handle.)
A custom handle can be installed onto the
3/4" thick panel, replacing the supplied
handle.
• The custom handle can be installed at the
top or side of the panel.
• Drill pilot holes through the front of the
custom panel to match the chosen handle.
• Secure the handle to the panel with flat
head wood screws.
• Replace original handle screws in the top of
the door frame.
Step 5:
Secure side trim pieces to custom panel.
• Lay the custom panel, appearance side down
on a clean surface.
• Align top and bottom side trim to the
custom panel sides.
• Tape the side trim pieces to the back of the
custom panel.
• Place the panel with trim against the door to
be sure that trim and panel fits the door side
to side and top to bottom. Adjust as needed.
• Mark screw locations and remove trim. Drill
pilot holes.
• Install side trim to the back side of the
custom panel with screws (not supplied).
Use flat head wood screws approximately
1/2" long.
Step 6:
Install assembled panel onto the ice machine.
• Install panel to ice machine with supplied
screws, 4 on each side.
Step 7:
Install supplied door handle (if used)
• Install the new supplied handle with original
screws.