9
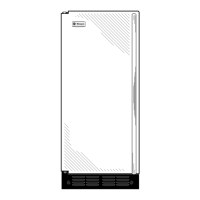
ZIP75WW, ZIP75BB Kit
For 3/4" Custom Panel
Before you begin – Read these instructions completely and carefully.
IMPORTANT: Save these instructions for local inspector’s use.
IMPORTANT: OBSERVE ALL GOVERNING CODES AND ORDINANCES.
NOTE TO INSTALLER: Be sure to leave these instructions with the Consumer.
NOTE TO CONSUMER: Keep these instructions with your Use and Care Book for future
reference.
To prevent electric shock,
disconnect electrical power
supply to ice machine before
installing front panel. Do not
operate the ice machine while
installing panel.
Kit Contents:
• 2 side trim pieces
• 8 side trim screws
• Door handle
This kit contains a new handle and 2 side
mounting brackets to support a trimless
custom door panel up to 3/4" thick.
A custom handle may replace the supplied
handle.
Important:
• Cut edges of the
custom door panel
will be seen and must
be finished for best
appearance. The
back side of the panel
should be finished a
minimum of 1/2" on
all sides.
• The custom panel,
both raised and flat
design, should be
constructed in the
same manner as
typical cabinet doors.
• Order the custom
panel from the
cabinet manufac-
turer. Be sure to
provide the exact
dimensions so that
the panel is con-
structed accurately.
WARNING
14-23/32"
29-1/2"
Left Trim
Right Trim
Handle
Custom
Panel
Tools and Materials Required:
• 8 flat head wood screws, 1/2” long
• Drill and 1/8” bit
• Safety glasses
• Tape
• Custom panel
Pour éviter les chocs électriques,
il faut debrancher
l’alimentation du distributeur
de glace avant d’installer le
panneau avant. Le distributeur
de glace ne doit pas être en
marche pendant l’installation
du panneau avant.
WARNING
ATTENTION
NOTE: If Installing a 3/4" trimless custom
panel, a 3/4" wide filler strip or side panel
may be required. The filler strip will act as a
spacer between the icemaker case and
adjacent cabinet and will prevent interference
with icemaker door swing. The width of the
cutout opening must include the additional
width of the filler panels.