EasyManua.ls Logo

GE PDWT480R10SS User Manual

GE PDWT480R10SS
32 pages
To Next Page IconTo Next Page
Page #1 background imageLoading...
Page #1 background image
04 _,Mf
Appliances
Installation Instructions
Built-In Dishwasher
If you have questions, call 800.GE.CARES(800.432.2737) or visit our Website at: GEAppliances.com
In Canada call 1.800.561.3344 or www.GEAppliances.ca
BEFORE YOU BEGIN
Readthese instructions completely and
carefully.
| L J l"_t'_ _'T'A k |'It
I Ivli_Ui_ | _l_l| - The dishwasherMUST
be installedtoallowforfutureremovalfromtheenclosure
if service is required.
IM PORTANT Observeallgoverning codesand
ordinances.
Note to Installer - Besure to leave these instructions for the
consumer's and local inspector's use.
Note to Consumer - Keep these instructions with your
Owner's Manual for future reference.
Skill Level- Installation of this dishwasher requires
basic mechanical, electrical and plumbing skills. Proper
installation is the responsibility of the installer. Product
failure due to improper installation is not covered under
the GEAppliance Warranty. Seewarranty information.
Completion Time - 1 to 3 Hours. New installations require
more time than replacement installations.
If you received a damaged dishwasher, you should
immediately contact your dealer or builder.
Optional Accessories - See the Owner's Manual for available
custom panel kits.
FOR YOUR SAFETY
Read and observe all CAUTIONSand WARNINGS
shown throughout these instructions, While performing
installations described in this booklet, gloves and either
safety glasses or goggles should be worn,
READ CAREFULLY.
KEEP THESE INSTRUCTIONS.
Stainless SteelTub Models
imagination at work
Question and Answer IconNeed help?

Do you have a question about the GE PDWT480R10SS and is the answer not in the manual?

GE PDWT480R10SS Specifications

General IconGeneral
TypeBuilt-In
Capacity16 Place Settings
ColorStainless Steel
Wash Cycles6
Energy Star CertifiedYes
StyleTraditional
Control TypeElectronic
Upper Rack FeaturesAdjustable
Lower Rack FeaturesFold-Down Tines
Tub MaterialStainless Steel
Water Filtration SystemYes
Soil SensorYes
Third RackNo
Stainless Steel InteriorYes
Delay StartYes
Drying SystemHeated Dry
Width24 inches
Depth24 inches
Height34.5 inches

Summary

General Information and Safety

Before You Begin

Read all instructions completely and carefully before starting installation.

Safety Precautions

Read and observe all cautions and warnings; wear safety glasses or gloves during installation.

Installation Preparation: Parts and Tools

Parts Supplied with Installation Kit

Lists components provided with the dishwasher for installation purposes.

Materials and Tools Needed

Details required materials and tools for a successful dishwasher installation.

Enclosure Preparation

Prepare Dishwasher Enclosure

Specifies dimensions and clearance requirements for the dishwasher installation space.

Drain Plumbing Preparation

Prepare Drain Plumbing

Guides on drain hose requirements, including loops or air gaps for proper drainage.

Electrical Supply Preparation

Prepare Electrical Wiring

Instructions for electrical requirements, grounding, and wiring connections.

Hot Water Supply Preparation

Prepare Hot Water Supply

Details on connecting the hot water line, including pressure and temperature guidelines.

Dishwasher Installation - Initial Steps

Step 1 - Locate Installation Items

Identify and gather all necessary installation components and literature.

Step 2 - Install Trim Pieces

Instructions for attaching decorative trim pieces to the dishwasher's tub flange.

Step 3 - Check Door Balance

Adjusting the door spring tension for proper opening and closing.

Dishwasher Installation - Base and Power

Step 4 - Remove Wood Base, Install Leveling Legs

Remove the shipping base and install the adjustable leveling legs.

Step 5 - Remove Toekick

Detaching the front toekick for access or later reinstallation.

Step 7 - Install Power Cord

Connecting the dishwasher's power cord to the house wiring.

Dishwasher Installation - Plumbing Connections

Step 8 - Install 90° Elbow

Attaching the 90° elbow to the water inlet valve with thread seal tape.

Step 10 - Install Drain Hose to Dishwasher Drain Port

Connecting the drain hose securely to the dishwasher's drain pump outlet.

Dishwasher Installation - Into Cabinet

Step 11 - Insert Drain Hose Through Cabinet

Routing the drain hose through the cabinet opening.

Step 12 - Slide Dishwasher Three-Fourths of the Way Into Cabinet

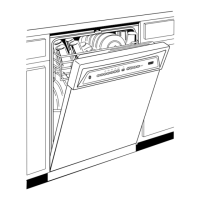
Initial insertion of the dishwasher into its designated enclosure.

Dishwasher Installation - Final Placement

Step 13 - Slide Dishwasher Into Final Position

Fully inserting the dishwasher into the cabinet and aligning the door.

Special Considerations for Positioning Top-Mount Control Models

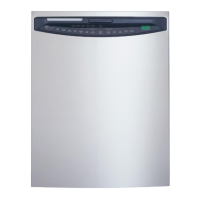
Ensuring proper gap for hidden controls on top-mount models.

Dishwasher Installation - Leveling and Securing

Step 14 - Level Dishwasher

Adjusting the leveling legs to ensure the dishwasher is stable and level.

Step 15 - Secure Dishwasher to Countertop or Cabinet

Fastening the dishwasher to the countertop or adjacent cabinets for stability.

Dishwasher Installation - Final Plumbing Connections

Step 16 - Connect Water Supply

Connecting the water supply line to the dishwasher's inlet valve.

Step 17 - Connect Drain Line

Connecting the dishwasher's drain hose to the house plumbing system.

Dishwasher Installation - Electrical and Checks

Step 18 - Connect Power Supply

Connecting the house wiring to the dishwasher's junction box.

Step 19 - Pretest Checklist

A comprehensive list of checks before initial operation to prevent issues.

Dishwasher Installation - Testing and Features

Step 20 - Dishwasher Wet Test

Performing a test cycle to check for leaks and proper operation.

Step 21 - Set Water Hardness

Calibrating the dishwasher based on local water hardness levels.

Step 22 - Install Sound Upgrade Kit

Attaching sound dampening material for quieter operation.

Dishwasher Installation - Final Touches

Step 23 - Install Toekick

Reattaching the front toekick panel to complete the installation.

Step 24 - Literature

Ensuring the consumer receives all necessary documentation.

Related product manuals