– 30
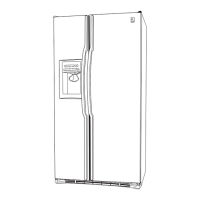
4. Tape the freezer capillary tube 6 inches below
the brazing joint. Score and break the two
capillary tubes below the brazing joints.
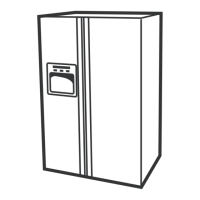
Jumper Tube
FF Capillary
Tube
Two Capillary
Tubes
Tape Here
FZ Capillary
Tube
Break
Here
Break
Here
Black
Mark
Brazing
Joints
Common
Tube
Valve Body
1. Unplug the refrigerator.
2. Remove the rear access cover and evacuate
the sealed system. (See Evacuation and
Charging Procedure.)
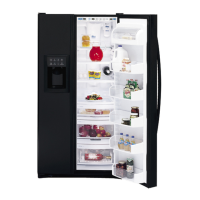
3. Remove the valve body from the valve coil by
carefully pressing down on top of the valve
body.
Press
Here
5. Connect the new jumper tube to the inlet tube
of the new 3-way valve.
6. Prepare the taped capillary tube, and insert
it into the 3-way valve freezer outlet port
(identifi ed with black mark or tape).
7. Prepare the remaining capillary tube and
insert it into the 3-way valve fresh food outlet
port.
Fresh Food
Outlet
Black
Mark
Inlet
Freezer
Outlet
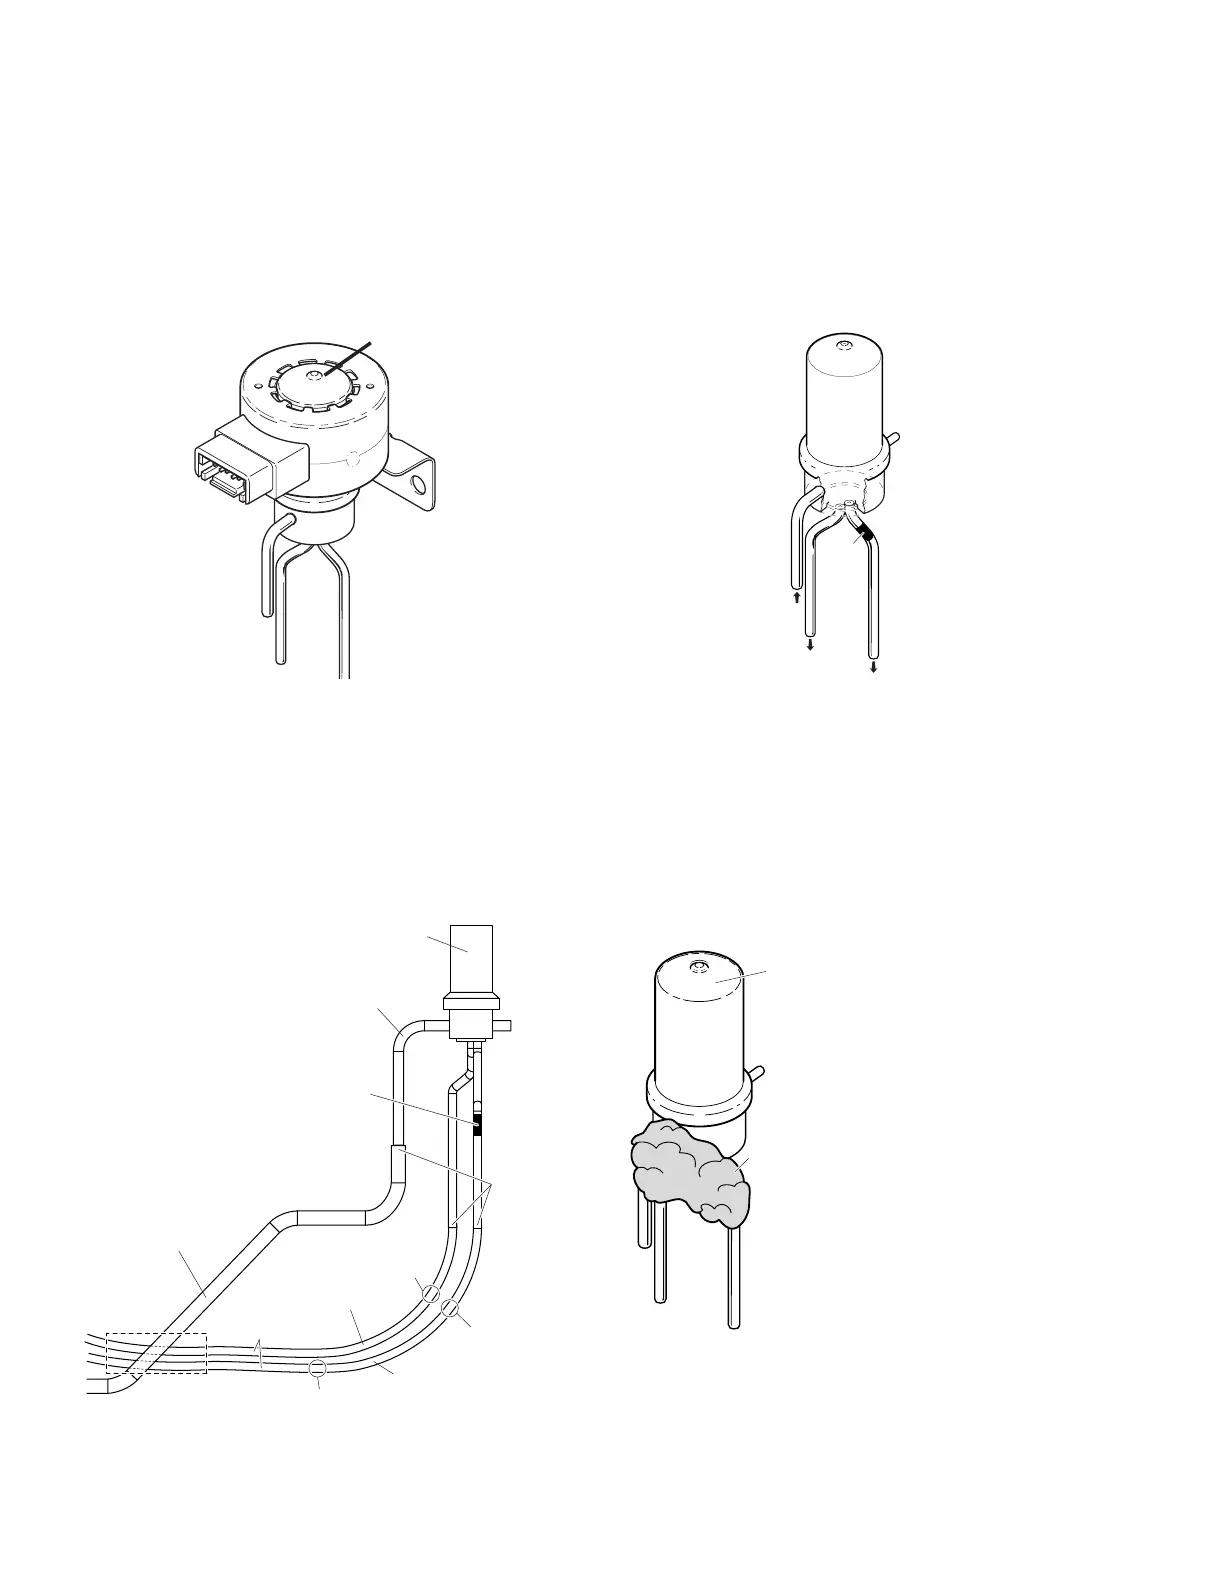
Thermal
Paste
Apply a Wet Cloth
to Top of Valve to
Help Keep Valve Cool
8. Apply a liberal amount of thermal paste to
the base of the three tubes on the new valve.
Apply a wet cloth to the top of the valve to
help keep the valve cool.
 Loading...